
I love entertaining around the holidays!! I say yes to everything and then I feel completely rushed and overbooked. Does anyone know what I’m talking about? So when I was creating these breakfast buns my number one priority was for them to taste delicious. Obviously. But it was also extremely important that they be quick + easy. Because we’re going to blink and it will suddenly be January…and then we’ll be all juice fasts and yoga pants and I GUARANTEE we’ll be wishing we ate more breakfast buns. Happens. Every. Year.
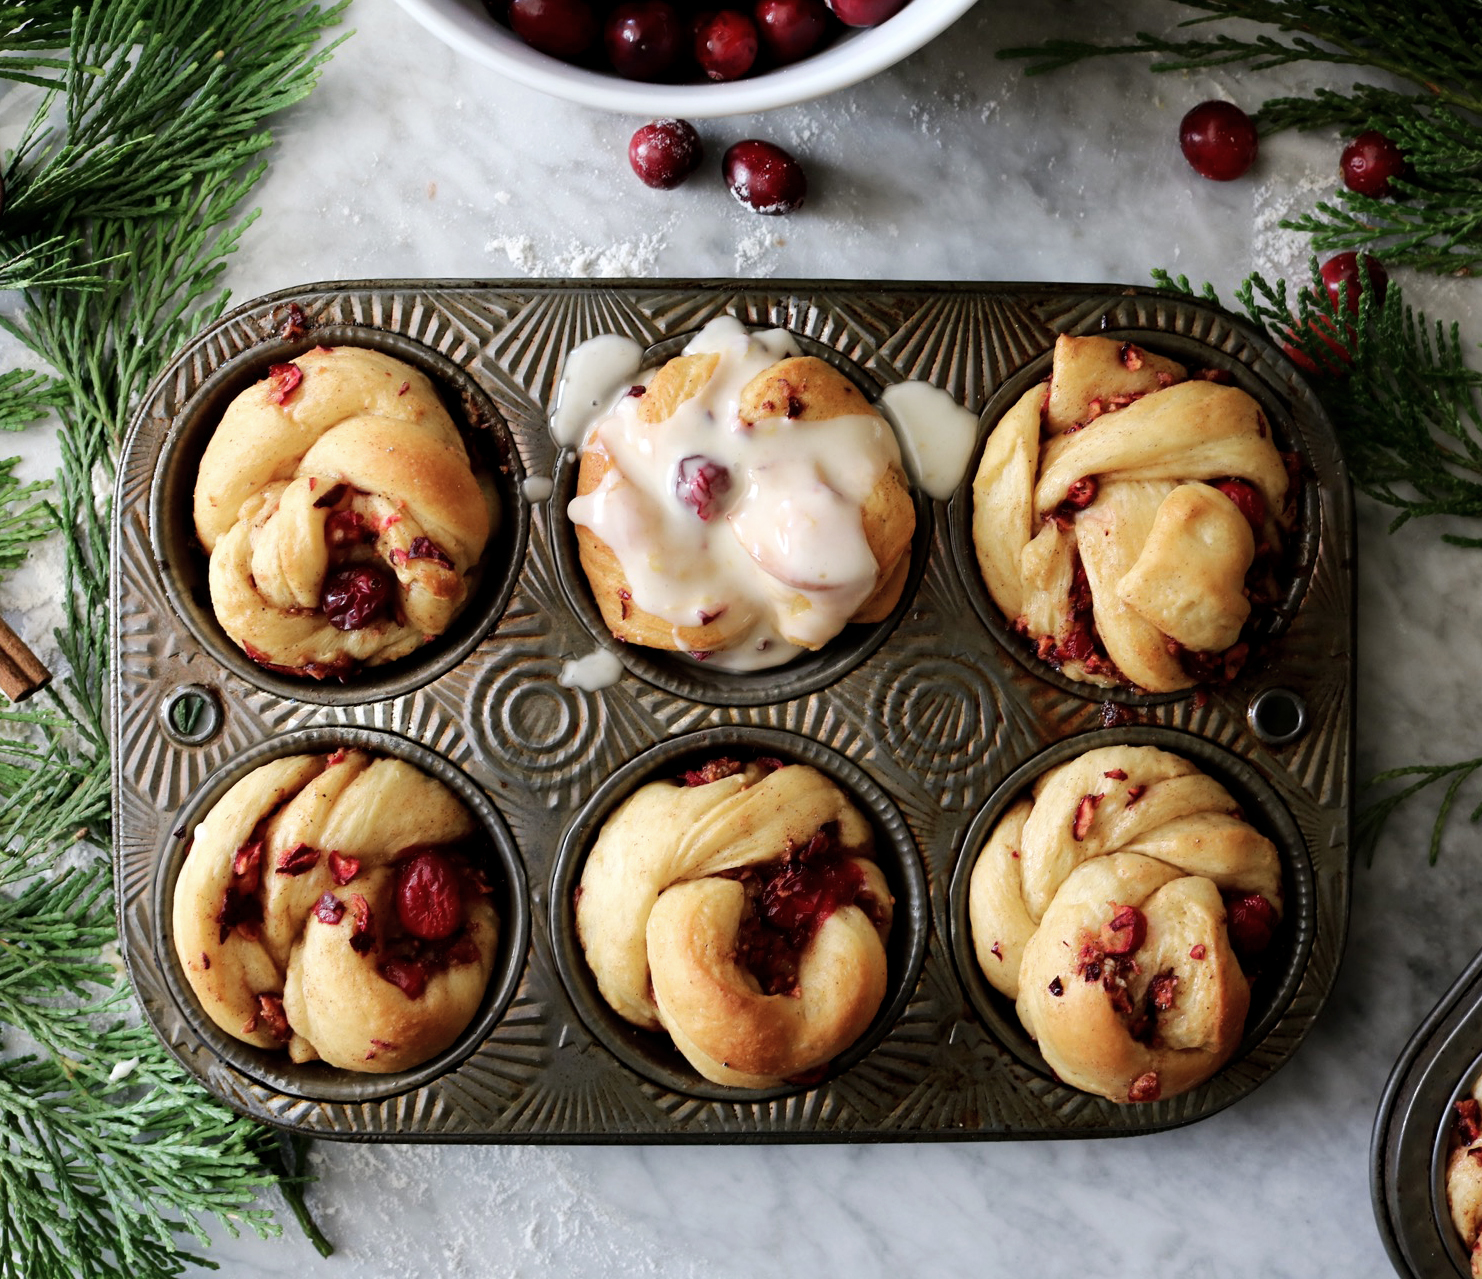
Let’s get to know our buns before we begin, shall we? We start with a simple dough rich with egg yolks, butter, brown sugar and spices. It smells like heaven. Then we whip up a cranberry, jewel-toned filling that just smacks of the holidays. All the smells…All the colors…All the feels.
This dough is going to make your life next-level amazing. I mean it. We’re going to let our yeast do all of the heavy lifting and flavor building while we take naps, drink egg nog, paint our nails fire engine red and decorate the house with mistletoe and tinsel. In a nutshell we’re going to do a long + slow rise in the fridge and then we’re going to do a quick second rise with the aid of our oven + steam. It’s easy. We got this. Now we have more time to untangle Christmas lights and pick out wrapping paper patterns.
Before We Get Started…
- Buttermilk. I love buttermilk. I practically bathe in it. But I understand that you might not feel the same. So I tested this with regular milk, as well as water. Guess what? It all turned out marvvy. Buttermilk and I have a thing, so that will always be my number one go-to, but you do you.
- Temperature. Make sure your buttermilk (or water or milk) are nice and warm. Everyone suggests using a thermometer but I’m telling you right now that 99% of you will never take the temperature of your buttermilk. Am I right? So I take it for a short spin in the microwave and then stick my finger in it…if it burns my finger it’s wayyyy too hot. I set it aside to cool a beat or it might kill off my yeast. You want it to be warmer than your body temperature, so that it feels like a lukewarm bath…or a blanket fresh from the dryer.
- Make Ahead. As mentioned above, the dough’s initial rise can take place over 1-4 days in the fridge which really means that the day of baking you’ll only have about 1 to 1 ½ hours max from the fridge to the table. Not bad…not bad at all.
- Adding Flour To Your Dough. It is very important when you’re mixing the dough that you are conservative with the amount of flour you add to keep the dough from sticking. Too much flour will yield a dry bun. Not good. Not enough flour and your dough will be really difficult to handle. It’s a dance.
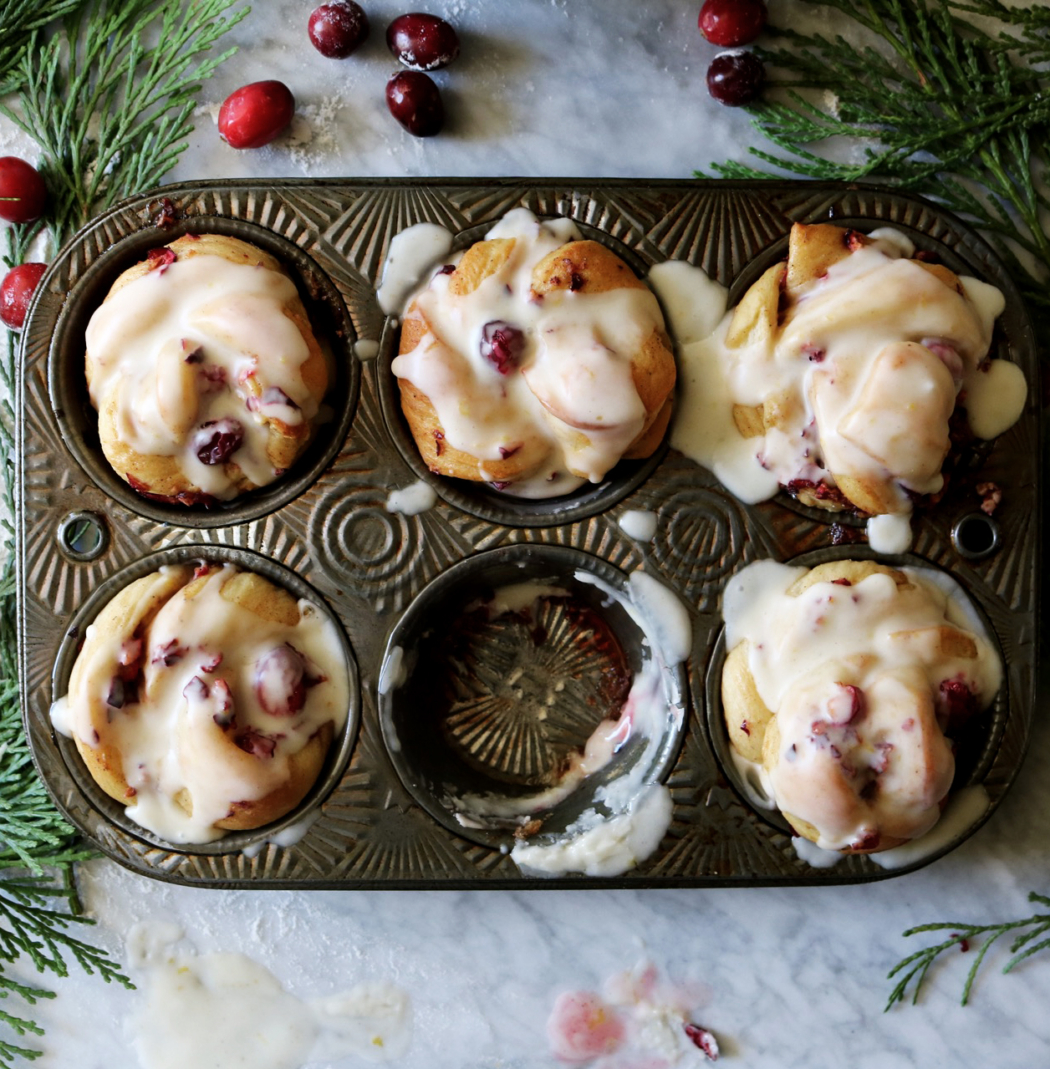
- Muffin Tins. I put these in muffin tins because I wanted them to rise up and not out. Plus I thought they looked cute. However, you could just as easily put them on a parchment-lined baking sheet.
Let’s get our bake on!
Cranberry Spice Breakfast Buns
Makes 24 Petite Buns
INGREDIENTS
For the Dough
- 1 package instant or active dry yeast, approximately 2 1/4 teaspoons
- 1 cup buttermilk, milk or water, warmed
- 1 stick (4 ounces) unsalted butter, melted and cooled
- 1/4 cup brown sugar, packed
- 3 large egg yolks, room temperature
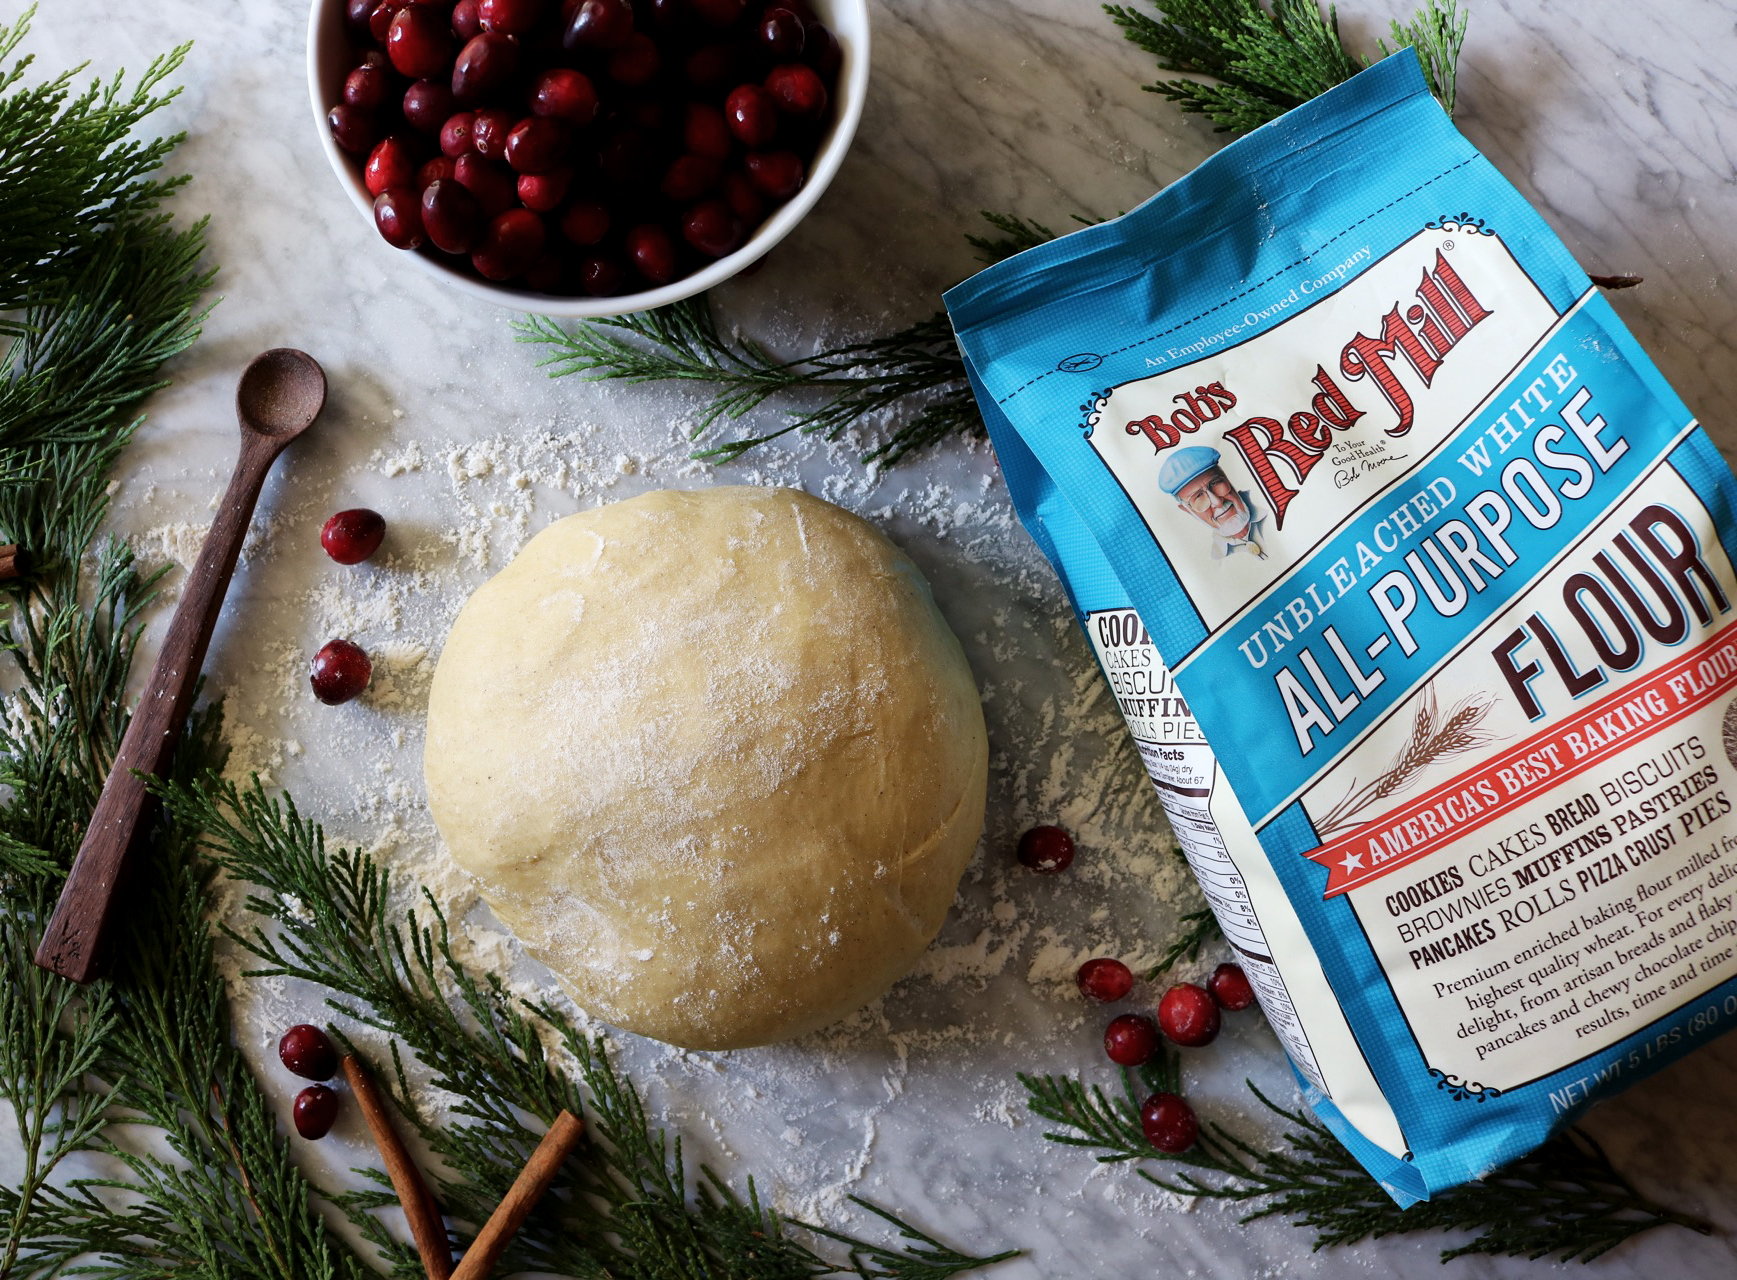
- 4 cups of Bob’s Red Mill all-purpose flour, you may need up to ½ cup additional flour to keep it from sticking + dusting your surfaces
- 1 1/2 teaspoons sea salt
- 1 teaspoon cinnamon
- ½ teaspoon cardamom
- 1 tablespoon vegetable oil, for the bowl
For the Filling
- 2 cup fresh cranberries, coarsely chopped*
- 1 ¼ cups packed brown sugar
- ¼ cup pecans, finely chopped
- 1 tablespoon ground cinnamon
- 1 teaspoon cardamom
- 1 tangerine or orange, zested (about 1 tablespoon)
- 4 tablespoons unsalted butter, melted
*Optional: You can decorate the top of each bun with a whole cranberry for a pretty pop of color + flavor. You’ll need an additional 24 small cranberries to do this.
For the Icing
- Juice + zest from 1 tangerine or orange (if your orange isn’t especially forthcoming, you may need 2 oranges to thin the icing to the correct consistency)
- 2 cups powdered sugar
- 1 teaspoon cinnamon
- 1/2 teaspoon cardamom
INSTRUCTIONS
- In your electric-stand mixer fitted with the dough hook attachment, add your yeast + warmed buttermilk. Let sit for 10 minutes while the yeast gets foamy and frothy. Add the cooled melted butter, brown sugar and egg yolks and run the machine on low to blend the ingredients for about 1 minute.
- Add 4 cups of flour, sea salt, cinnamon + cardamom to the mixer bowl. Run the machine on low for 1 minute and then increase to medium for 10 minutes. Periodically add flour, no more than 1 tablespoon at a time, to keep the dough from sticking. It will have formed into a ball, with some dough sticking to the bottom of the machine. A little stick is fine. I use floured hands to get the dough out of the mixer bowl.
- Add 1 tablespoon of vegetable oil to a large bowl and swirl it around so the interior is coated. Set the dough in the bottom of the bowl and then rotate it so that both the top and bottom are lightly coated in oil.
- MAKE AHEAD: At this point, you can wrap the bowl tightly in plastic wrap and place in the fridge for 1, 2, 3 or (I’m not kidding) 4 days. When you’re ready to bake your buns, take the dough out of the fridge and proceed to step #6.
- If you want to bake your buns on the same day, cover the bowl with plastic wrap or a damp kitchen towel, set in a warm, draft-free area and let rise for about 2 hour or until double in size.
- In a medium bowl mix together your cranberries, brown sugar, pecans, cinnamon, cardamom and tangerine/orange zest and set aside.
- Divide your dough into two equal-size dough balls. Lightly flour a clean surface and roll each dough ball into a roughly 12 X 9 inch rectangle. Try to make sure the edges are squared off and not rounded. Brush the topside of each dough rectangle with 2 tablespoons of melted butter. Equally distribute the cranberry mixture between both pieces of dough.
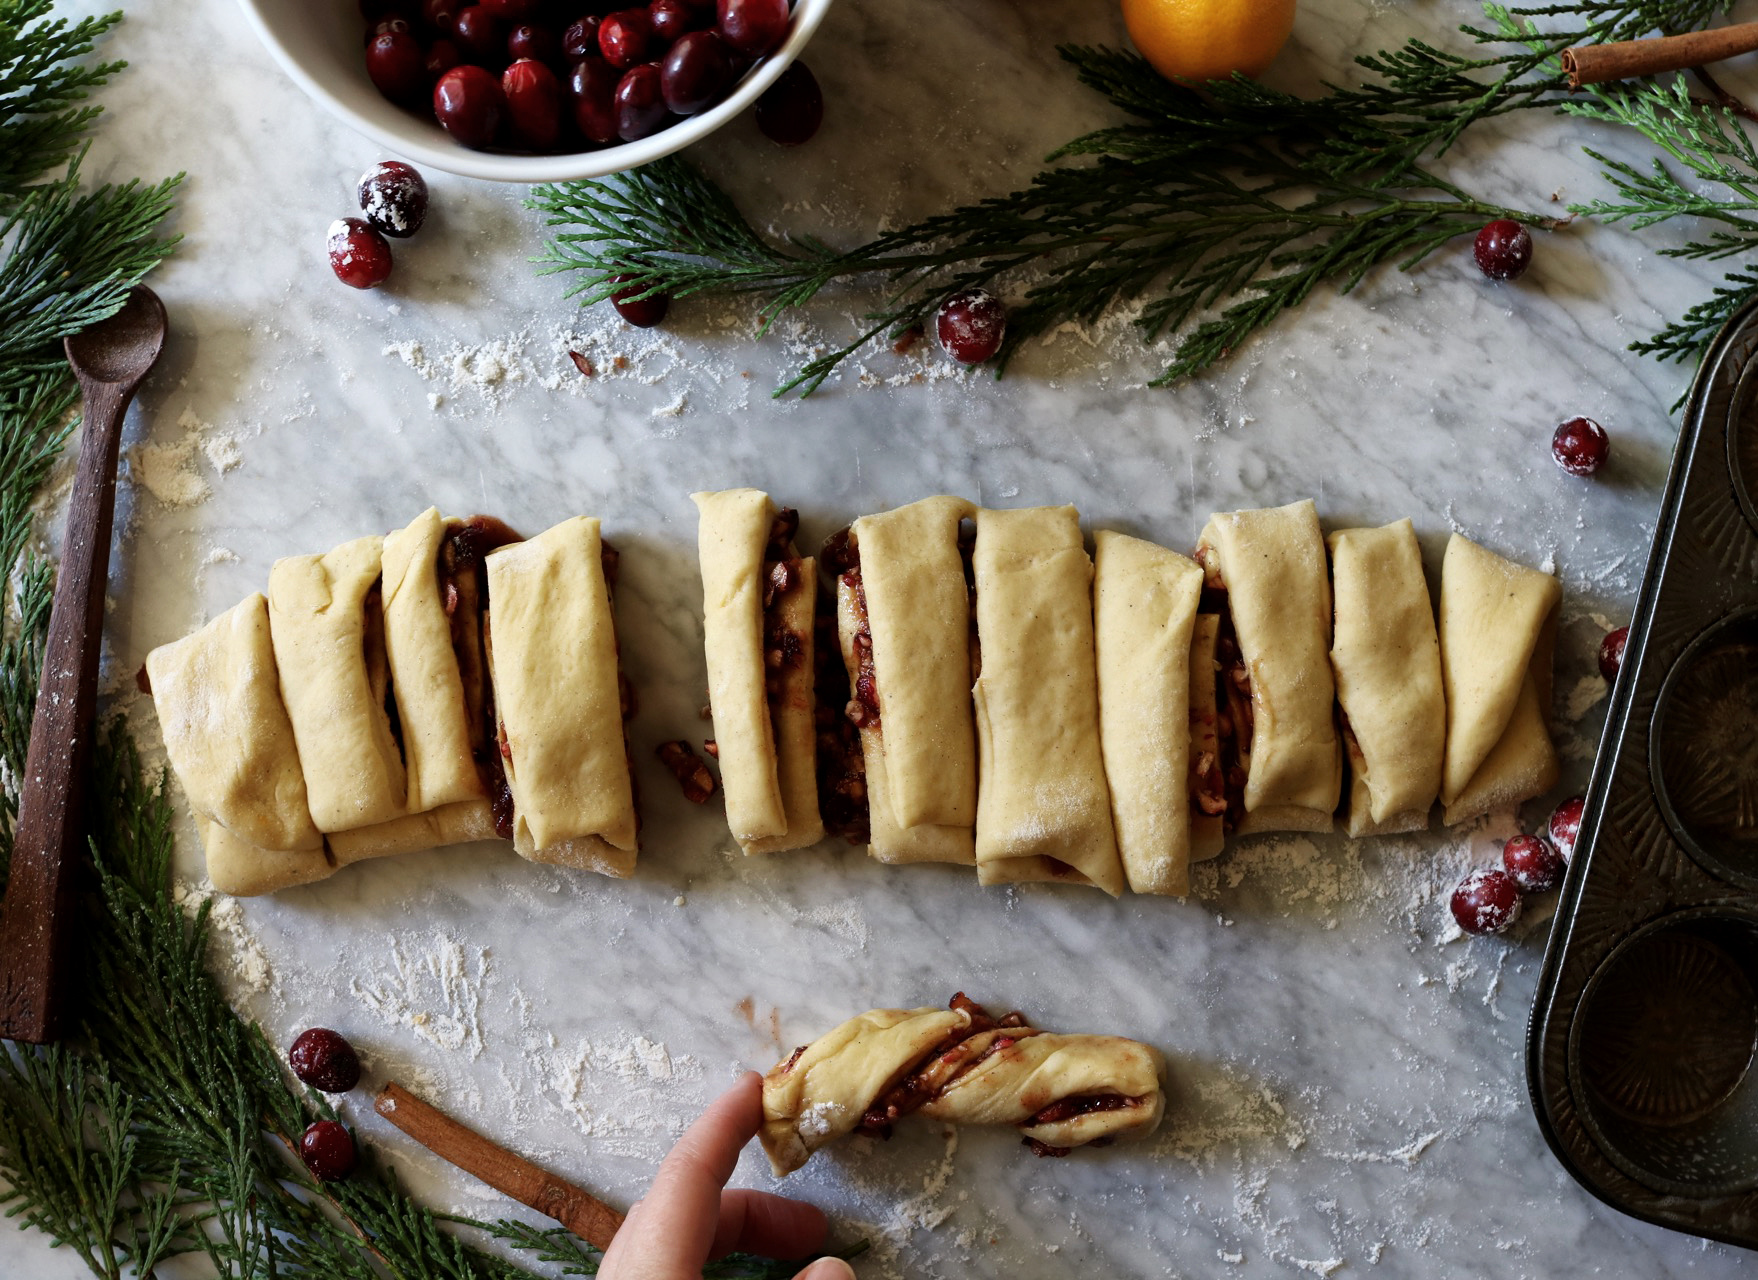
- With the long side nearest you, grab the two closest edges and fold the dough halfway up the dough, on top of itself. Then, like you’re folding a letter, grab the top edges of the dough and fold them down over the top. Square out the edges of the dough a bit. Repeat with the other piece of dough.
- Now we’re going to cut strips of the dough log (see photo). I like to use a pizza cutter, but you could also use a very sharp knife, pastry scraper or dental floss (I’ve never had much luck with the latter, but maybe you’ll love it). Each piece should be roughly 1 ½ centimeters wide…but don’t stress out on that too much as these are rustic little buns…each with their own charm. Each dough log should yield 12 strips of dough, for a total of 24.
- Pause a minute and boil some water on the stovetop (we’re going to use this to aid in rising the dough), place a rack in the center of your oven and a skillet on the bottom rack just beneath it. Butter or spray with nonstick two standard muffin tins.
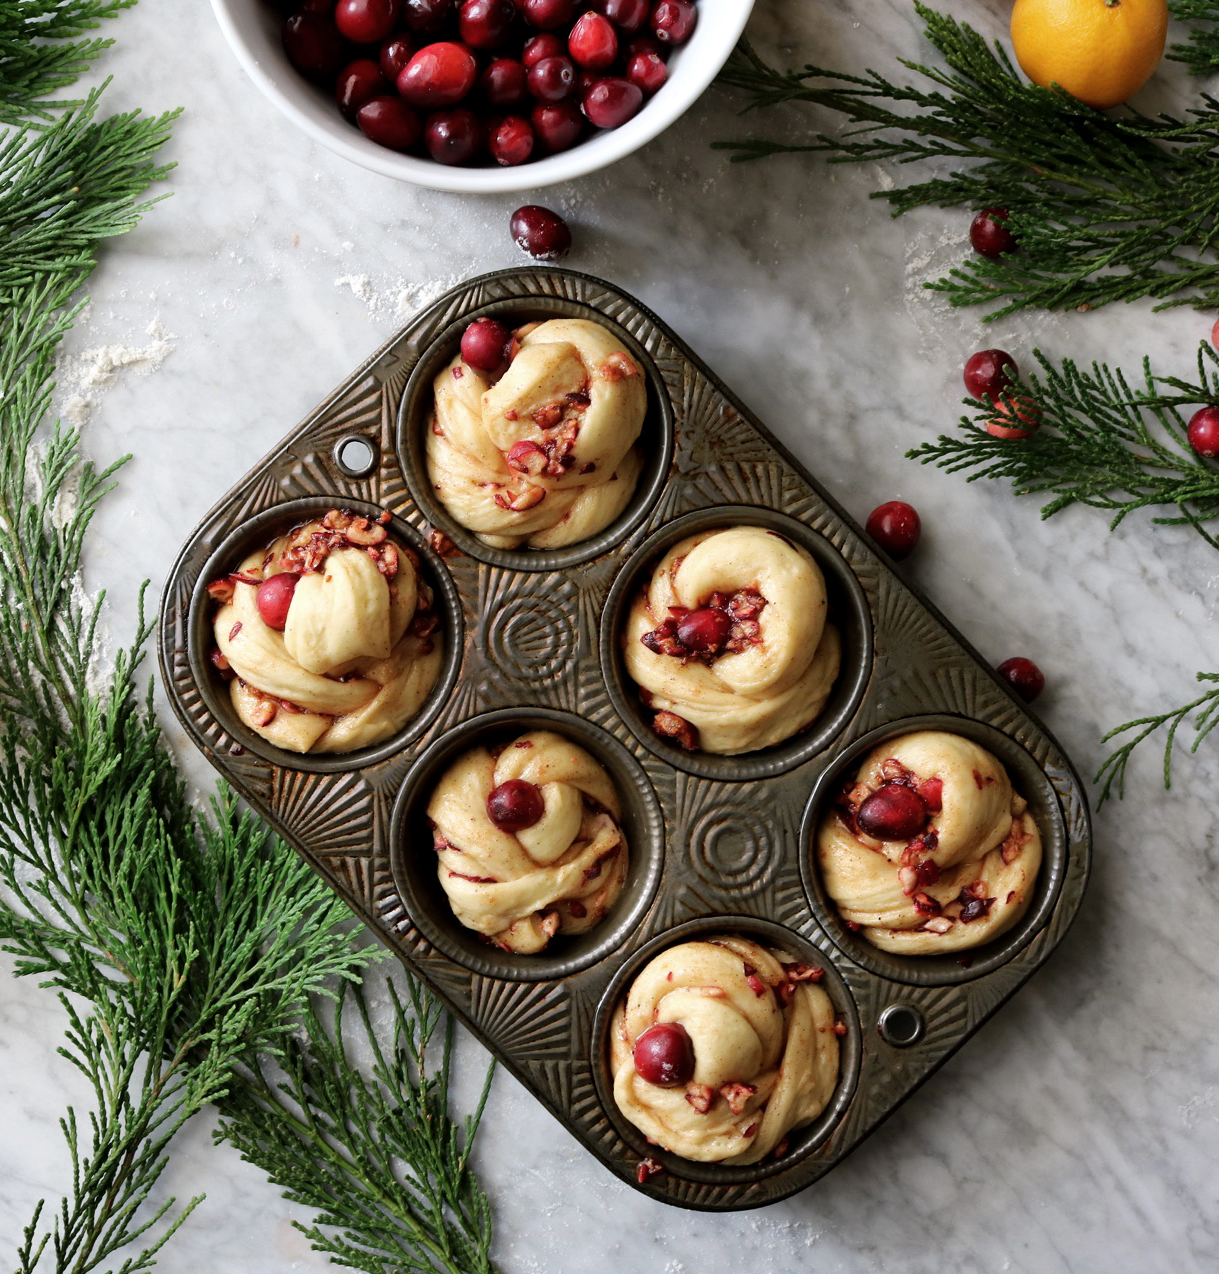
- Grab one strip of dough. Holding each end gently twist the dough (again, see photo), then we’re going to tie it into a simple knot. Wrap the dough (adding some more twists if you like) around your index and middle finger and then tuck the ends underneath as you slide it off of your fingers. This is A) a bit messy and B) an imperfect process. Go with it. As you shape the buns place them in the prepared muffin tins. If you’d like, at this point, shove a small, whole cranberry into a nook near the center of the dough.
- Place the muffin tins in the oven (your oven should be turned off and cool) and pour the boiling water in the skillet underneath them and close the oven door. Set the timer for 30 minutes. When done, the buns should be puffed up. Remove the buns and the skillet from the oven and turn it to 350 degrees F.
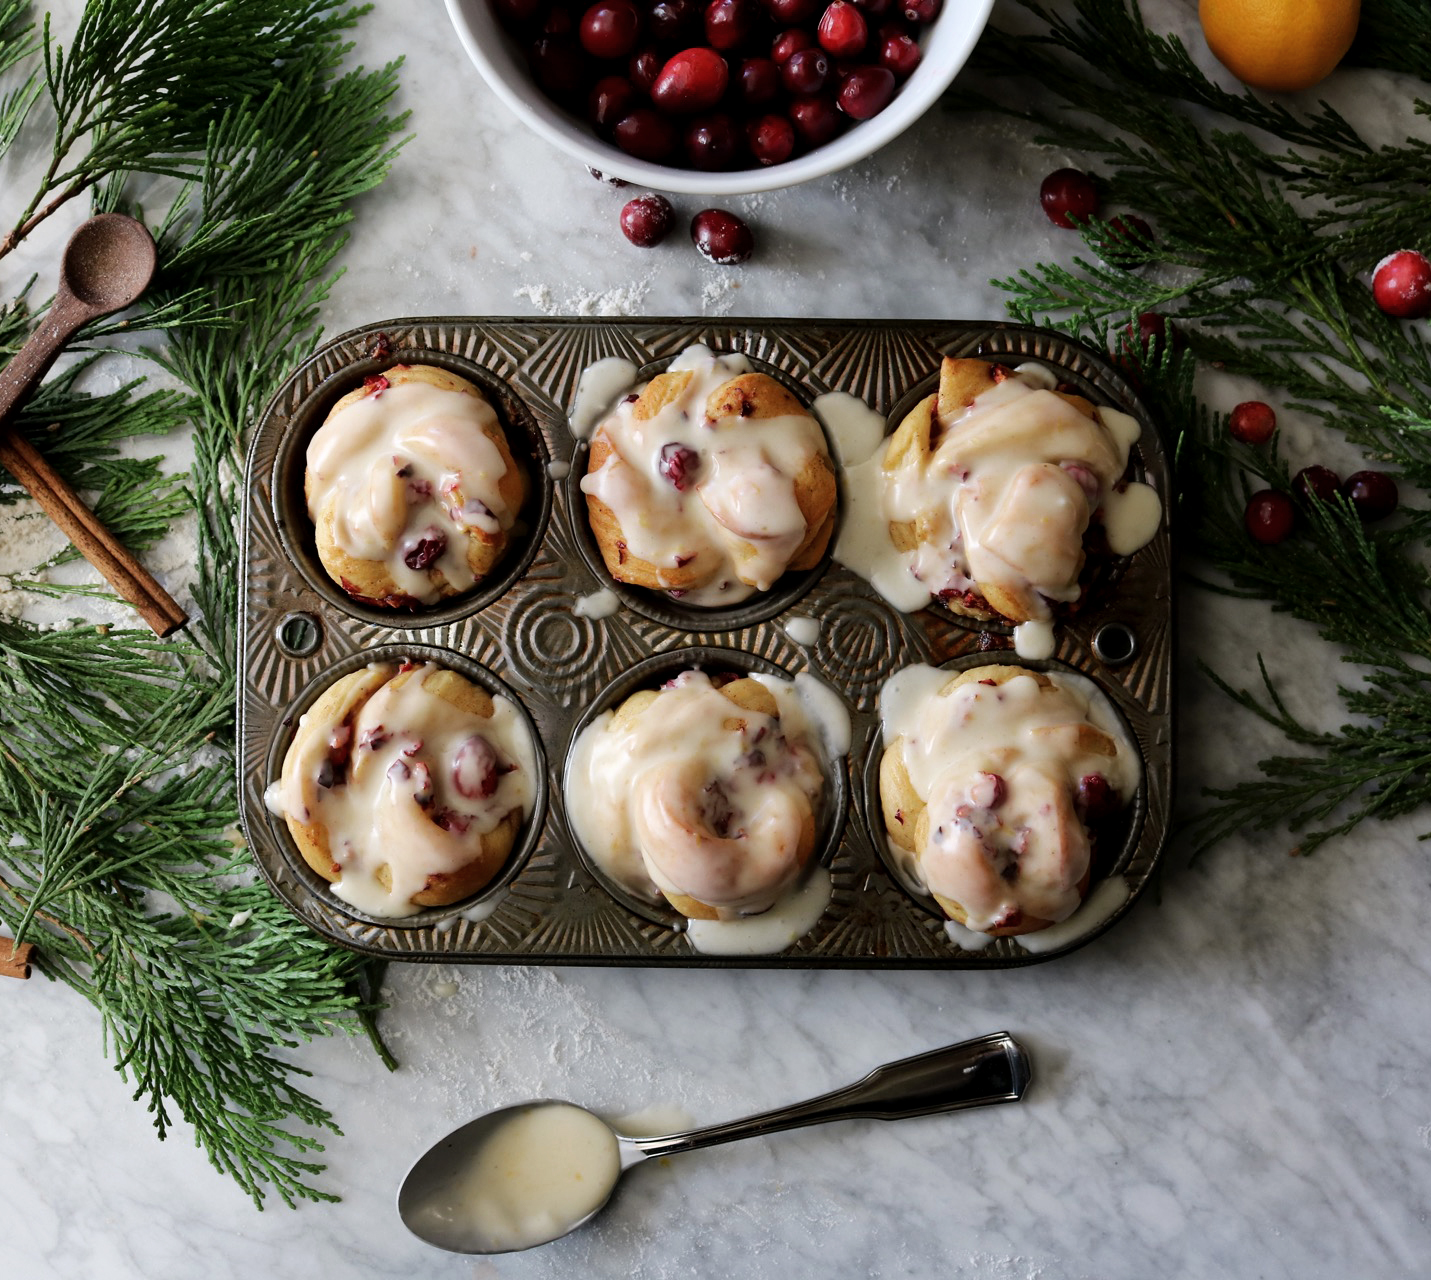
- Bake your buns on the middle rack of the oven for 14-16 minutes. You want them to be lightly bronzed and cooked through, but not George Hamilton dark. Set the muffin tins on a cooling rack. As they cool in the muffin tins, whip up your icing. Grab a medium bowl and whisk the orange juice + zest, powdered sugar, cinnamon + cardamom together until smooth and thick. You want it thin enough to drizzle off of the spoon, but thick enough that it all won’t run off of your buns.
- Once the buns have cooled a bit, about 30 minutes, drizzle each with a spoonful of icing.
- I hope these make it to your holiday breakfast table. Please tag me @displacedhousewife #displacedhousewife so I can see your gorgeous buns!! Let the holiday season commence! xo
This post was sponsored by Bob’s Red Mill + feedfeed. All opinions and thoughts are my own. A big THANK YOU to both for including me in this campaign!
More recipes from my Bob’s Red Mill Instagram Takeover:
Brown Butter Muscovado Chocolate Chunks Cookies
Brown Butter Pumpkin Spice Baked Donuts
Spiced Apple Cake
Hi there! I don’t have a bread maker, can you share how I could make this without one? Thank you so much!
Ange
Woops—never mind!
These look amazing! Your photos are gorgeous but really …you can just tell that these are delicious! I’m thinking that they are destined to be on my Christmas morning table. And if you don’t mind sharing …where did you get that stunning muffin tin?
Ditto to overbooking and loving the holidays and all things buttermilk. My boys’ favorite chicken recipe is all about a good long soak in a buttermilk bath…it’s makes it tangy and tender. And I’m sure it makes these buns extra good. These will be on our holiday breakfast table for sure.
Cathy — LOVVEEEE the buttermilk chicken soak. Your boys are very wise. I hope you love them Cathy!! xoxox
I love everything about these buns, Rebecca, from the buttermilk, and long slow rise to the cardamom and that drizzle! OMG!! They are gorgeous and look so fluffy… I could eat the whole pan myself! Way to go on your take over too! It was fabulous my dear!! xo
Traci — Thank you so much!!! I was so excited to share this recipe. And thanks for the sweet words on the takeover…it was heaps of fun!! xoxo
Loved your takeover and these gorgeous buns!!! What beautiful photos lady! You are really one amazing baker! :)
Amisha — Thank you so much!! It was such a fun takeover and both were awesome companies to work with!!! Thank you so much on the photo love — I worked really hard on them!!! Sending lots of love!! xoxo
Breakfast buns have never looked better.. I need these beauties in my life! :)
Laura — Huge compliment from you!! Thank you!! xoxo
I’m very excited to try these, they look scrumptious!
Just a little question: in the recipe you mention a 12×9 rectangle, is that in inches or in cm? Thanks!
Chloe — That is an excellent question!!! The answer is ‘inches’…I will go edit that right now. Thank you so much for asking…I’m sure that will help others as well! I hope you love them!! xoxo
I love getting to know these buns with you. Yum – what a show stopping holiday treat!
Karen — Thank you so much!! I just love how they look. From now on, all breakfast treats in muffin tins!! xoxo
What a tasty holiday breakfast treat Rebecca! Your photos are putting me in the holiday spirit. I love, love, love the triple dose of cardamon (one of my favorites spices) in these buns. That filling and that glaze…mmmm! I can see myself already wrapping gifts and enjoying one (or two!) of these buns….in my yoga pants of course!
Mary Ann — I am so in the holiday spirit already!!! xox
OMG I saw these on Instagram and I couldn’t wait for the recipe to go up!! So excited to try these!! xox
Lillian — Yay!! I hope you love them!! xoxo
Wow! Can’t wait to read the recipe they look amazing
Xavier — Thank you so much for your nice note!! I hope you like them!
love that you baked these in muffin tins! i find that i like the look of taller things (food, handlettering, my body, etc), and then there’s also more forgiveness in terms of baking time.
Heather — I was testing them on parchment and I’m so glad the muffin tins came to mind!! I too love tall things…all of the tall things you mentioned!! xoxo