
Welcome to the magic that is this Fudgy Chocolate Brownie Meringue Cake!
What This Chocolate Brownie Meringue Cake Is and Isn’t
(this is important)
First, let me tell you there is zero separating egg whites from yolks in this recipe. This feels important to say.
I have a meringue cake in The Cake Book (the Chocolate Horchata Meringue Cake and it is 🔥) that is made by separating your eggs. Most meringue cakes require this step, plus the whipping up of, yes, meringue.
For many meringue cakes, including mine from my book, you have to take the cake out of the oven mid-bake and add the meringue before you finish baking. Which is fine. But this cake isn’t that.
This also isn’t going to have a pile of meringue over the top of the cake, let’s just get that out of the way.
Now that we’ve talked about what it isn’t, let’s talk about what it is.
It’s a very simple cake batter that mixes up very similarly to my Fudgy, Crinkly, Shiny Brownies. You melt some chocolate (and other stuff) and then combine it with some very whipped and frothy eggs, add a little flour and shazam. You’ve got the most delicious brownies.
And if you love chocolate and espresso together (like I do!), check out: one-bowl Espresso Chocolate Chip Cookies (swoon), Chocolate Espresso Muffins and this Chocolate Espresso Cake!
And these Fudgy Brownie Cookies are BEYOND.
We’re going to create this cake in much the same fashion. The biggest difference is the quantity of eggs. We’re using a whopping six eggs plus one egg yolk.
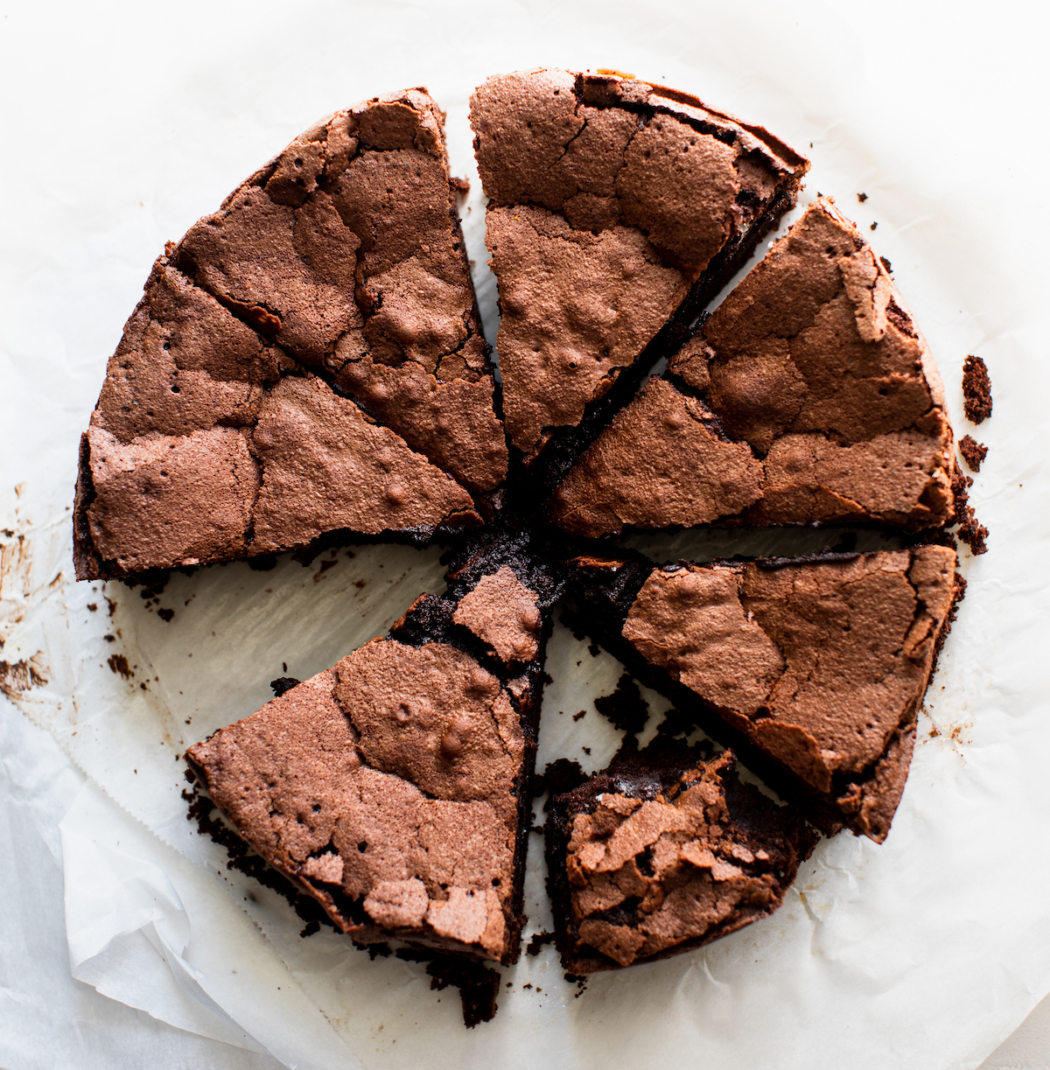
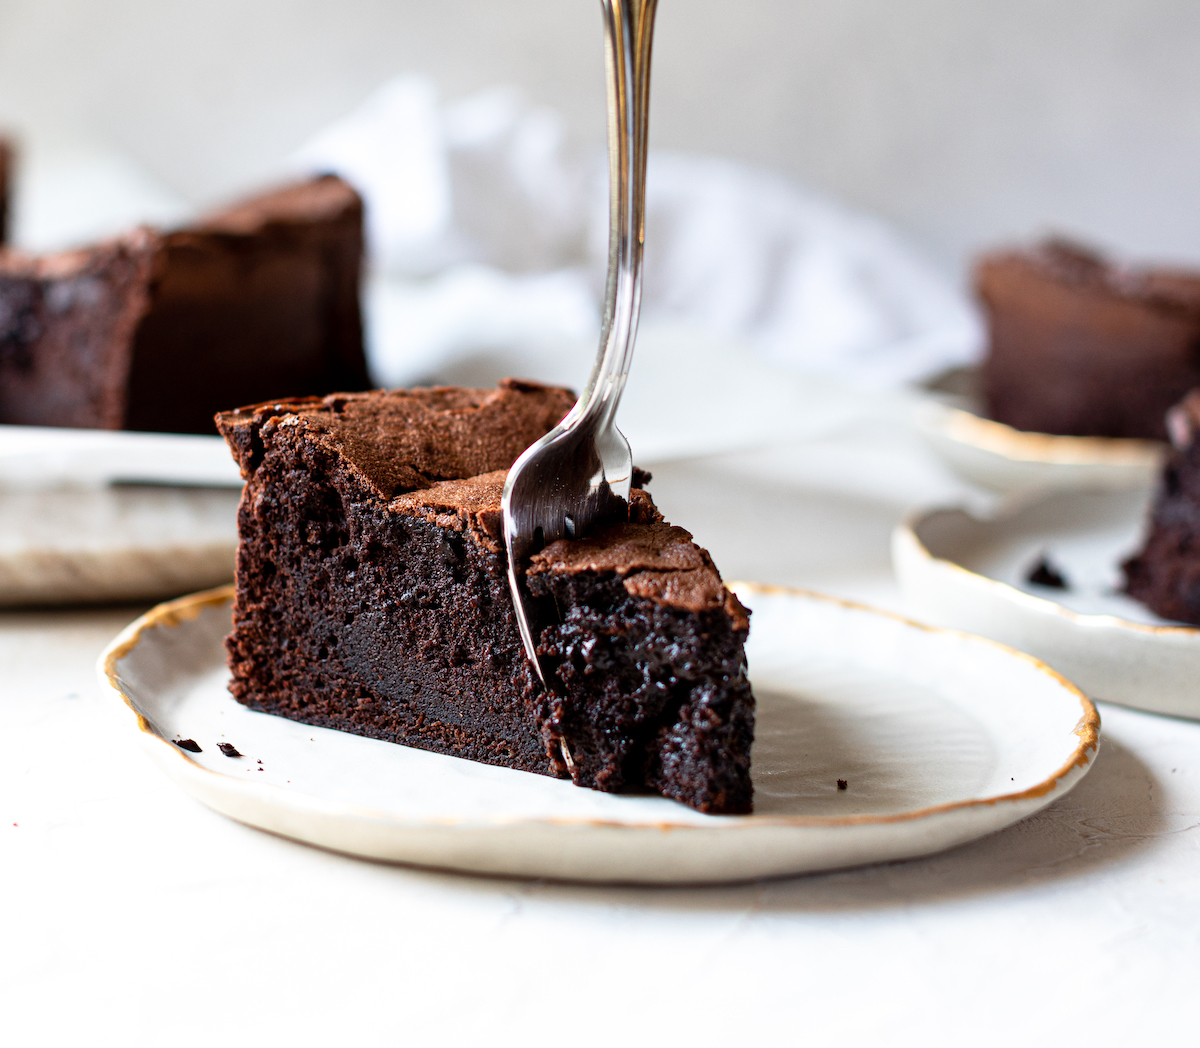
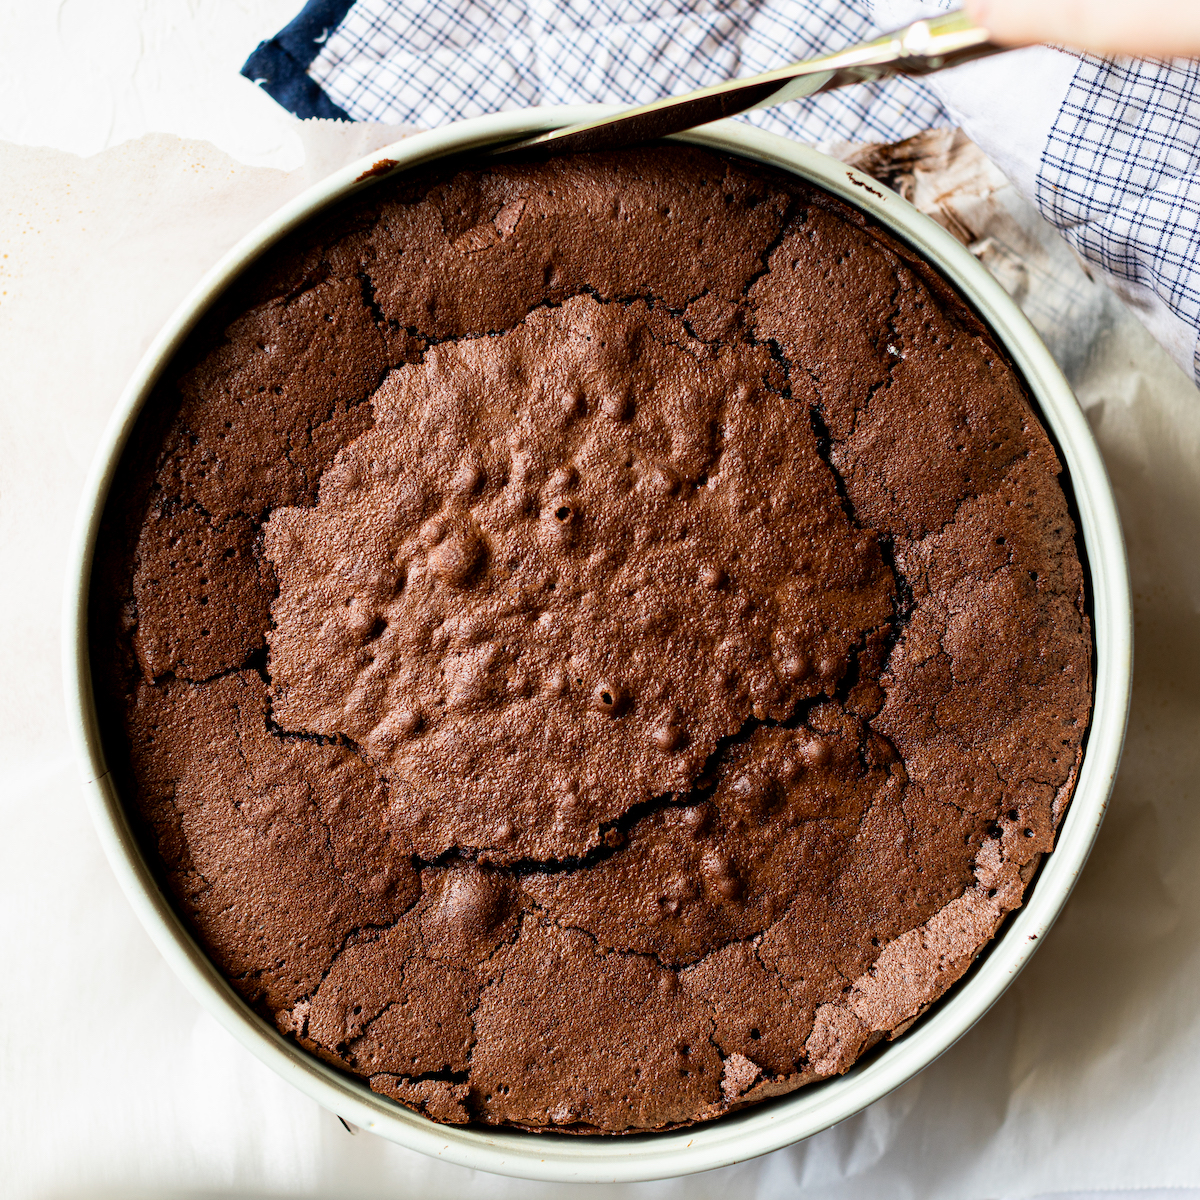
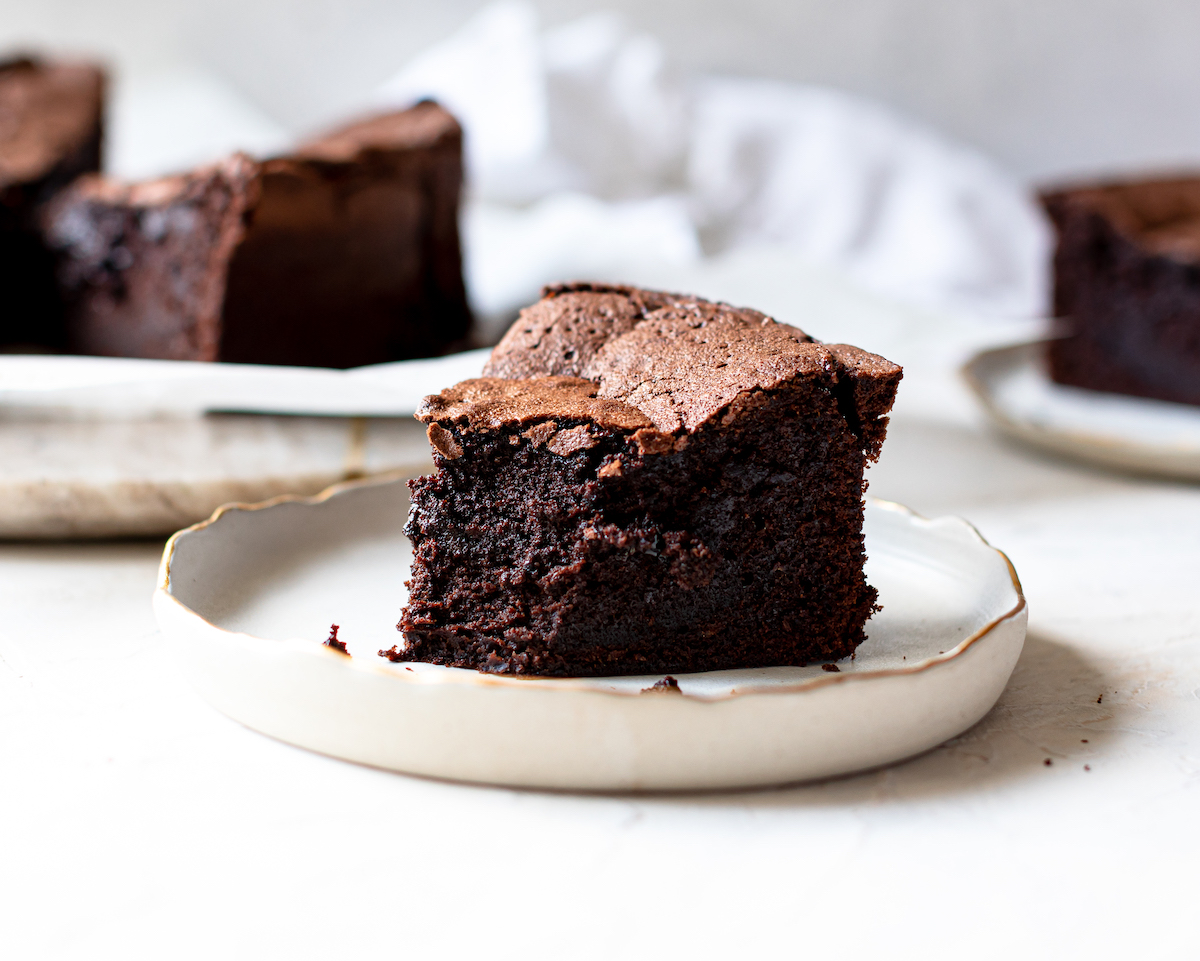
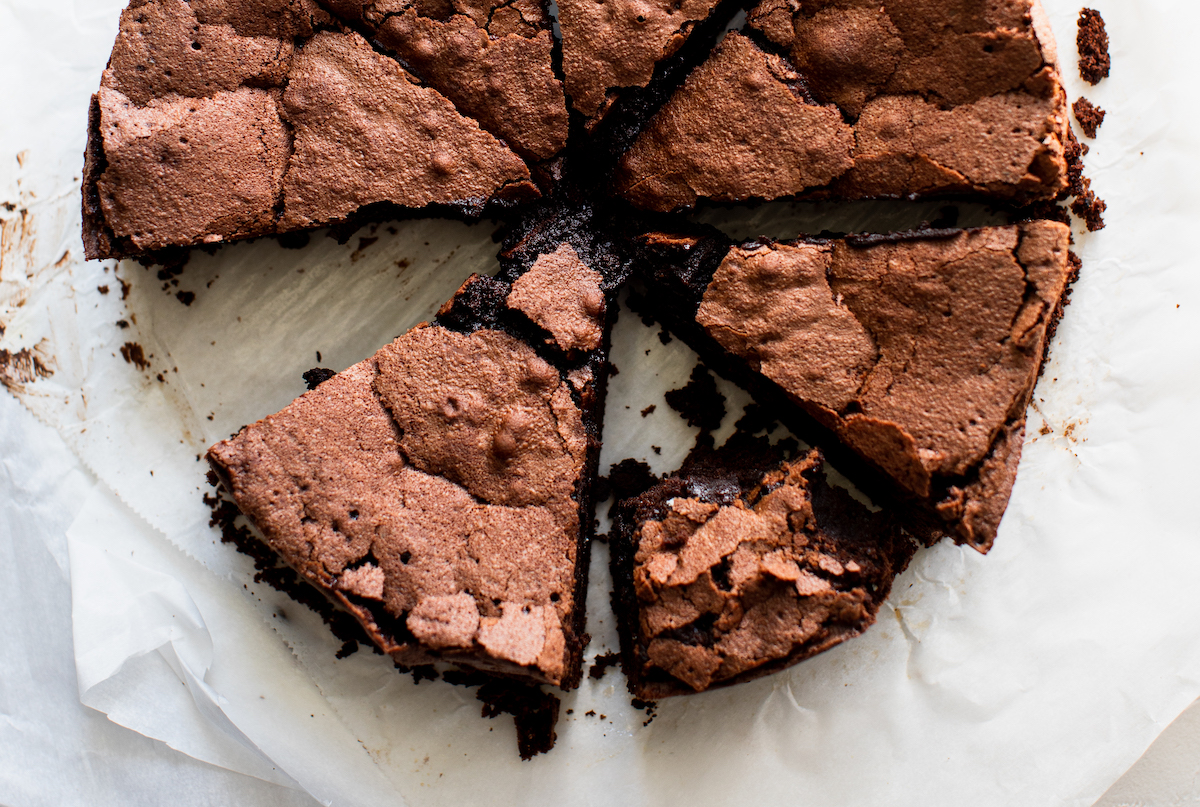
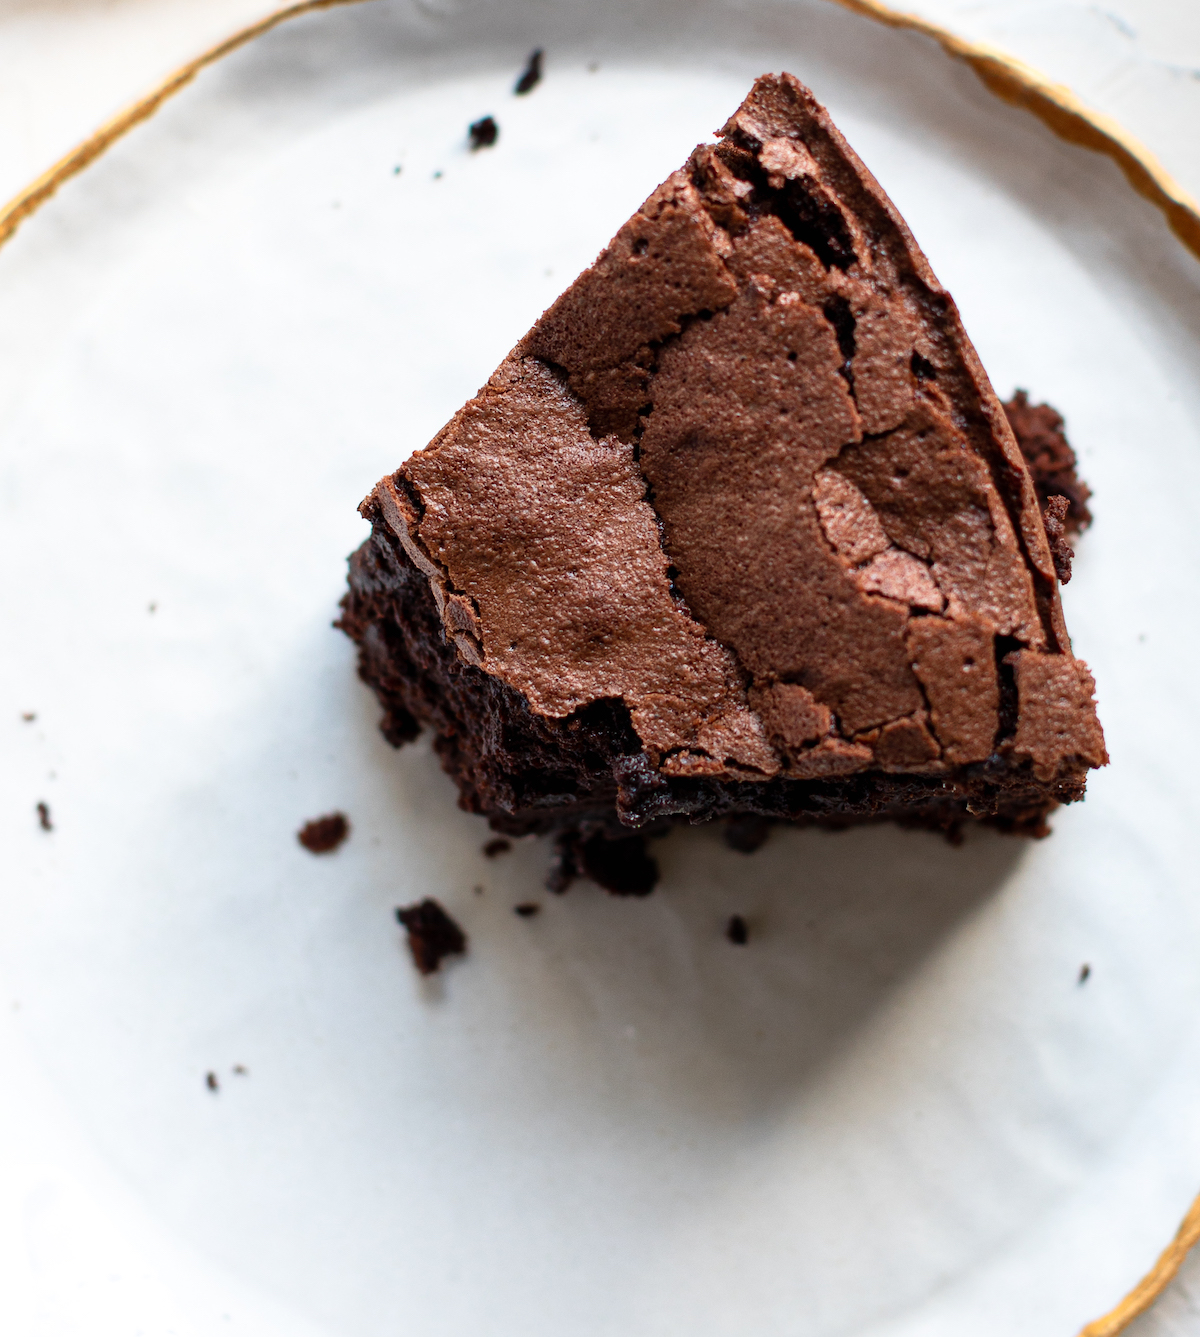
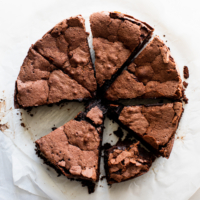
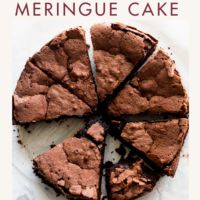
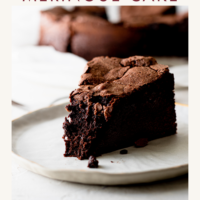
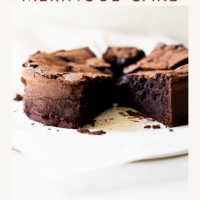
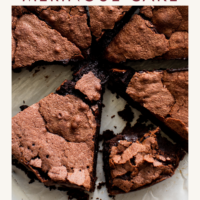
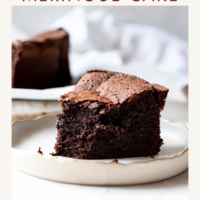
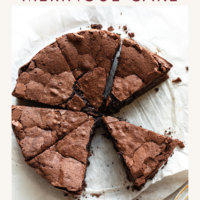
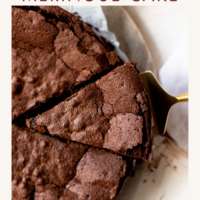
The result: a very brownie-like cake texture that is fudgy in the middle and a bit more cake-like towards the edges.
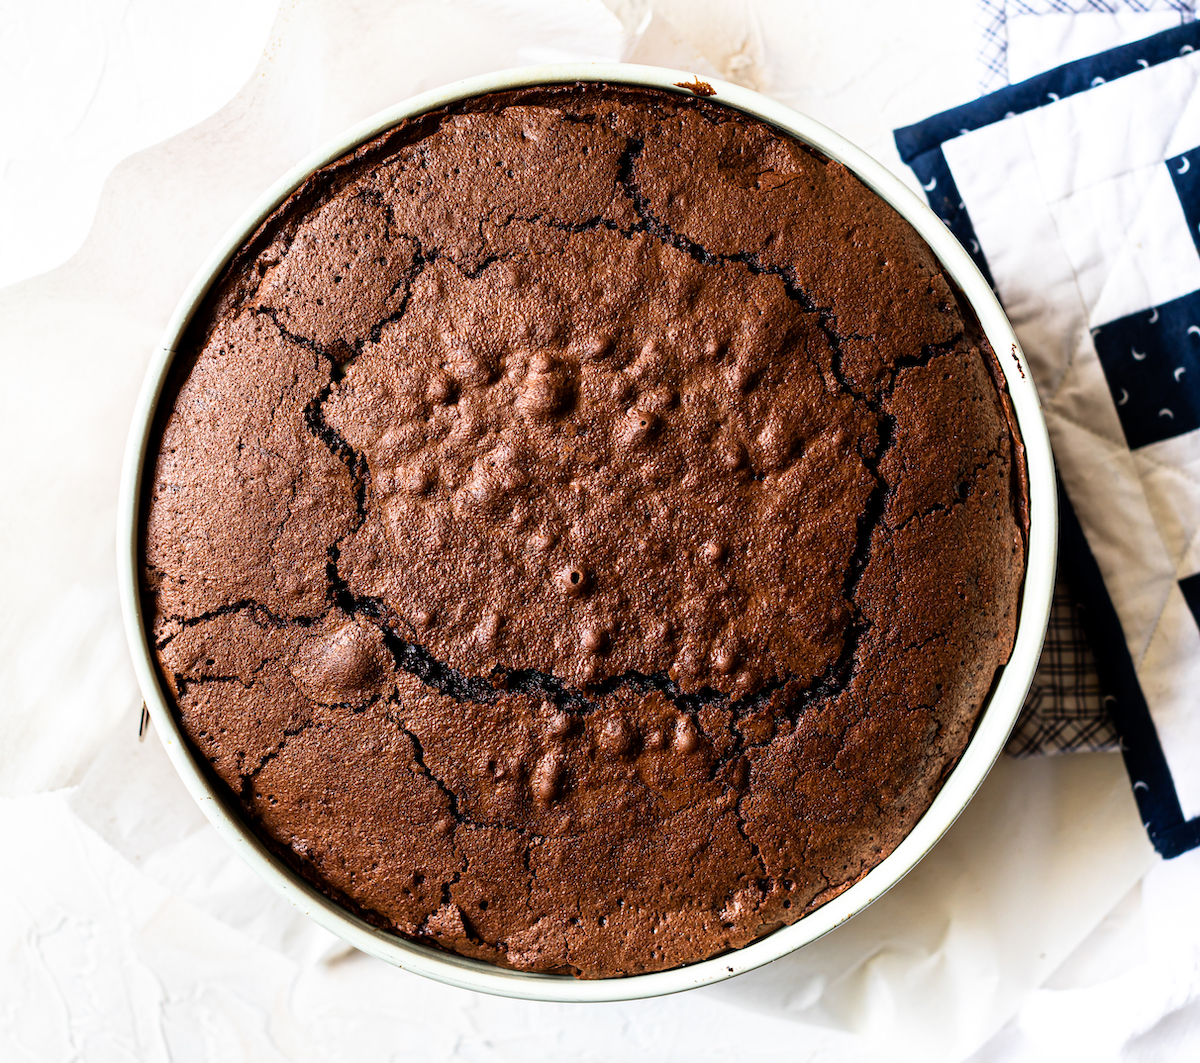
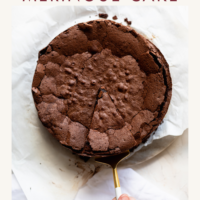
The top of the brownie meringue cake puffs up quite tall and get’s all crispy in a way that’s similar to a crispy meringue cookie (like these crispy fabulous french meringues here) rather than soft and fluffy and toasty like a lemon meringue pie (or like the Toasted Marshmallow Meringue on these Pumpkin Bars).
I absolutely love chocolate everything! Check out more chocolate deliciousness such as Chocolate Guinness Cake (that pairs perfectly with this creamy 5-Minute Chocolate Malt Buttercream), this super simple Chocolate Bundt Cake and this dreamyyyy Chocolate Cake with Marshmallow Frosting!
This chocolate meringue cake is delicious with vanilla ice cream and homemade brown sugar caramel!
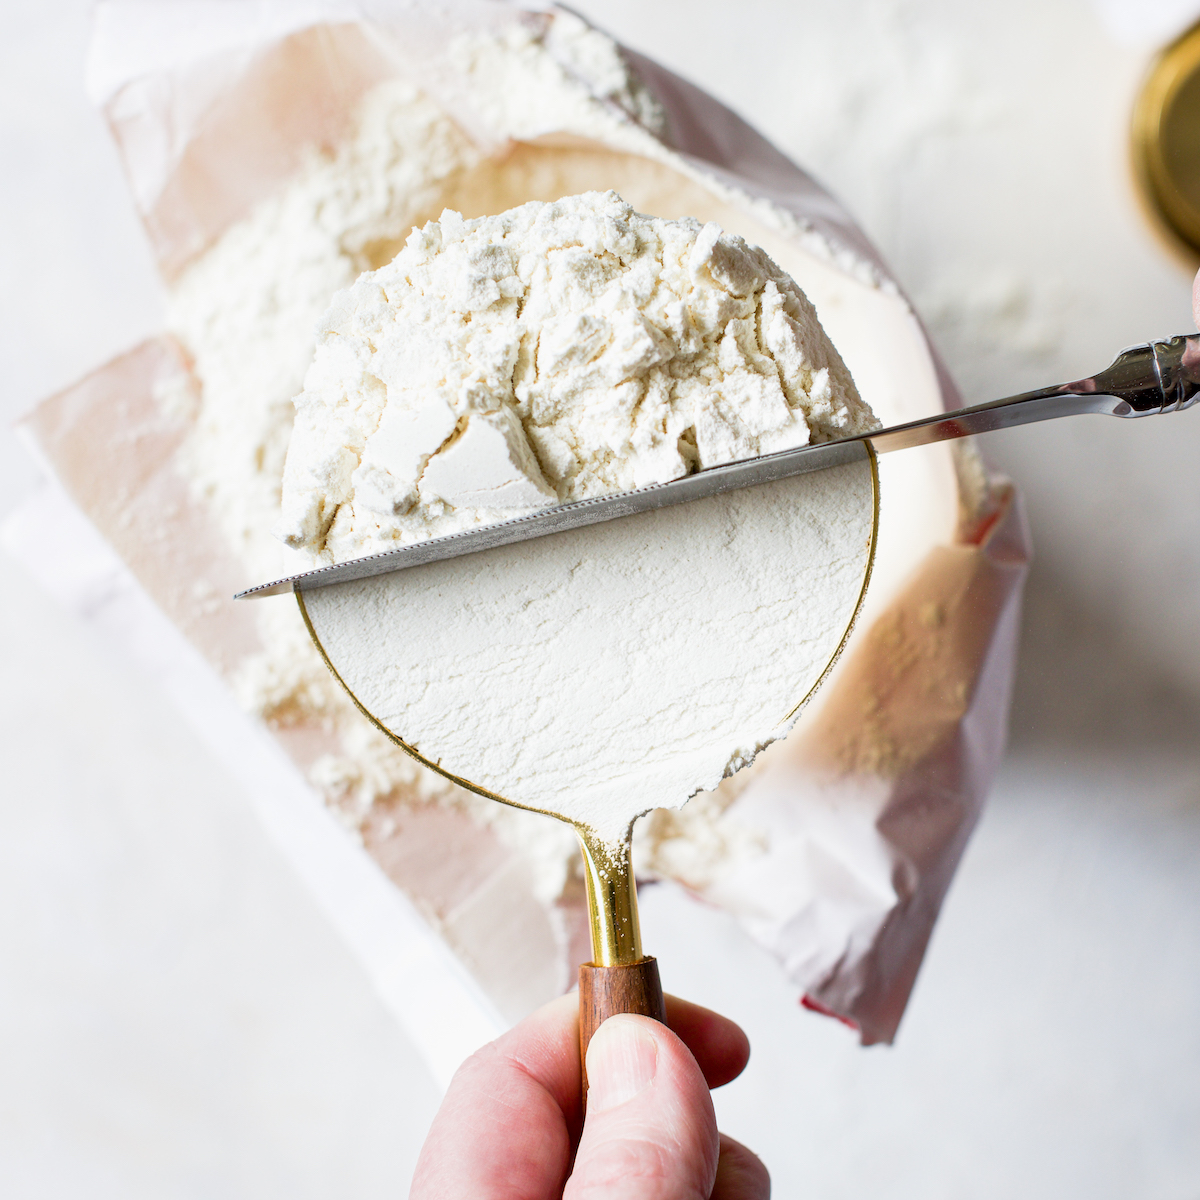
The Baker’s Guide to Measuring Flour
One of the biggest (and most common) mistakes in baking is how we measure flour. If you find yourself without a scale, see my top tips on how to properly measure flour for the perfect amount every time!
Step-by-Step Instructions for this Brownie Meringue Cake
Below are step-by-step photos (with captions) to make your Fudgy Chocolate Brownie Meringue Cake perfect every time! My biggest tips are:
- Use a 9-inch (23-cm), 10-cup Springform pan. Springforms have nice, high sides (the one I use has 3-inch (8-cm) sides). The cake rises quite a bit during baking and you’ll need those high sides to keep it contained. *IF* you use a regular cake pan, make sure it has 10-cup capacity with at least 3-inch (8-cm) tall sides.
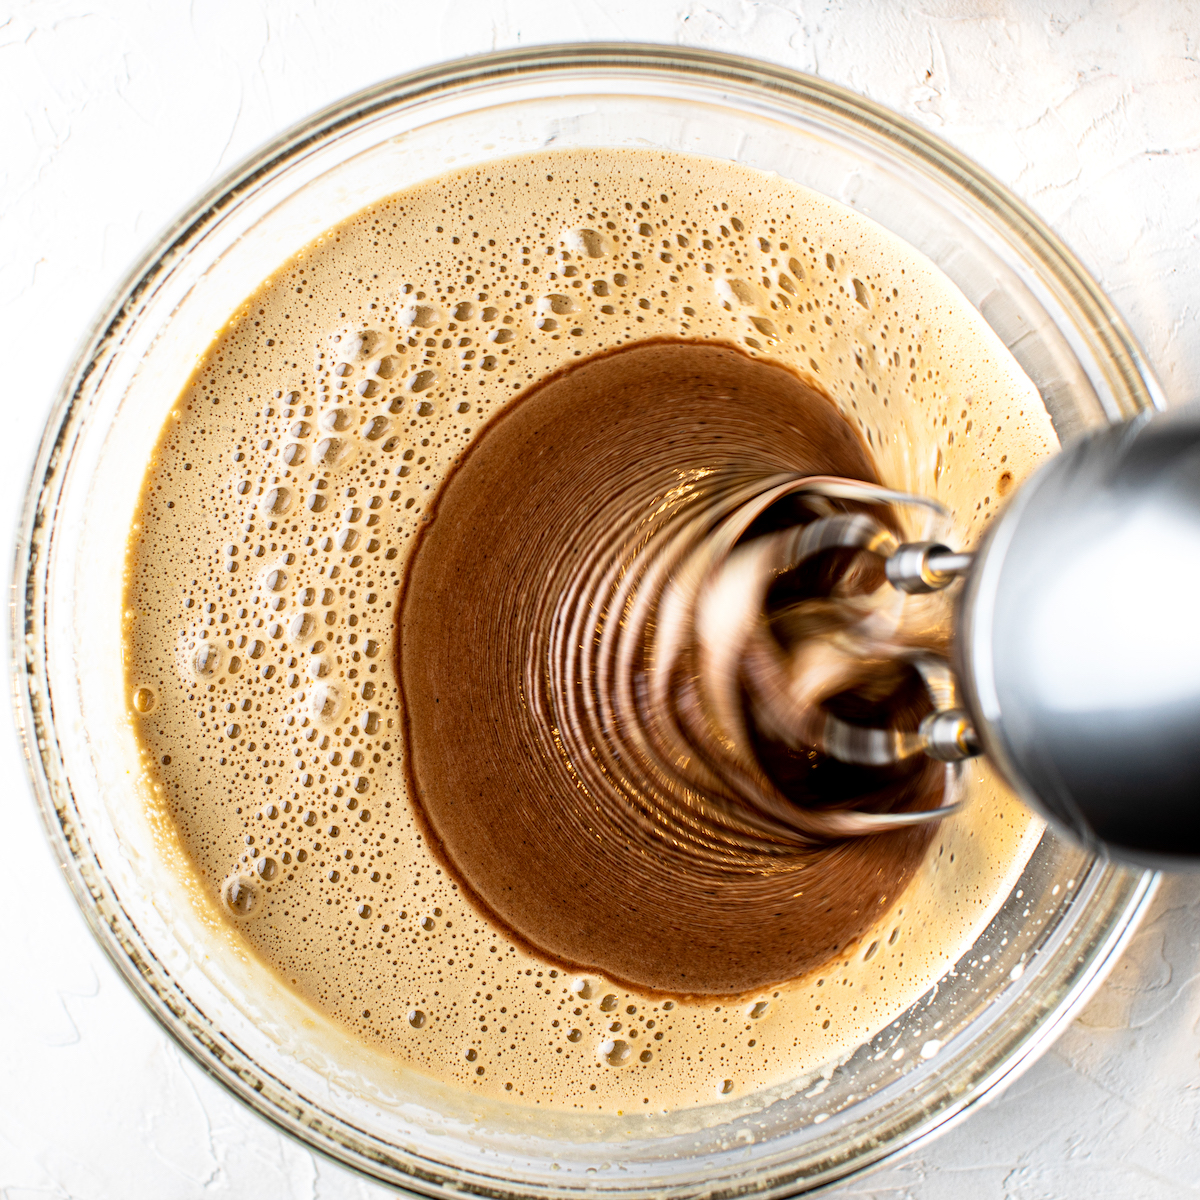
- Let your chocolate cool before adding it to the whipped up eggs. If you add the warm chocolate to the frothed up eggs you run the risk of deflating them. Let the melted chocolate cool (stirring frequently) until it is close to room temperature before adding to your whipped eggs.
- Make sure your eggs are at room temperature. Not only will room temperature eggs whip up to loftier heights than colder eggs, but you also don’t want the cold eggs mixing with slightly warm chocolate. You want both the frothy eggs and melted chocolate to be about the same temperature when you combine them.
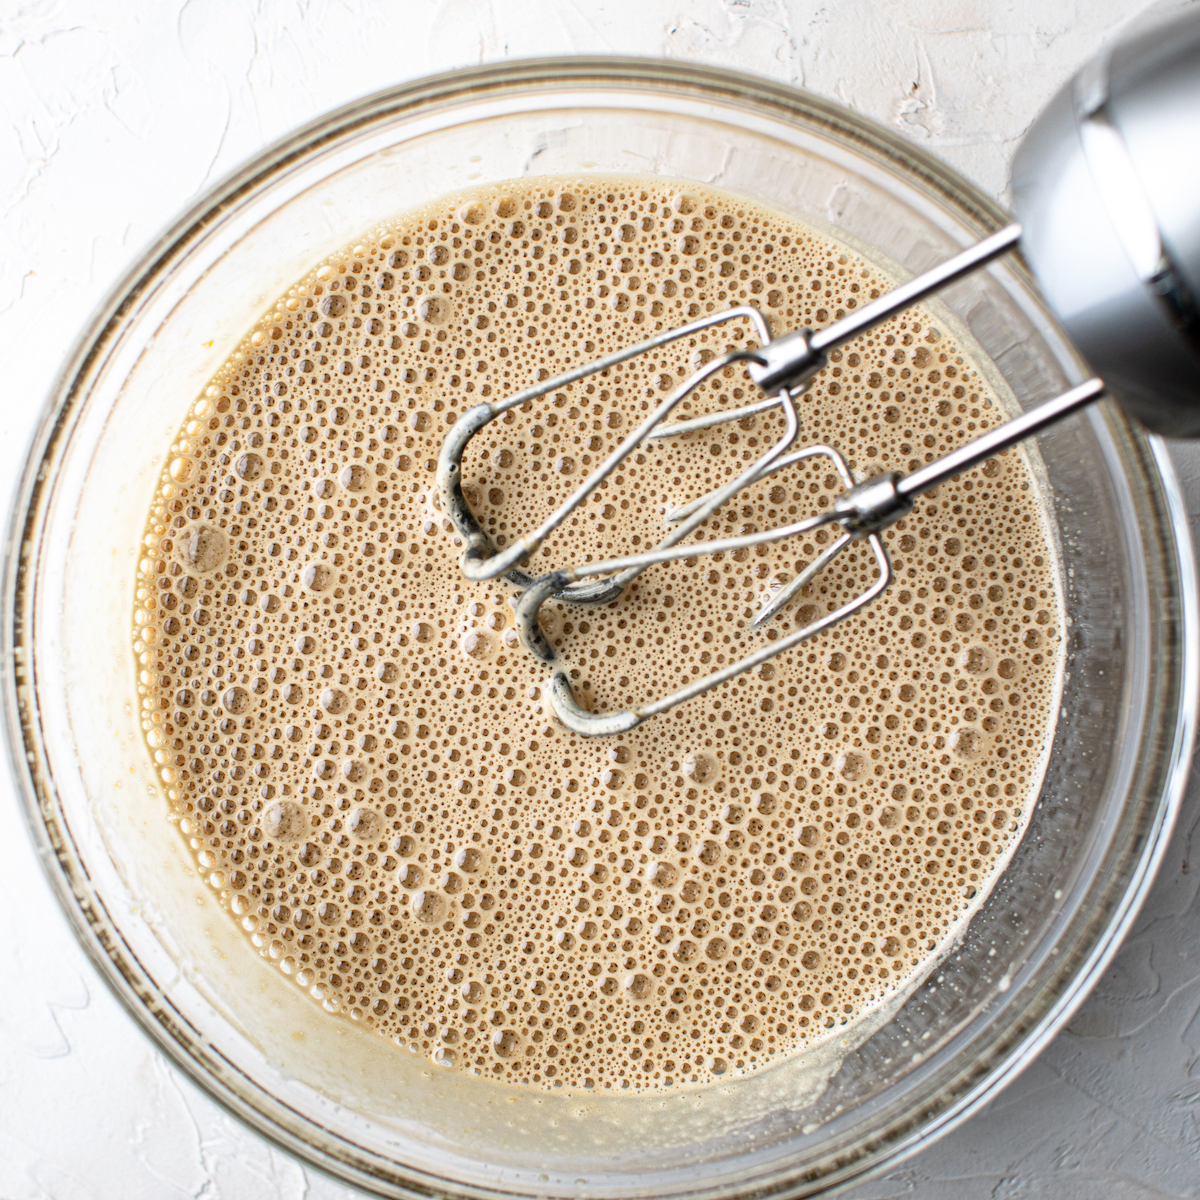
- Really whip up your eggs. Go big. Using a hand or stand mixer, really whip up your eggs. I want the mixture to have doubled in size and lightened in color. If you watch the video you’ll see the progression. We aren’t using any leavening (baking soda or baking powder) in this cake, the whipped up eggs are what will make it light and fabulous.

Best Baking Tools for This Meringue Cake
These are the tools I used to make this cake:
Electric Stand Mixer (I prefer the Artisan to the Professional)
Or Breville Handheld Mixer, this one has a bunch of speeds, dough hooks, whisks. I was never a fan of handhelds until I got this one!
A whisk and/or a spatula for making sure your chocolate is smooth and your flour is properly blended.
My, never-let-me-down Nordic Ware Springform.
My trusty scale for precision.
These heat-safe nesting glass bowls for melting the chocolate and that I really need everyone to own.
Knife, love this chef’s knife with the white handle.
For more fun shopping, check out my Shop (aka my favorite things!).
More Meringue Fun
As mentioned earlier, this isn’t your typical ‘meringue’ cake and I’m using the term loosely.
But if we want to dive more into whipping up eggs and churning out something beautiful, take a look at these recipes: Perfect French Meringues, Chocolate Orange Meringue Cookies (these are super fun to make!) or my favorite Chocolate French Macaron recipe (with Marshmallow Filling, love).
The Inspiration for This Cake
One of my most favorite cookbooks is Nigella Lawson‘s How to Eat. If you don’t have it, get it! It was the book that made me fall in love with cookbooks. The first cookbook I read cover-to-cover.
And if I had to say the one person that inspires me about the kind of baker/recipe author I’d like to be, it would be her (and this book).
One of my favorite recipes is the Gooey Chocolate Puddings in How to Eat (I mention it in The Cake Book as well; I love it so much!). The recipe starts off:
“Before you’ve even taken your coat off, put the chocolate and butter in the top of a double boiler above simmering water. Whisk every now and again until melted.”
Nigella Lawson, How to Eat
This might be my favorite start to any recipe, ever.
I want this recipe to have that same energy. You’ve just gotten home and you want a really delicious dessert and this is it. Start melting the chocolate, frothing up the eggs and shove it in the oven.
Then go change into something comfortable or sparkly, depends on who’s coming to dinner.
While the cake bakes and cools you can throw your dinner together. By dessert time it’s perfectly cool (but maybe still slightly warm) and ready to be topped with crème fraîche, barely-sweetened whipped cream, some frosty vanilla-bean ice cream and/or my favorite homemade caramel sauce.

A quick note on safety! This cake has a fudge-like center. To ensure its safety, make sure the cake is baked to at least 160°F (71°C) when tested in the center with an instant-read thermometer. This is especially important for those with compromised immune systems or our pregnant friends.
Enjoy your fudgy chocolate brownie meringue cake!
Fudgy Chocolate Brownie Meringue Cake
Ingredients
- 12 tablespoons (170 g) unsalted butter, (cut into 24 pieces)
- 3/4 cup (64 g) unsweetened dark (Dutch process) cocoa powder
- 1/4 cup (56 g) fresh hot espresso ((you can also use strong coffee or hot water))
- 1 1/2 cups (255 g) dark chocolate, ( finely chopped)
- 6 large eggs, (room temperature)
- 1 large egg yolk, (room temperature)
- 1 cup (200 g) granulated sugar
- 3/4 cup (165 g) dark brown sugar, (packed)
- 1 ½ tablespoons (19 g) real vanilla extract
- 1 teaspoon espresso powder ((optional))
- 1 ½ teaspoons fine sea salt
- 1 cup (135 g) all-purpose flour (how to measure flour)
Instructions
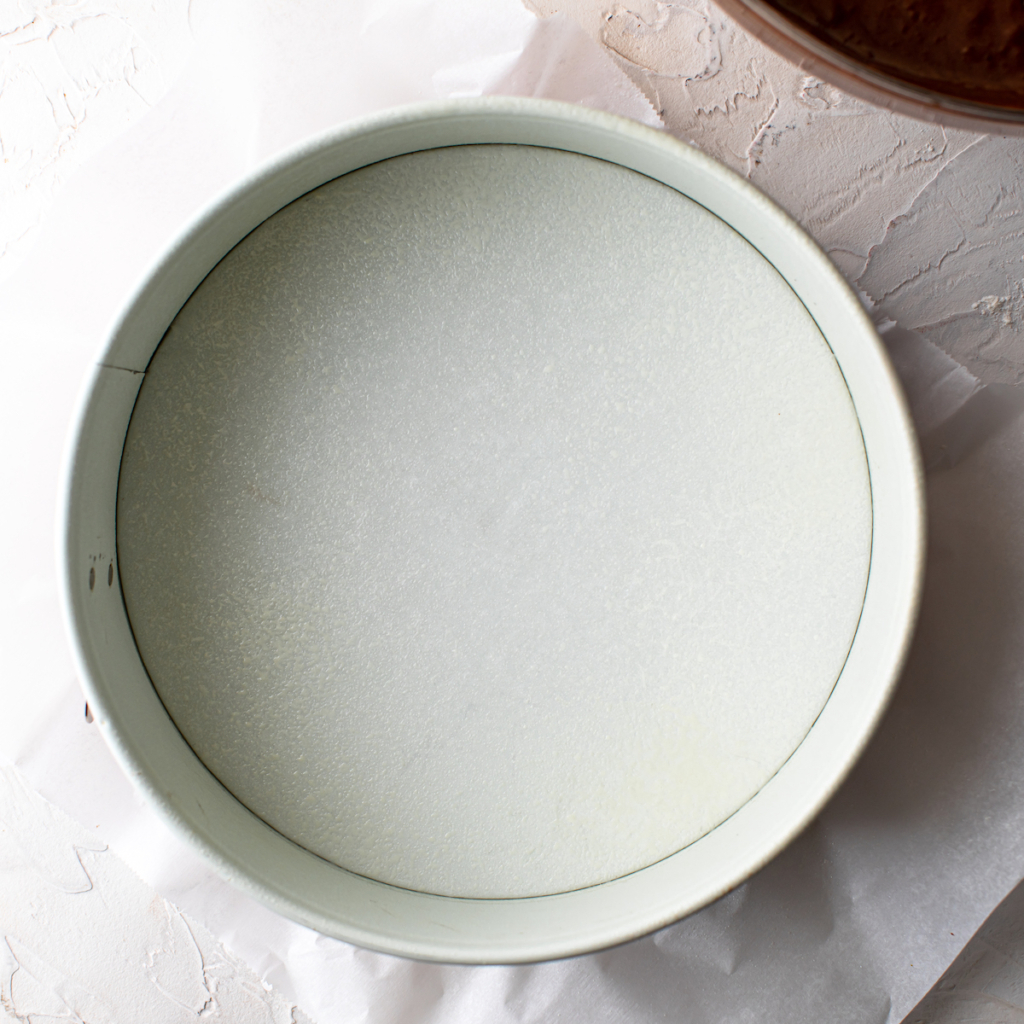
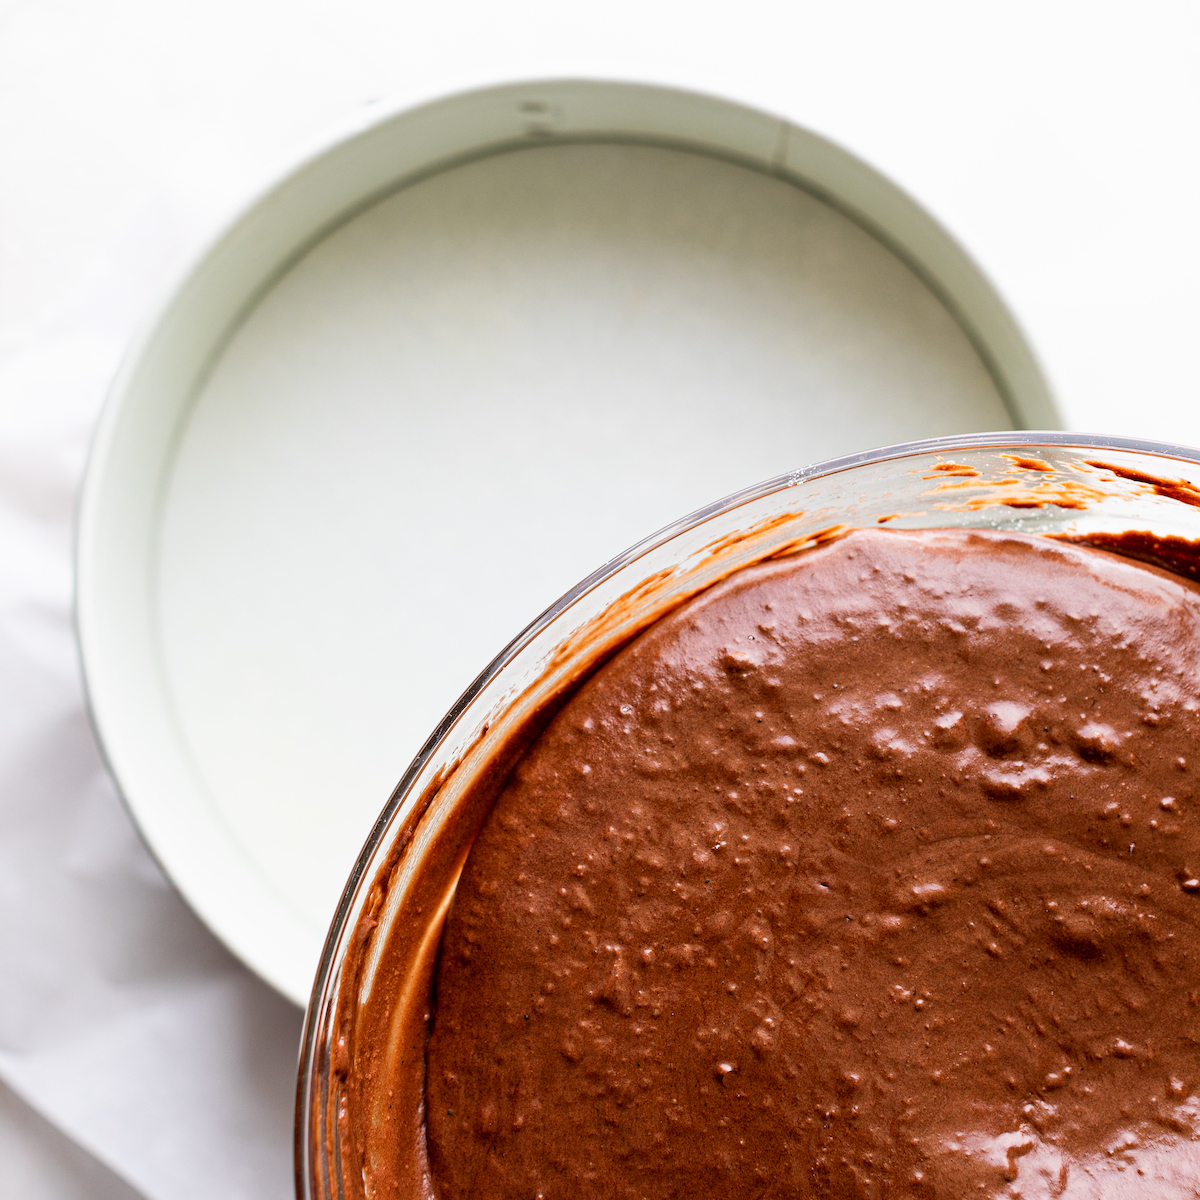
- Preheat the oven to 350ºF (177ºC). Note that as soon as you put the cake in the oven, you'll reduce the heat to 325ºF (170ºC). Grease a 9×3-inch (23×8-cm) springform pan and place a piece of parchment across the bottom before securing the sides, so it lines just the bottom of the pan. See photo.

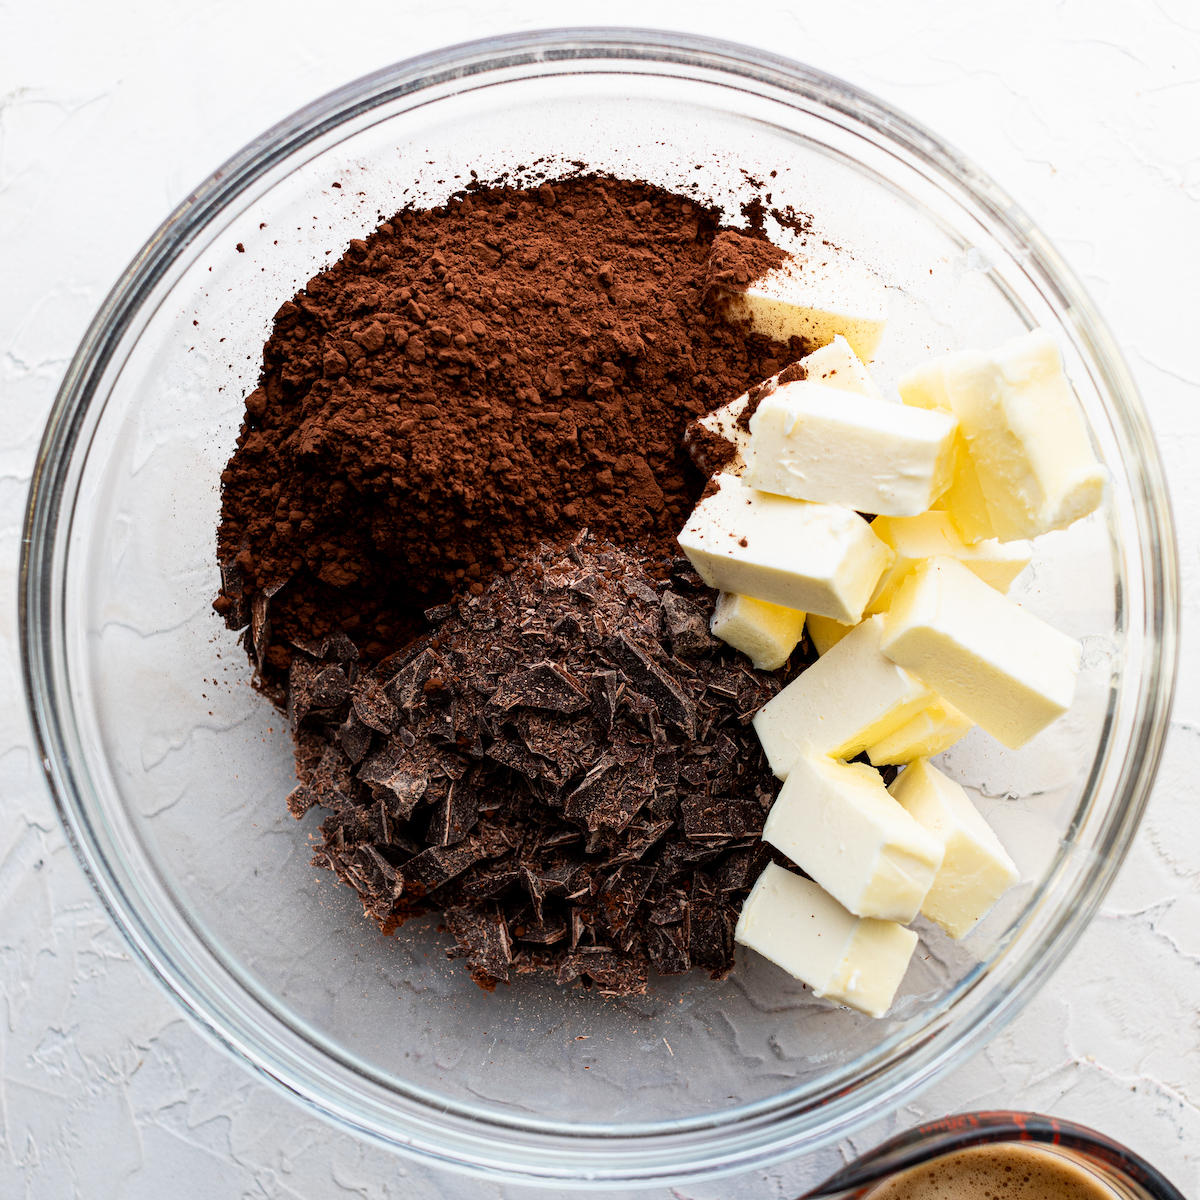
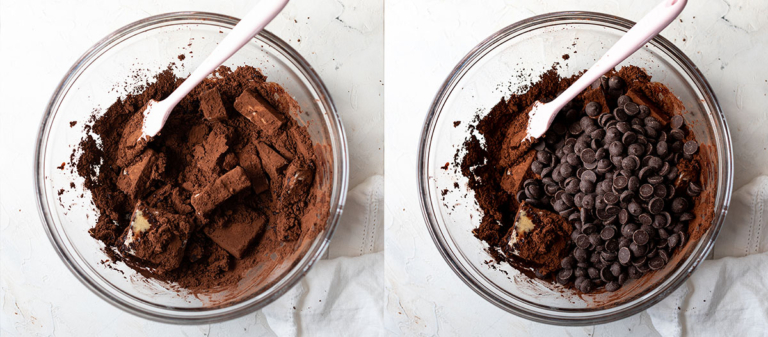
- To a medium, heat-safe bowl add the butter, cocoa powder and hot espresso. Stir to coat. It won't be enough liquid to really do much, but nudge it around. Add the chocolate and set over a medium saucepan of simmering water. Do not let the bowl touch the water or let the water come to a boil. Stir frequently until melted and smooth and set aside to cool.

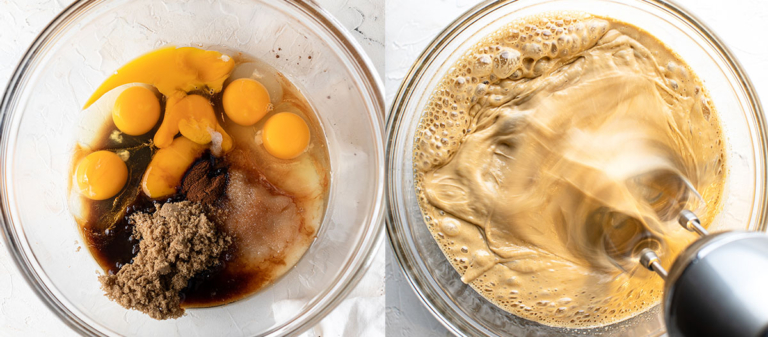
- In an electric stand mixer fitted with the whisk attachment, add the eggs, egg yolk, sugar, brown sugar, vanilla, espresso and salt and whisk on medium-high for about 8 to 10 minutes or until thick, light in color and doubled in volume.
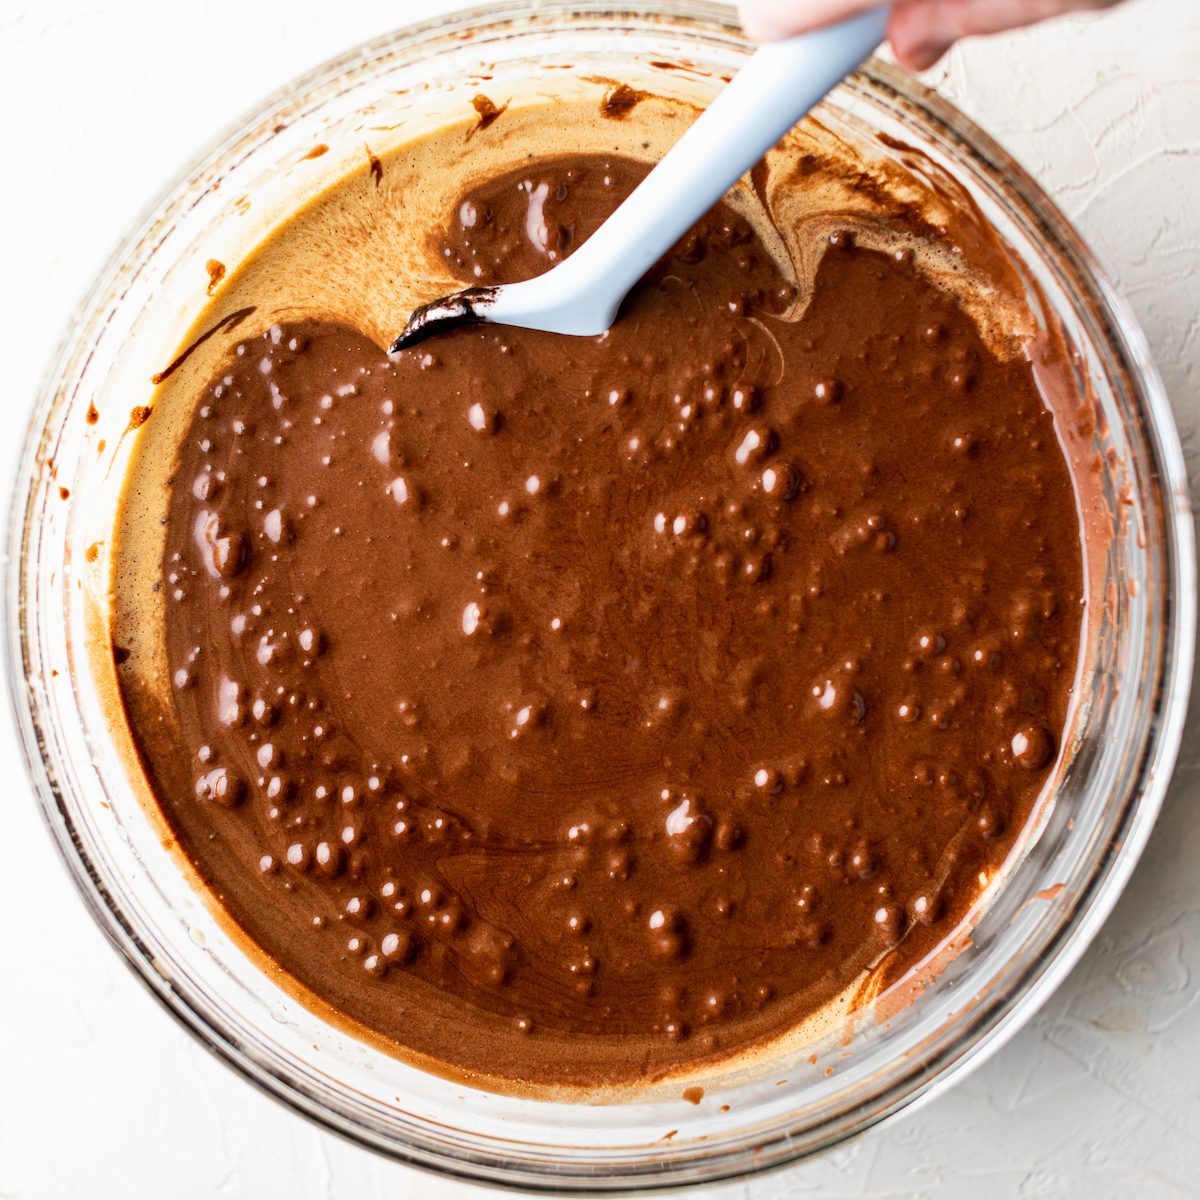
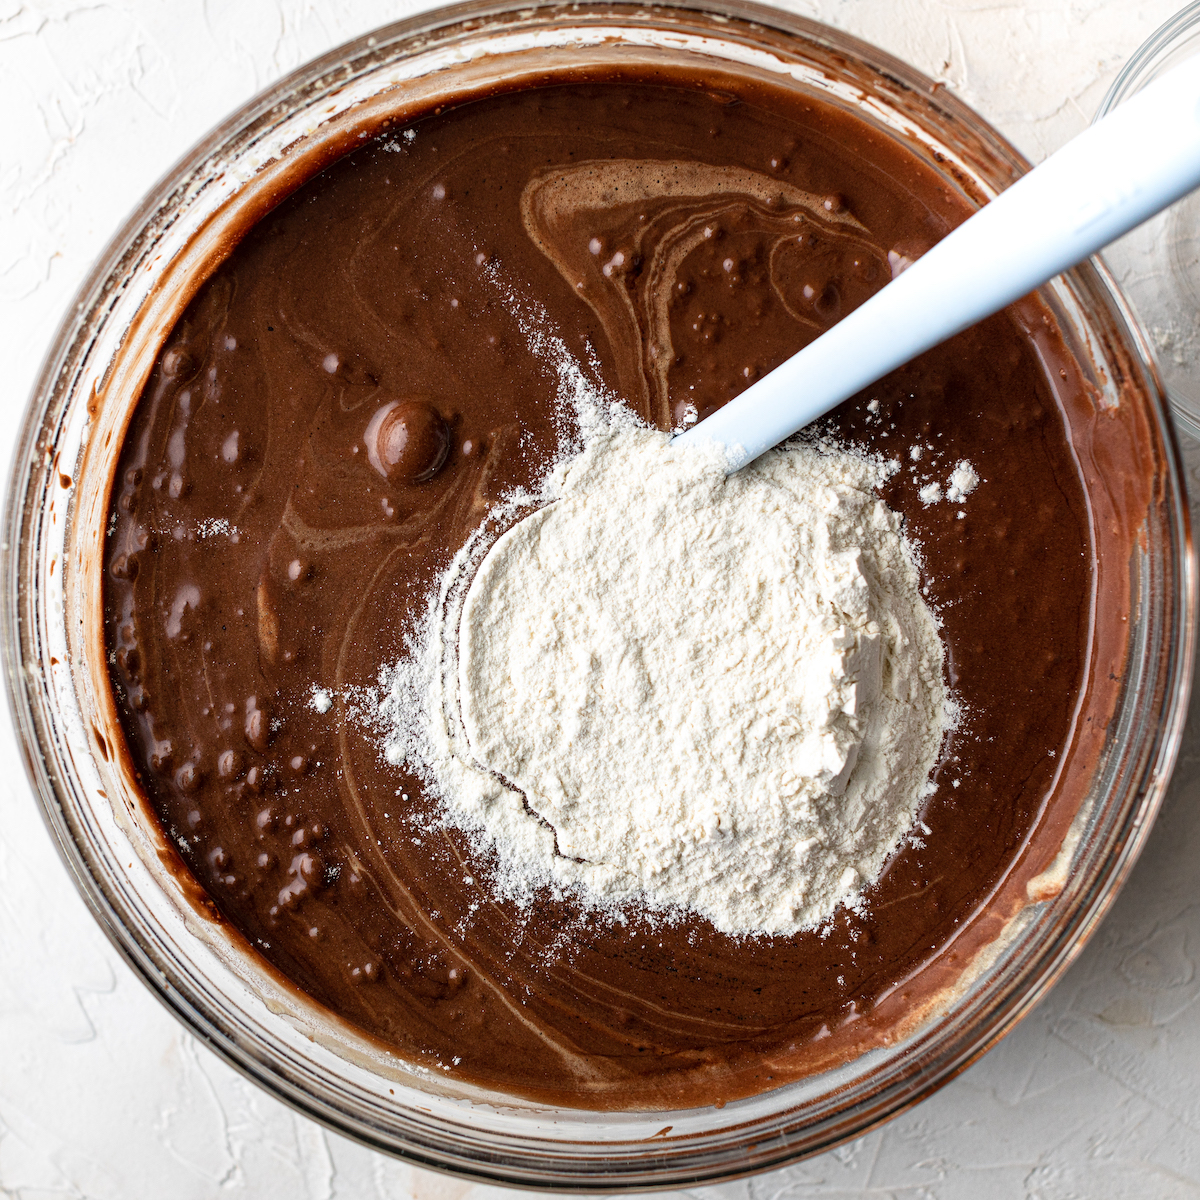
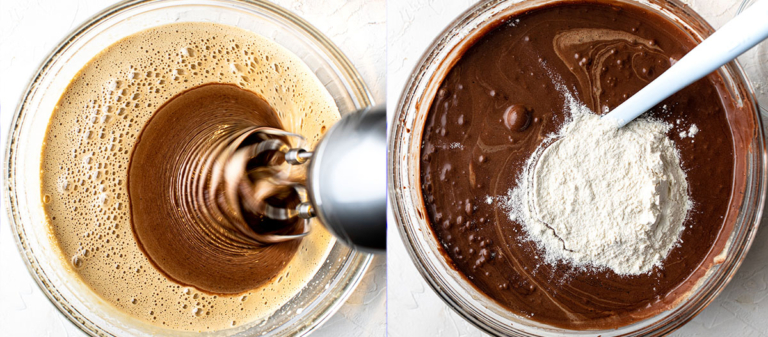
- Slowly add in the cooled, melted chocolate with the mixer on medium-low. Then run the mixer for 30 seconds on low to combine. Take the bowl out of the mixer and fold in the flour until just combined. Gently run a whisk through to make sure there aren't any flour pockets. Be gentle as you don't want to deflate the cake batter.
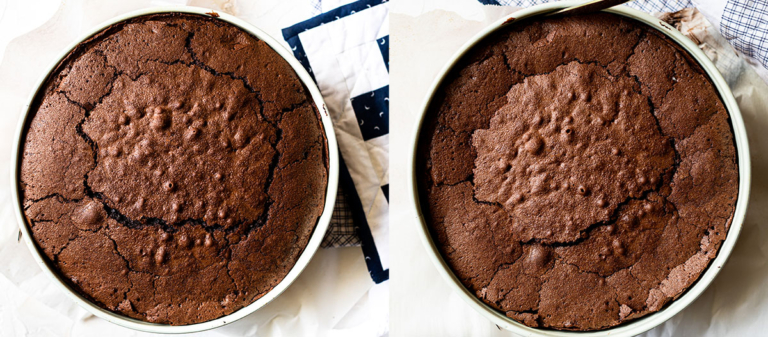
- Pour into the prepared pan and place in the center of the oven. Immediately lower the temperature to 325℉ (170ºC) and bake for 55 minutes. Once done, set on a cooling rack. After 10 minutes run a knife along the edge of the cake and carefully remove the outer edge of the pan. Let cool completely before serving (if you can). It will deflate and crack a bit as it cools.I like the cake best the same day it is bake as the top will still be crispy. The next day it is still delicious, but the crispy top will soften.


My top wasn’t dull and crackly like yours it was smooth and dark. Not sure what happened.
Hi Daisy!
I’m thinking the eggs and sugar needed to be whipped more. The more they are whipped, the lighter in color the top will be and all of that air whipped into the batter will cause the cake to rise and then fall, causing the cracks. Let me know if you have any other questions!
xo
Oh I have been so excited for this recipe, I can’t wait to make it! Looks decadent
Hi Anna! That makes me so happy to hear!! Enjoy and let me know if you have any questions!! xo
I’ve been waiting for you to post this one. I can’t wait to try ❤️
Thanks Lorie! I hope you enjoy! xo