
{ fresh tomato crostata }
Three years ago I started with two raised planter beds for veggies and I ushered in this growing season with nine. That’s right, nine. I had visions of bed after bed of tomatoes. More tomatoes than I could possible eat or can. And then I went seed shopping. I was so compelled by tomatillos and cantaloupes (and who says I can’t grow broccoli in summer?) that I ended up with about one full bed (or two half-beds) of tomatoes. Oddly, I need to go back and check my seed packets, but I believe I only have cherry and tom tomatoes. Why I’m not seeing any large ones in this crazy wilderness is beyond me. I let the tomato vines run amok this year…they are spilling out the sides and climbing up plants. It’s my own little backyard country sprawl. Without the commute.
For future reference, nine planter beds isn’t enough. Next year I need more. Some grass is gonna go. And I can’t stop dreaming about a greenhouse so that I can grow all winter. Grow things in the wrong season ALL WINTER LONG!! It sounds like a dream. I’m picturing one of those greenhouses that is built out of old windows. Can you see it?
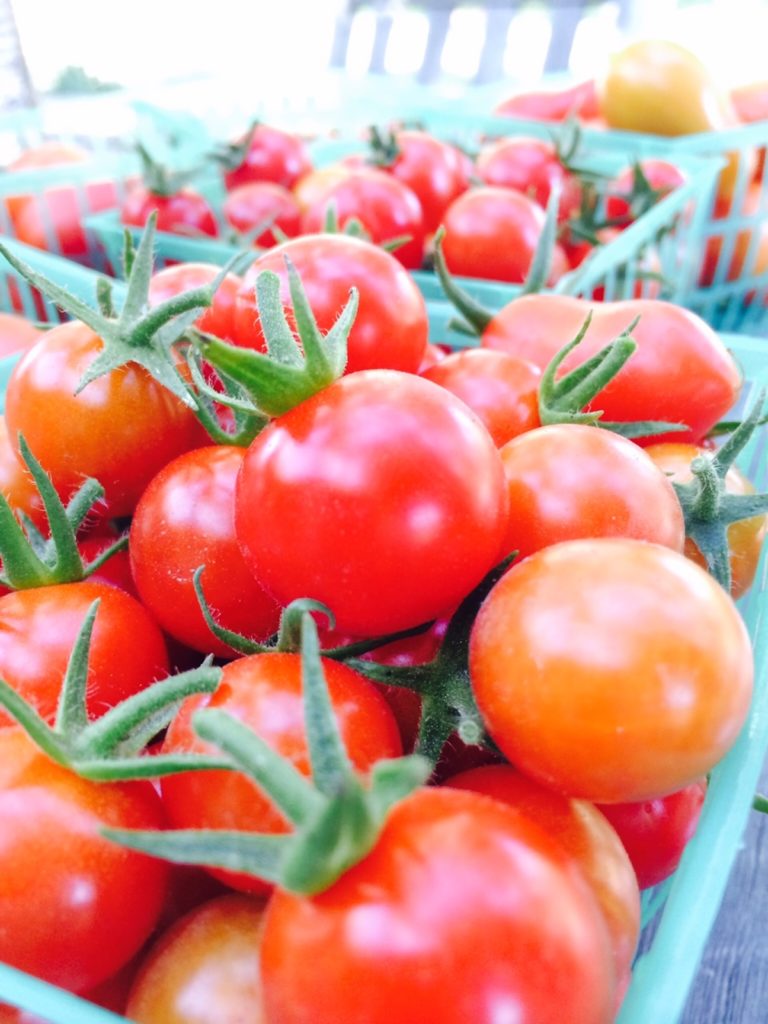
My beautiful daughter and I spent the morning picking tomatoes. Every last ripe one. I had visions of making them into something new and different. At least new and different to me. I’ve really run into the ground bruschetta, canned tomatoes, canned tomato sauce, fresh tomato sauce, canned salsa, fresh salsa.
Cherry tomatoes in a bowl on the counter, anyone? You know what I’m talking about.
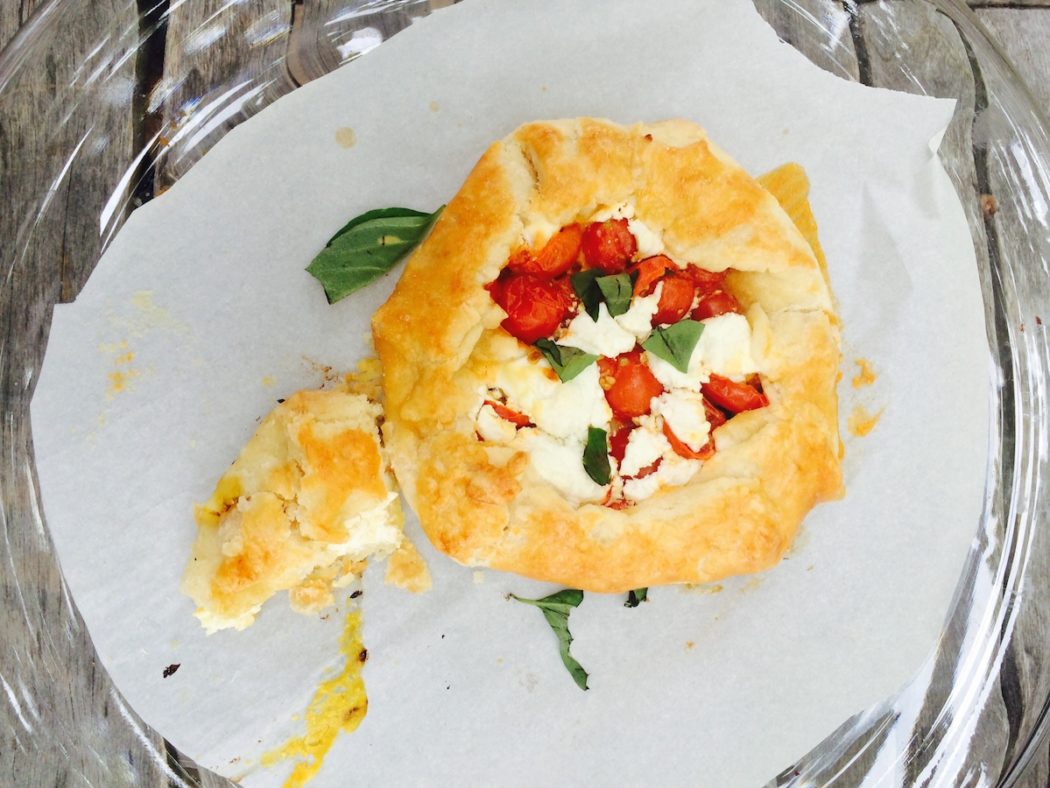
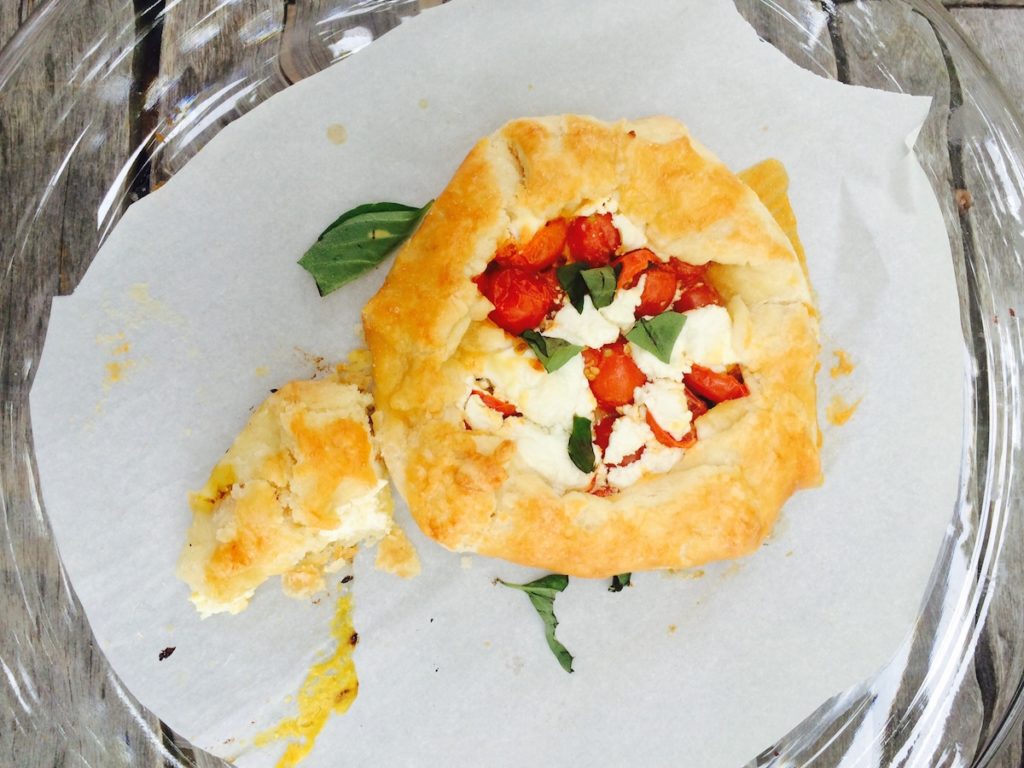
I wanted to do something with pie crust and I came up with the crostata. I love the free-form pie thing. It’s so low maintenance and not perfect. It’s the anti-pie. This feels very European to me…all you need is a little white wine and a side salad. Perhaps something from the garden? Why don’t you dine al fresco while you’re at it.
Don’t scoff or panic over the pie crust. This is the easiest, bestest pie crust you will EVER MAKE. IN YOUR LIFE. It’s from Cook’s Illustrated and they should close up shop and call it a day because almost ten years ago they were literally hit by genius. And you’re baking with vodka…does it get any better?
{ fresh tomato crostata }
INGREDIENTS
Makes 4 Entree Servings…or could be a great appetizer cut up in wedges
Pie Crust
- 1 1/4 cup unbleached all-purpose flour
- 1/2 teaspoon table salt
- 1 tablespoon sugar
- 6 tablespoons cold unsalted butter (3/4 stick), cut into 1/4-inch slices
- 1/4 cup chilled solid vegetable shortening, cut into 2 pieces
- 2 tablespoons vodka, cold
- 2 tablespoons cold water
- 1 large egg yolk + 1 tablespoon milk for your egg wash
Tomato Filling Goodness
- 3.5 cups small cherry tomatoes, cut in half
- 2 tablespoons olive oil
- 1 teaspoon salt
- 1/2 lemon zested, plus 1 tsp lemon juice
- 2 garlic cloves, pressed
- 6 ounces goat cheese
- 4 tablespoons fresh basil, chiffonade
INSTRUCTIONS
For the Crust
- Combine the vodka and water and place in the freezer so it’s nice and cold.
- Process 3/4 cups flour, salt, and sugar together in food processor until combined, about 2 one-second pulses. Add butter and shortening and process until homogenous dough just starts to collect in uneven clumps, about 10 seconds (dough will resemble cottage cheese curds with some very small pieces of butter remaining, but there should be no uncoated flour). Scrape down sides and bottom of bowl with rubber spatula and redistribute dough evenly around processor blade. Add remaining 1/2 cup flour and pulse until mixture is evenly distributed around bowl and mass of dough has been broken up, 4 to 6 quick pulses. Empty mixture into medium bowl.
- Sprinkle vodka and water over mixture. With rubber spatula, use folding motion to mix, pressing down on dough until dough is slightly tacky and sticks together. Flatten dough into 4 equal size discs. Wrap in plastic wrap and refrigerate at least 45 minutes or up to 2 days.
- The above was taken verbatim from the Cook’s Illustrated people…can’t improve on it, don’t want to claim it, want to give credit where credit is due. HOWEVER, for this recipe I altered putting the dough into four roundish discs, since we’re making little crostata-ettes. And I added the first instruction. There, I did change it a little.
For the Filling
- While the dough’s chillin’, let’s mix the tomato mixture together. I love to do this in a glass bowl because it’s so pretty to look at. Put the cut tomatoes, olive oil, salt, lemon zest and juice and the pressed cloves in a bowl and give it a good stir. How’s it taste? You might need more salt. I’m not a big salter…but salt really brings out the beauty in tomatoes. Cover with plastic wrap and leave on the counter to marinade and get happy.
Back to the Dough
- After about 45, take it out and let it get a wee bit warm. Just a touch so it’s pliable. This dough reminds me of playdough. Really, the way you can mold it and shape it and it still is beautifully flakey and tender.
- Turn your oven to 425 degrees F. While the dough is warming up just a hair, grab a jelly roll pan or casserole pan or both…anything with a lip so that if juices start oozing out, they won’t smoke up your oven. Line with parchment paper. Gently beat your one egg in a bowl. That sentence is making me giggle.
- Roll the dough into sweet, little rustic circles. They don’t have to be perfect. But if they are, good for you. Make sure you throw some flour down before you roll…sprinkle it on top of and underneath each disc. This dough is wetter than most…so it needs this or it will stick a bit. Use your judgement and trust your instinct. You want it to be thin, but not so much so that you’re on the verge of falling apart.
- Even though this dough is very forgiving, I still heed the general rule of thumb with dough: don’t overwork it and work fast. What makes dough work (and work well) are the flecks of butter throughout that melt when the heat hits it and in turn, the butter steam (official terminology) gives us those wonderfully flakey layers. Overwork your dough and you lose the ribbons of butter. There goes the steam and your dough is going to hell in a hand basket. I don’t know what ‘hell in a hand basket’ means, but I heard it a lot growing up. Everything was going there. The vacation, the homework, the messy bedrooms, the Thanksgiving turkey. Now mix us a martini and let’s talk more about that ‘hand basket’.
- Grab a slotted spoon, scoop the tomato mixture and let it drain a bit. You want to make sure you get a fair amount of moisture out so that your crust doesn’t get all limp and soggy.
- How’s it taste? Seasoning ok? Saltiness ok? Remember you can always add more. Don’t overdo it.
- Divide the tomato mixture evenly among the four crusts; leaving about an inch around the edge.
- Sprinkle with the basil…kind of nestle it in the tomatoes…you don’t want it to burn.
- Sprinkle the chunks of goat cheese evenly over the four crusts, also leaving a one-inch border. Here’s where I’m going to give you your license to get creative. If you don’t like goat cheese, don’t do it! I’m thinking a gruyere would be great…maybe some parmesan? If you go for a cheese that doesn’t melt great (smooth and gooey), then you could pair it with one that does? I like this to hint at the cheese flavor and not have it be the main attraction…it’s tomato’s night to shine. Use something with a nice bite, but don’t go too cray.
- Now we’re going to deal with the crust. First, roll up a small (1-inch width) piece of dough just a little over the top of the tomato mixture. When you grab your next 1-inch piece, it will overlap the first one a bit. Crimp the dough (gently) here to hold it in place. Keep doing this until the whole crostata is sort of wrapped up in a dough-like swaddle. Make sure you have a decent amount of tomatoes and goat cheese not covered in dough. Doesn’t it look safe, serene and secure? Ready for night night. Repeat the swaddle maneuver with the other three crostatas.
- Gently brush the egg wash over the crust. This will make it nice and toasty instead of bland and anemic.
- These should bake for about 25 to 30 minutes…but I want you to really start watching them about 20 minutes in. The last thing you want, after this effort, is to have crusts that are too brown. They’re a little like the pavlova…we’re not looking for George Hamilton bronze here. You do, however, want the goat cheese to look like it’s getting the first hint of a Hawaiian vacation. Think Na Pali Coast. Think St. Regis at Princeville. Tai Tai’s mind is starting to drift to Mai Tai’s and ahi poke.
- When you get these out of the oven, let them rest for five. You want the juices to redistribute and calm down. You want the cheese to chill and relax. Otherwise when you cut them you’ll have one hot mess on your hands. Tai tai no like that.
- While they’re relaxing, I say grab some wine. I’m thinking white…I’m thinking chardonnay. That’s where my mind keeps going. Any suggestions? Love me some Hilliard Bruce right now, thank you very much. Maybe grab a handful of arugula, squeeze a little lemon, drizzle a little olive oil…a little salt and pepper. And while they’re resting…let’s recap a couple of key things. First, pie crust isn’t just for the holidays. Second, pie crust can be our friend when it’s this easy. Third, you’re feeling a little Euro right now, aren’t you?
Comments
No Comments