

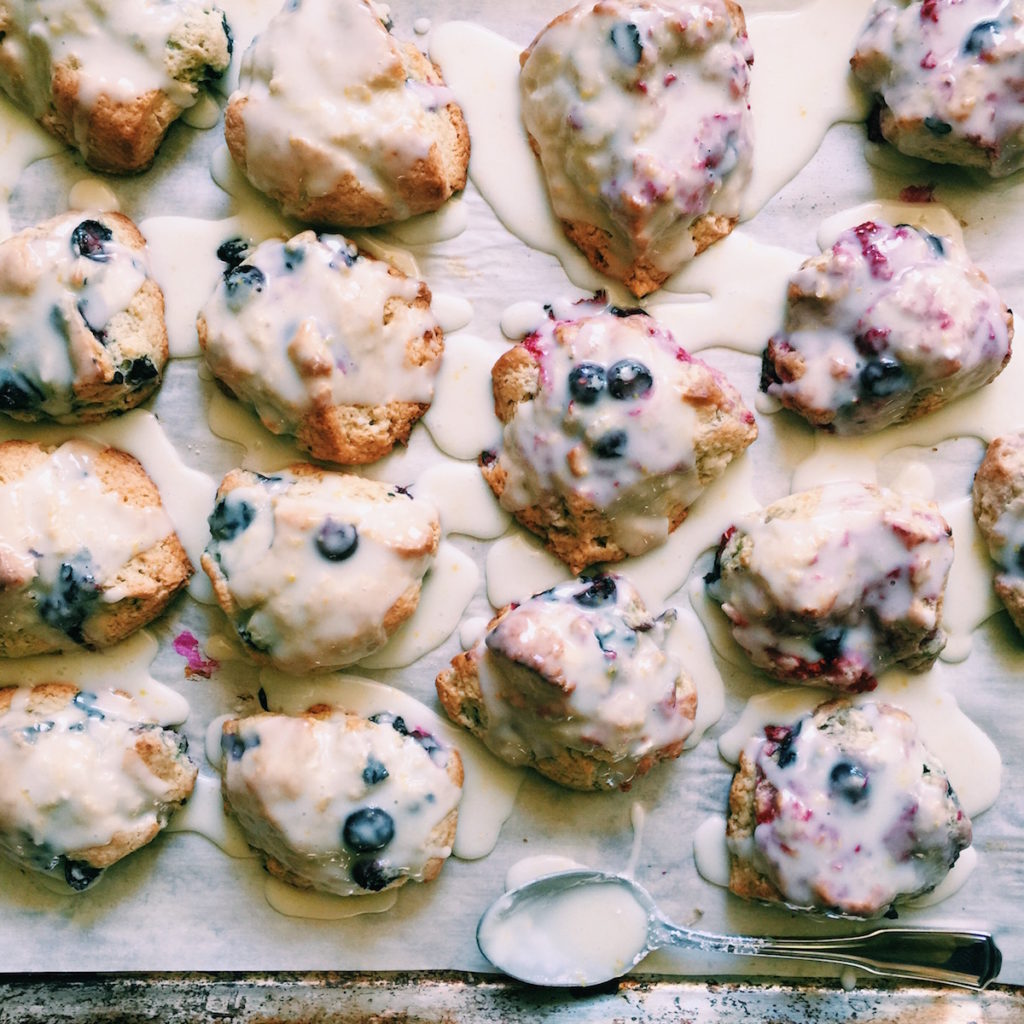
I consider these The Best Mixed Berry Scones with a Bright Lemon Glaze my core scone recipe! This is an older post (that is in the queue to be updated); please reach out with any questions!!
The instructions look extensive, but it’s only because I put a ton of detail in them for a perfect outcome. I promise they aren’t complicated!
Oh-So-Important Scone-Making Tips
Freezing Your Scone Dough
I cannot emphasize enough the importance of freezing your scone dough. In previous recipes I have suggested a minimum of 30 minutes in the freezer. This does a couple of things. First, it will give you a higher rise once this dough hits the heat of the oven. Second, it makes this moist dough much easier to deal with.
I have become incredibly cocky when it comes to freezing dough, oftentimes leaving it in the freezer overnight. I’m a bit maniacal that after a quick freeze (say, 60 minutes?), you then wrap it tightly in parchment paper, then plastic wrap, then foil and then place in a re-sealable plastic bag so as not to lose any extra moisture (I like me some moist scones…I’m a little OCD about it).
However, I recently made scone dough, placed it in the freezer and went wine tasting. Totally normal. And P.S., I totally forgot about them. Next morning I shuffled to the freezer and thought, crap, I’ve ruined them. Popped them in the oven (straight from the freezer) and they were perfection. If they have been frozen for longer than an hour, make sure to tack on a minute or two to the bake time.
Also, if you have fresh fruit in the frozen scone (such as blueberries, raspberries, etc.), check to make sure the dough closest to the fruit is cooked through.
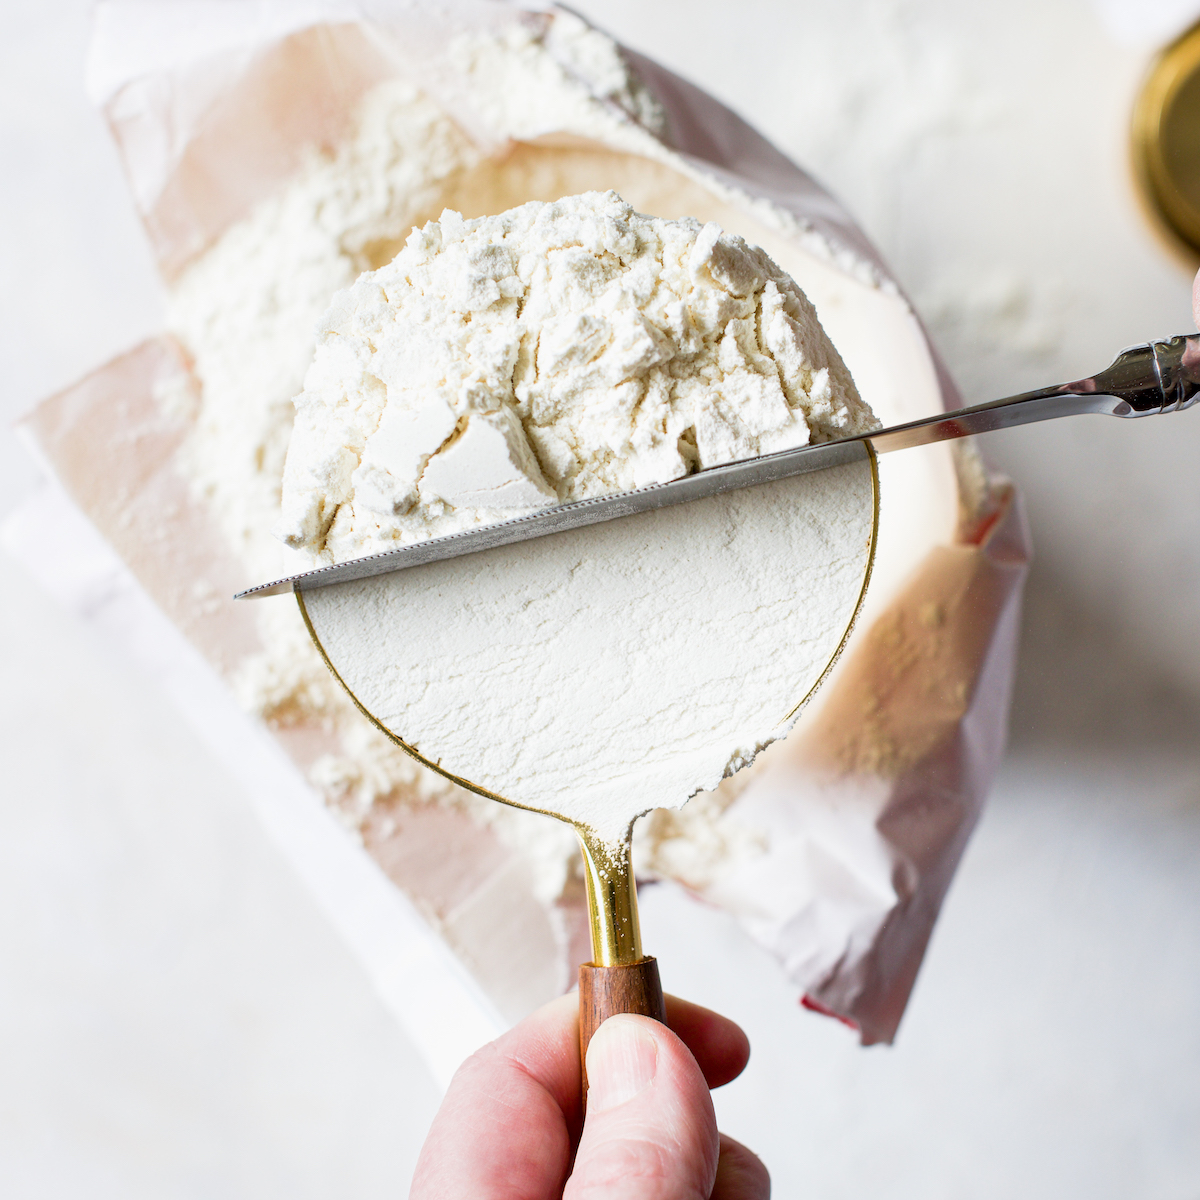
The Baker’s Guide to Measuring Flour
One of the biggest (and most common) mistakes in baking is how we measure flour. If you find yourself without a scale, see my top tips on how to properly measure flour for the perfect amount every time!
The Flour You Use For Your Scones is Important!
I cannot emphasize enough the importance of using cake flour in this recipe. You could use all-purpose flour for the entire recipe, but it will not yield the same fluffy finished product. It’s worth it.
You can make your own cake flour at home. For every 1 cup of cake flour, use 1 cup of all-purpose flour. Then take 2 tablespoons of all-purpose flour out, and put 2 tablespoons of cornstarch in. Everyone and their mother will tell you to sift the flour and cornstarch combo 6 times.
I grab my whisk and fluff the ingredients around a bit and keep working. You decide on which approach you’d like to take.
People will also say that this cake flour hack doesn’t work. Is it perfect? Is it exactly the same? No and no. But it works in a pinch!
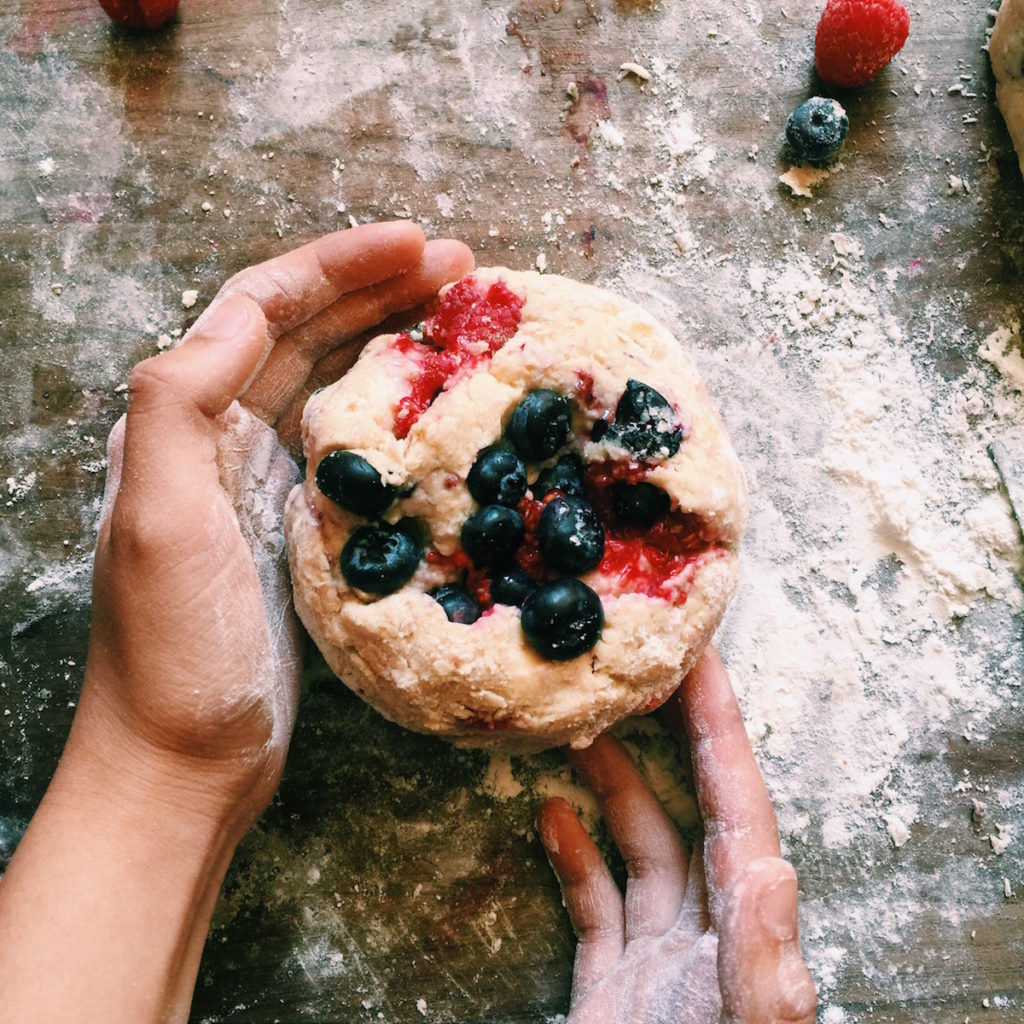
Your Beautiful Berries
Adding the raspberries is going to be a bit messy and it will make your dough feel a bit odd (almost slick). They’re going to break and you might even have a bit of a panic attack and think you’re doing it wrong. You’re not. Punch on through. You can do it.
Make sure that you clean and dry your fruit (completely) in advance of adding it to the dough. Likewise make sure it is fresh, ripe and firm. If the fruit is overripe it will bleed like hell all over the dough.
The fruit will bleed regardless, however overripe fruit will make it worse. We want pretty streaks, not a crime scene.
Choosing Baking Powder for Your Mixed Berry Scones
Go for the aluminum-free baking powder. Scones can be a bit on the blonde side and the aluminum in baking powder can give them this faint, bluish hue. It’s not a deal breaker, but if you’re at the store pick up the non-aluminum kind.
Humidity
This might be the most humidity-sensitive dough I have ever worked with. The below measurements are perfect for average humidity. If it’s really humid, you should add in 1 more tablespoon of all-purpose flour. If it’s dry out, I would add an extra tablespoon of cream.
Your New Scone Master Recipe
Consider this a ‘master’ scone recipe. You can create all sorts of combinations with this…make it your own. Chocolate chip? Orange? Get creative people.
More Scones Please!
Like I mentioned, I used to bake scones for a living so there are quite a few on this site. These particular mixed berry scones I made every weekend! Seasonally I would add in Fresh Strawberry Scones, Maple Oat Scones and these Chocolate Almond Scones (so good).
You can find all of my scone recipes here!
Let’s make The Best Mixed Berry Scones with a Bright Lemon Glaze!


The Best Mixed Berry Scones with a Bright Lemon Glaze
Ingredients
For the Scones
- 1 1/2 cups (187 g) cake flour (how to measure flour)
- 1 cup plus 3 tablespoons (162 g) all-purpose flour (how to measure flour)
- 1 tablespoon (15 g) baking powder
- 1/2 teaspoon sea salt
- 1 heaping tablespoon lemon zest (about 1 lemon)
- 1 teaspoon (2 g) cinnamon
- 2/3 cup (133 g) granulated sugar
- 8 tablespoons (113 g) cold unsalted butter (cut in 8 pieces)
- 2/3 cup (160 g) heavy whipping cream, (cold)
- 1 large egg, (cold)
- 2/3 cup (99 g) blueberries (see note)
- 2/3 cup (83 g) raspberries (see note)
For the Garnish
- 1 tablespoon (15 g) heavy whipping cream, (for the top of the scone)
- 1 large egg, (for the top of the scone)
- 3 tablespoons (36 g) granulated sugar, (for the top of the scone)
For the Glaze
- 2 cup (240 g) confectioners' sugar, (sifted)
- 1 lemon zested and juiced
- 1 tablespoon (15 g) heavy whipping cream
Instructions
For the Scones
- In a large bowl, whisk together your cake flour, all-purpose flour, salt, baking powder, lemon zest and cinnamon. Sprinkle in 2/3 cup of sugar and mix to combine. Cut in the butter using a pastry blender, two forks or your hands. Make sure the butter is pretty evenly mixed in, with a healthy smattering of pea-sized chunks of butter throughout.
- Mix the egg and 2/3 cup of cream together in a separate, small bowl and then drizzle over the flour mixture. Using a fork, fluff around a bit more until a dough is starting to form. I usually get in there with my hands to force the issue. If it looks like it could use a couple of kneads to form a ball of dough, I do that…but not too aggressively. Max out at about five-ish kneads.
- Lift the dough up and sprinkle the fruit on the bottom of the bowl. Set the dough down and gently press it into the fruit. Then flip the dough over and fold the dough onto itself, like a taco shell and press it together. Gently work the fruit into the dough in as few presses as possible. It will be a bit messy. Fruit will break and bleed a bit. That’s ok. It will look pretty in the end. Promise.
- Line a cookie sheet with parchment paper or a silpat. If using the parchment, dust with some flour. Flour up your hands really well.
- Separate the dough into 4 equal-size lumps on top of the parchment/silpat and mold into discs, about an inch thick. Don’t overwork your dough. You just want them to look relatively circular and even. To me, scones are rustic and that’s part of their charm. A really smooth and polished scone makes me nervous. Like someone that never smiles.
- If your hands are getting sticky, add more flour. Just know that there is a fine line with flour here. Add enough that your dough is super easy to work with and you run the risk of having dry scones. Don’t add enough and it will be a hot sticky mess, enough to send you to the sanitarium.
Garnishing + Baking
- In a small bowl, whisk together the 1 tablespoon of cream and egg.
- Using a pastry brush (or whatever you have on hand), brush the cream and egg mixture on top of the 4 dough discs. Then sprinkle, with a heavy hand (which is usually my advice for all sugar- or alcohol-based concoctions), the sugar on top of the dough discs.
- Pop the discs, uncovered, into the freezer. Set the timer for a minimum of 30 minutes. I recommend something closer to 1 hour. At that point, either bake the raspberry + blueberry scones or wrap them tightly (as noted above) and freeze until you are ready to eat them.
- Pre-heat your oven to 400 degrees F.
- Pull the raspberry + blueberry scones out of the freezer. Using a sharp knife (I love my bread knife for this), cut each disc into 4, equal-size scones (yielding 16 cute, petite scones total). When cutting, make sure to press down quickly and lift straight up. If you wiggle the knife in there or use a sawing action, your sides won’t have a nice, defined edge.
- Pull the scones at least two inches away from each other…they need room to expand. You can gently loosen the bottoms with a spatula if they’re sticking a bit. Some recipes tell you to keep the scones pretty close together while baking as it will help them rise up. However, if they’re too close, the scones will grow back together and be kinda mushy on the sides. Error on the side of space.
- Set the timer for 13 minutes. Start watching them around the 13 minute mark to see how they’re doing. Make sure the area around the fruit is cooked through (especially if they were frozen solid). Don’t go over on the time looking for a bronze tinge. As soon as you see a light tan around the edges, pull them out. They should look firm on the tops and not dough-like, but not even close to George Hamilton dark.
- Set the raspberry + blueberry scones on a cooling rack. After about 5ish minutes, you should be able to take them off of the baking sheet and let them finish cooling on the rack.
For the Glaze
- While the scones are cooling…grab a bowl and whip up the glaze. Mixing schmooey is a tango…listen to what it wants and needs. Throw the zest, juice, confectioners' sugar and cream in a bowl and mix away. Does it need more powdered sugar? More lemon juice? Add more of each in little bits until you get the right consistency…which is when it is thin enough to drizzle, yet thick enough to stop in its’ tracks and not just run off the scone. Let it sit and mingle while the raspberry + blueberry scones cool. Smear the schmooey on top and you’re done.
- These are best the day that they are made. However, if you wrap them up tightly and store at room temperature, you can happily serve the next day as well. Tootles.
Rebecca, yes, please provide the weights. Until then, I’ll follow your blood orange recipe (I think it single handedly caused me to gain weight this winter – they were that good and I ate that many!) Oils you also recommend how to modify for gluten free flour. Not as good, I know, but my joints don’t care.
Hi Rachel!
Let me grab a coffee and I will update it with this morning…this is one of my favorite scone recipes!!
I’m so happy you love the blood orange ones!!
R xo
It’s done!
Oh, and about gluten-free…my favorite GF flour is Thomas Keller’s Cup-4-Cup. Since non-gluten flours have a harder time absorbing moisture, I would let the scone dough rest overnight for best results. If you make them GF let me know how it goes!
xox
Hello! I have tried making these scones few weeks back and they are really awesome! Thanks so much for sharing! I’m thinking of making another batch now and freezing them for future use. How Long would you recommend to keep them for in the freezer without compromising on the taste?
I’m so happy you liked them Jacelyn!! I usually only keep mine in the freezer for a couple of weeks and they’re fine. I’m thinking you could go up to a month-ish? Let me know your results!! xox
I made these on Saturday and they came out perfectly! Your hand holding on mixing the in berries helped tremendously, and even the note about the dough being slick – without that I would have been freaking out!
Here’s my question though: I still have two little lumps of dough in the freezer (wrapped in parchment, plastic and a baggie thankyouverymuch) – should I defrost for a bit before I bake them? Or just pop ’em in the oven and give them a little more time? Or both…
Hi Molly! First, thanks for the nice comment!! I’m glad you liked the recipe. You can pop them in the oven, straight from the freezer, and just add a couple-three more minutes. They should be lightly tanned, and check the area around the berries for doneness. Right around the berries will take longest to bake. Enjoy!! xx
your scone tips are spot on! i never use baking powder that has aluminum, but i had no idea it gave a bluish color. i love the looks of the lemon schmooey. i wish my mom would have made scones when i was young, but she always thought they were dry – but i worked hard to perfect a soft, flaky gluten-free version too. and they’re the best!
ps – i need to see pics of those chicks!!
xo, amanda
Hi Amanda,
I’m such a slacker — I can’t believe it’s taken me so long to respond!!! I totally prefer non-aluminum for health reasons…but sometimes (somehow) it winds up in my cupboard! I will work on photos of the chicks…and I want to check out your tender gluten-free scones — that sounds amazing (and quite a feat!). xx
Oy, “Scone Lady” – I feel ya on that one – almost as cringeworthy as when I hear someone call me “Ma’am” – am I beyond the “Miss” years already?!? To me, you can be my Scone Sista- sounds a little more age appropritate (I’m assuming we are around the same age based on some of the nostalgia you’ve written about). Every time I make your scone recipes, people go gaga over them – my Mom told me the other day it was probably the best scone she’s ever had. :)
Thank you for the great recipes and inspiration and better yet, the amusing writing that resonates with me so well! Scone Sistas unite!(insert knucks emoji here) xo
Hi Molly!! It just kills me that I can’t insert emojis in here. A fist bump would be perfect. I love that you make my scones (and other stuff)…it warms my heart!! Funny we’re virtual scone sistas living in the same town, right?? Happy baking pengyou!! xx
Oh my goodness. I’m still reeling with laughter over the “on my mind section” (not the summer lunch thing. . .that’s sad and was reality for many of the kids in Kenya).
It was mzungu for me while I was living in Nairobi. The next name for my pet? Mmmm . . maybe not. . .
And the boom box adventure. . .can you still buy those?
In all seriousness, these scones look divine. I too could be classified as scone lady myself (what can I say I like “cake in disguise” for breakfast) but have been trying to be good and eat more nutritionally sound meals to start my day. But these would make a nice treat as I especially love berries and lemon.
Lynn — I love it: cake in disguise!! It’s perfect. And I’m thinking you must be able to procure a boom box somehow?? This seems very Craig’s List..don’t you think?? Let me know if you make these pretties, Scone Lady Too!! xx
Ok – where are these damn noodles you keep talking about?! (sorry – the hangry rage is coming out!) I’m just really looking forward to them! Scones are one of my favorite acceptable breakfasts because you’re right, it’s dessert. I’ve never paired one with wine, which is making me want to give you the biggest bear hug, because now that’s all I can think about doing!
Hi Jessica! Wine + scones are natural partners. The sugar high alone makes it a winning combo. So…the noodles. My chive noodles still need some massaging. I learned there is a fine line between charring a chive and burning the crap out of it. BUT, the chow mein…we were very happy with that and it’s going to be a Shut Up & Eat…soon-ish. It’s coming…promise!! xx