
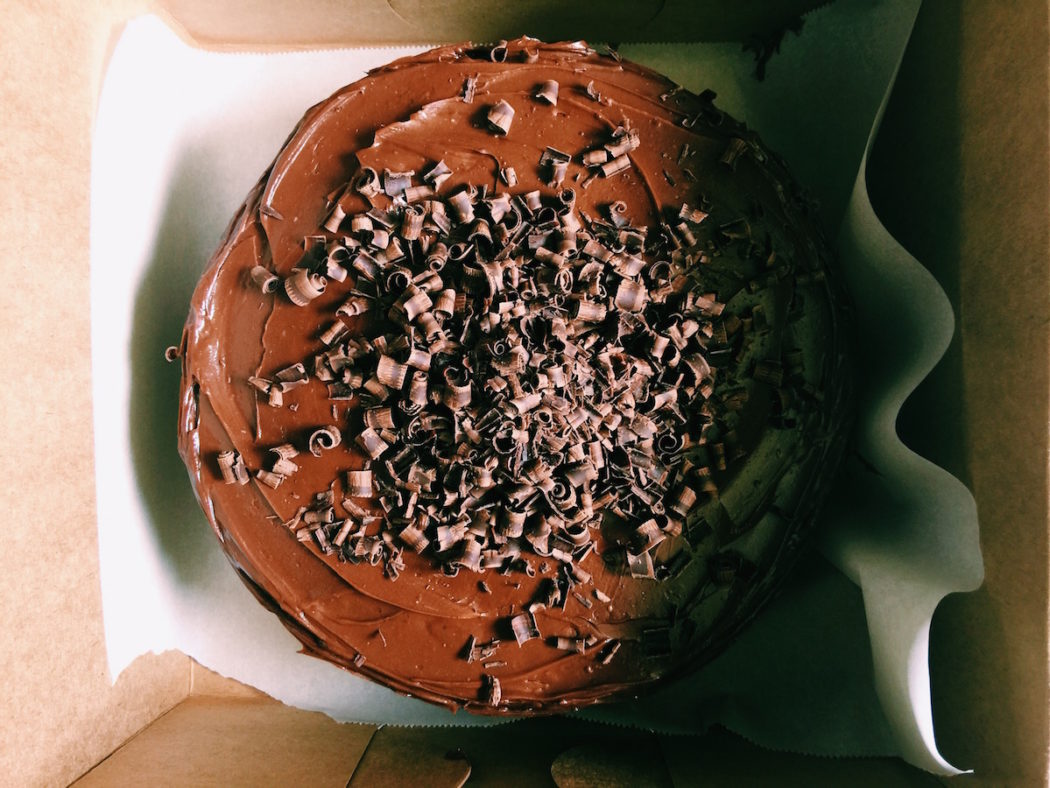
chocolate + espresso birthday cake
 { birthday season }
Let’s talk about ‘birthday season.’ It’s that time of year when you’re inundated with birthday celebrations of friends and family. You know what I’m talking about, right? You have one too? Every other day for seemingly weeks on end you’re running around buying gifts, making cakes and eating + drinking beyond capacity. It starts off with a big hurrah and ends with you feeling fat, drunk and bloated. Did I mention poor? I liken birthday season to your twenties and thirties when it seems that every weekend you’re spending truckloads of money on someone else’s wedding and buying yet another hideous bridesmaid dress.
Our family’s birthday season lands during the peak of summer, at the end of July and steamrolls into August. It starts off mild, with my dad’s birthday. As a courtesy he makes it a nice, civilized brunch. Mimosas. Bloody Mary’s. We’re all asleep by 10 pm. Nobody’s for the worse. Pause a day. It’s my mom and dad’s anniversary. Not technically a birthday, but a celebration indeed. Champagne? Well…it’d be rude not to. Sleep. Next: my brother-in-law’s mother’s 70th birthday. Mariachis. Margaritas. A blurry end to the night. I learned something important that night that I’d like to share with you should you ever find yourself in a similar situation: iCloud will not only locate your phone when missing, but tell you how much battery life is left. I had no idea. I heart you even more, iPhone. My phone was found on the other side of town next to two empty Modelos. Classy.
Sleep like a bear in hibernation. Dreaming about a saline drip. Brother-in-laws birthday. I act like a nun on leave from the convent. Shades on, I sit isolated by the swimming pool watching Gavin swim and avoid alcohol like it gives me anaphylaxis. Try not to make eye contact with anyone doing tequila shots. Leave before dusk, feeling a little like I ditched the marathon route for a hamburger. Quitter. My mom’s birthday. Pants are tight. Skin a little grey and dehydrated. Looking a little like Grampa Munster. Can you picture it? But I forge ahead. Birthday lunch? OK. Salad? No thanks. Champagne? We know where this is headed. No respite. Stella’s birthday. It’s just a simple celebration at my mom’s. Soldiers have fallen to the wayside, so it’s only my family, mom and sister. We all come in sweats. I make a very-strange (and sweet) lemon bar meets lemon meringue pie concoction that I’m amazed actually turns out. Wine? Maybe one glass. OK, one more wouldn’t hurt. This tastes better than I thought it would. Should we open another bottle?
Did I mention making cakes, cookies and galettes to celebrate? Or, that I was trying to work in the midst of all this gluttony? Or that I didn’t want to leave the house because after two days I only wanted to wear sweats? Or, the question I couldn’t stop pondering…how is it that once you’re in your forties you can seriously gain five solid pounds from one night? Throw five nights into one week of celebrations? Well, you’re looking at trying to lose that weight before the holidays. If you’re lucky. That’s not leaving us a lot of time people.
Let’s eat cake and forget any of this weight talk. Why don’t you just pop some bubbly while you’re at it…it would go nicely with this, don’t you think? What time should I come over? Please tell me I can wear sweats. I mean it. We’re cool, right? Some Tips Before We Get Started Cakes used to challenge me. They never turned out quite as beautiful as I wanted them to. They were either too domed, they fell or my frosting looked abysmal. But they tasted great. I researched and found a bunch of tips that have upped my cake game dramatically.

Have at it…
- When beating your wet ingredients, you can go on a medium-high speed until you get to putting the eggs in…if you whip too much air into the eggs your cake has the potential to collapse. When putting the eggs in, go slow and gentle.
- As you’re mixing the wet ingredients, make sure you scrape down the sides of the bowl as you go, so that everything is incorporated.
- I like to use three, 6-inch cake rounds when making a cake. They are just so fricken cute I could scream. To make sure that each layer of your cake is roughly the same size, measure out how much cake batter you put in each round to make it even. It sounds totally OCD, but it completely works. Take the time to do this. Please.
- Tap your cake pans, filled with the cake batter, on the counter several times to let any air bubbles escape, prior to baking.
- Cook it low and slow. I like to cook the cake at a lower heat, for longer, which makes it NOT create that dome effect that’s so hard to stack and frost. Try it. You’ll like it.
- Make sure your cake is completely cooled (perhaps even spending a short stint in the fridge) before frosting.
- Make sure that your frosting is not too thick, not too thin. Too thick it won’t spread nicely. Too thin and your cake will slide around. So sad when this happens.
- Invest in an icing spatula to help keep the frosting nice and smooth.
- This cake is light, with a great crumb and just the perfect hit of espresso. It will be delicious no matter what…so if your cake dips a little in the middle or you get some crumbs in your frosting, don’t sweat it. Take a deep breath, a sip of champs and make it work. It was supposed to look like that, right? That’s right.
{ chocolate + espresso birthday cake }
Serves 8-12 (depending on everyone’s sweet capacity)
INGREDIENTS
For the Cake
- 1 cup cake flour
- 1 cup all-purpose flour
- 1 cup unsweetened cocoa powder (I use your basic Hershey’s and it works great)
- 1 teaspoon baking powder
- 1 teaspoon baking soda
- 1 teaspoon sea salt
- 1 ½ sticks unsalted butter, room temperature
- 1 cup granulated sugar
- 1/3 cup packed light brown sugar
- 1/2 cup sour cream, room temperature
- 3 large eggs, room temperature
- 1/2 cup shaken buttermilk, room temperature
- 1/2 cup fresh brewed espresso or strong coffee
- 2 teaspoons real vanilla extract
For The Frosting
- 2 cups semi-sweet chocolate, chopped
- 1/4 cup shortening, room temperature (I use Crisco. Proudly.)
- 1 1/2 sticks of unsalted butter, room temperature
- 3 ounces cream cheese, room temperature
- 1 egg yolk
- 2 teaspoon vanilla
- 2 cups powdered sugar (or more, if needed)
- Thin with leftover buttermilk or regular milk
For the Top
- Your favorite chocolate bar (for me, that would be anything SUPER dark. Something with hazelnuts? Why not? Get frisky.)
INSTRUCTIONS
- Preheat the oven to 325 degrees F.
- You can use either three, 6-inch cake rounds or two, 8-inch rounds. Make sure you either spray well with non-stick cooking spray or butter and flour each thoroughly.
- Whisk together the cake flour, all-purpose flour, cocoa powder, baking powder, baking soda and salt in a medium bowl and set aside.
- In an electric stand mixer fitted with the paddle attachment (or you can use a regular bowl and spatula) put the butter, granulated sugar and brown sugar and mix until light and fluffy.
- Add the sour cream into the sugar mixture and beat until well blended.
- With the mixer on low, add the eggs one at a time making sure that they are completely blended in before you add in the next egg. Make sure to scrape down the sides so that everything gets nice and creamy.
- With the mixer still on low, add your buttermilk, espresso and vanilla extract.
- Throw your dry ingredients in the bowl and mix on low until JUST combined. Grab a spatula and finish mixing by hand to make sure that you get all the sides and the bottom of the bowl blended in.
- If using the 6-inch rounds, put about 2 cups of batter in each. If using the 8-inch, put about 3 cups in each.
- Tap the filled tins on the counter to release any trapped air bubbles.
- Grab your spatula again and gently smooth the tops of cakes so that they look relatively smooth. They don’t have to be perfect.
- Put the tins on a baking sheet and shove in the oven for 30 minutes or until a toothpick inserted into the center of the cakes comes out clean. If it comes out a little gooey, then put them back in for a couple more minutes. Don’t overbake! We don’t want dry cake. I mean, I’m begging you, I really don’t want dry cake. When are we opening that champagne, by the way?
- As soon as they’re out of the oven, set the cake pans directly on a cooling rack and let them start to cool down.
- After 30-60 minutes (I always get impatient), run a knife along the edge of the cakes. Then, flip them over, with one hand on the cake and gently tap the bottom of the cake round to help the cake release from the pan. If it’s not easily coming out, flip it back over and let it continue cooling. You don’t want to force it out of the pan or you’ll have parts of your cake stuck to the pan.
To Frost The Cake…Tips ‘n’ Shit…
- Once your cake is COMPLETELY cool, start on your frosting.
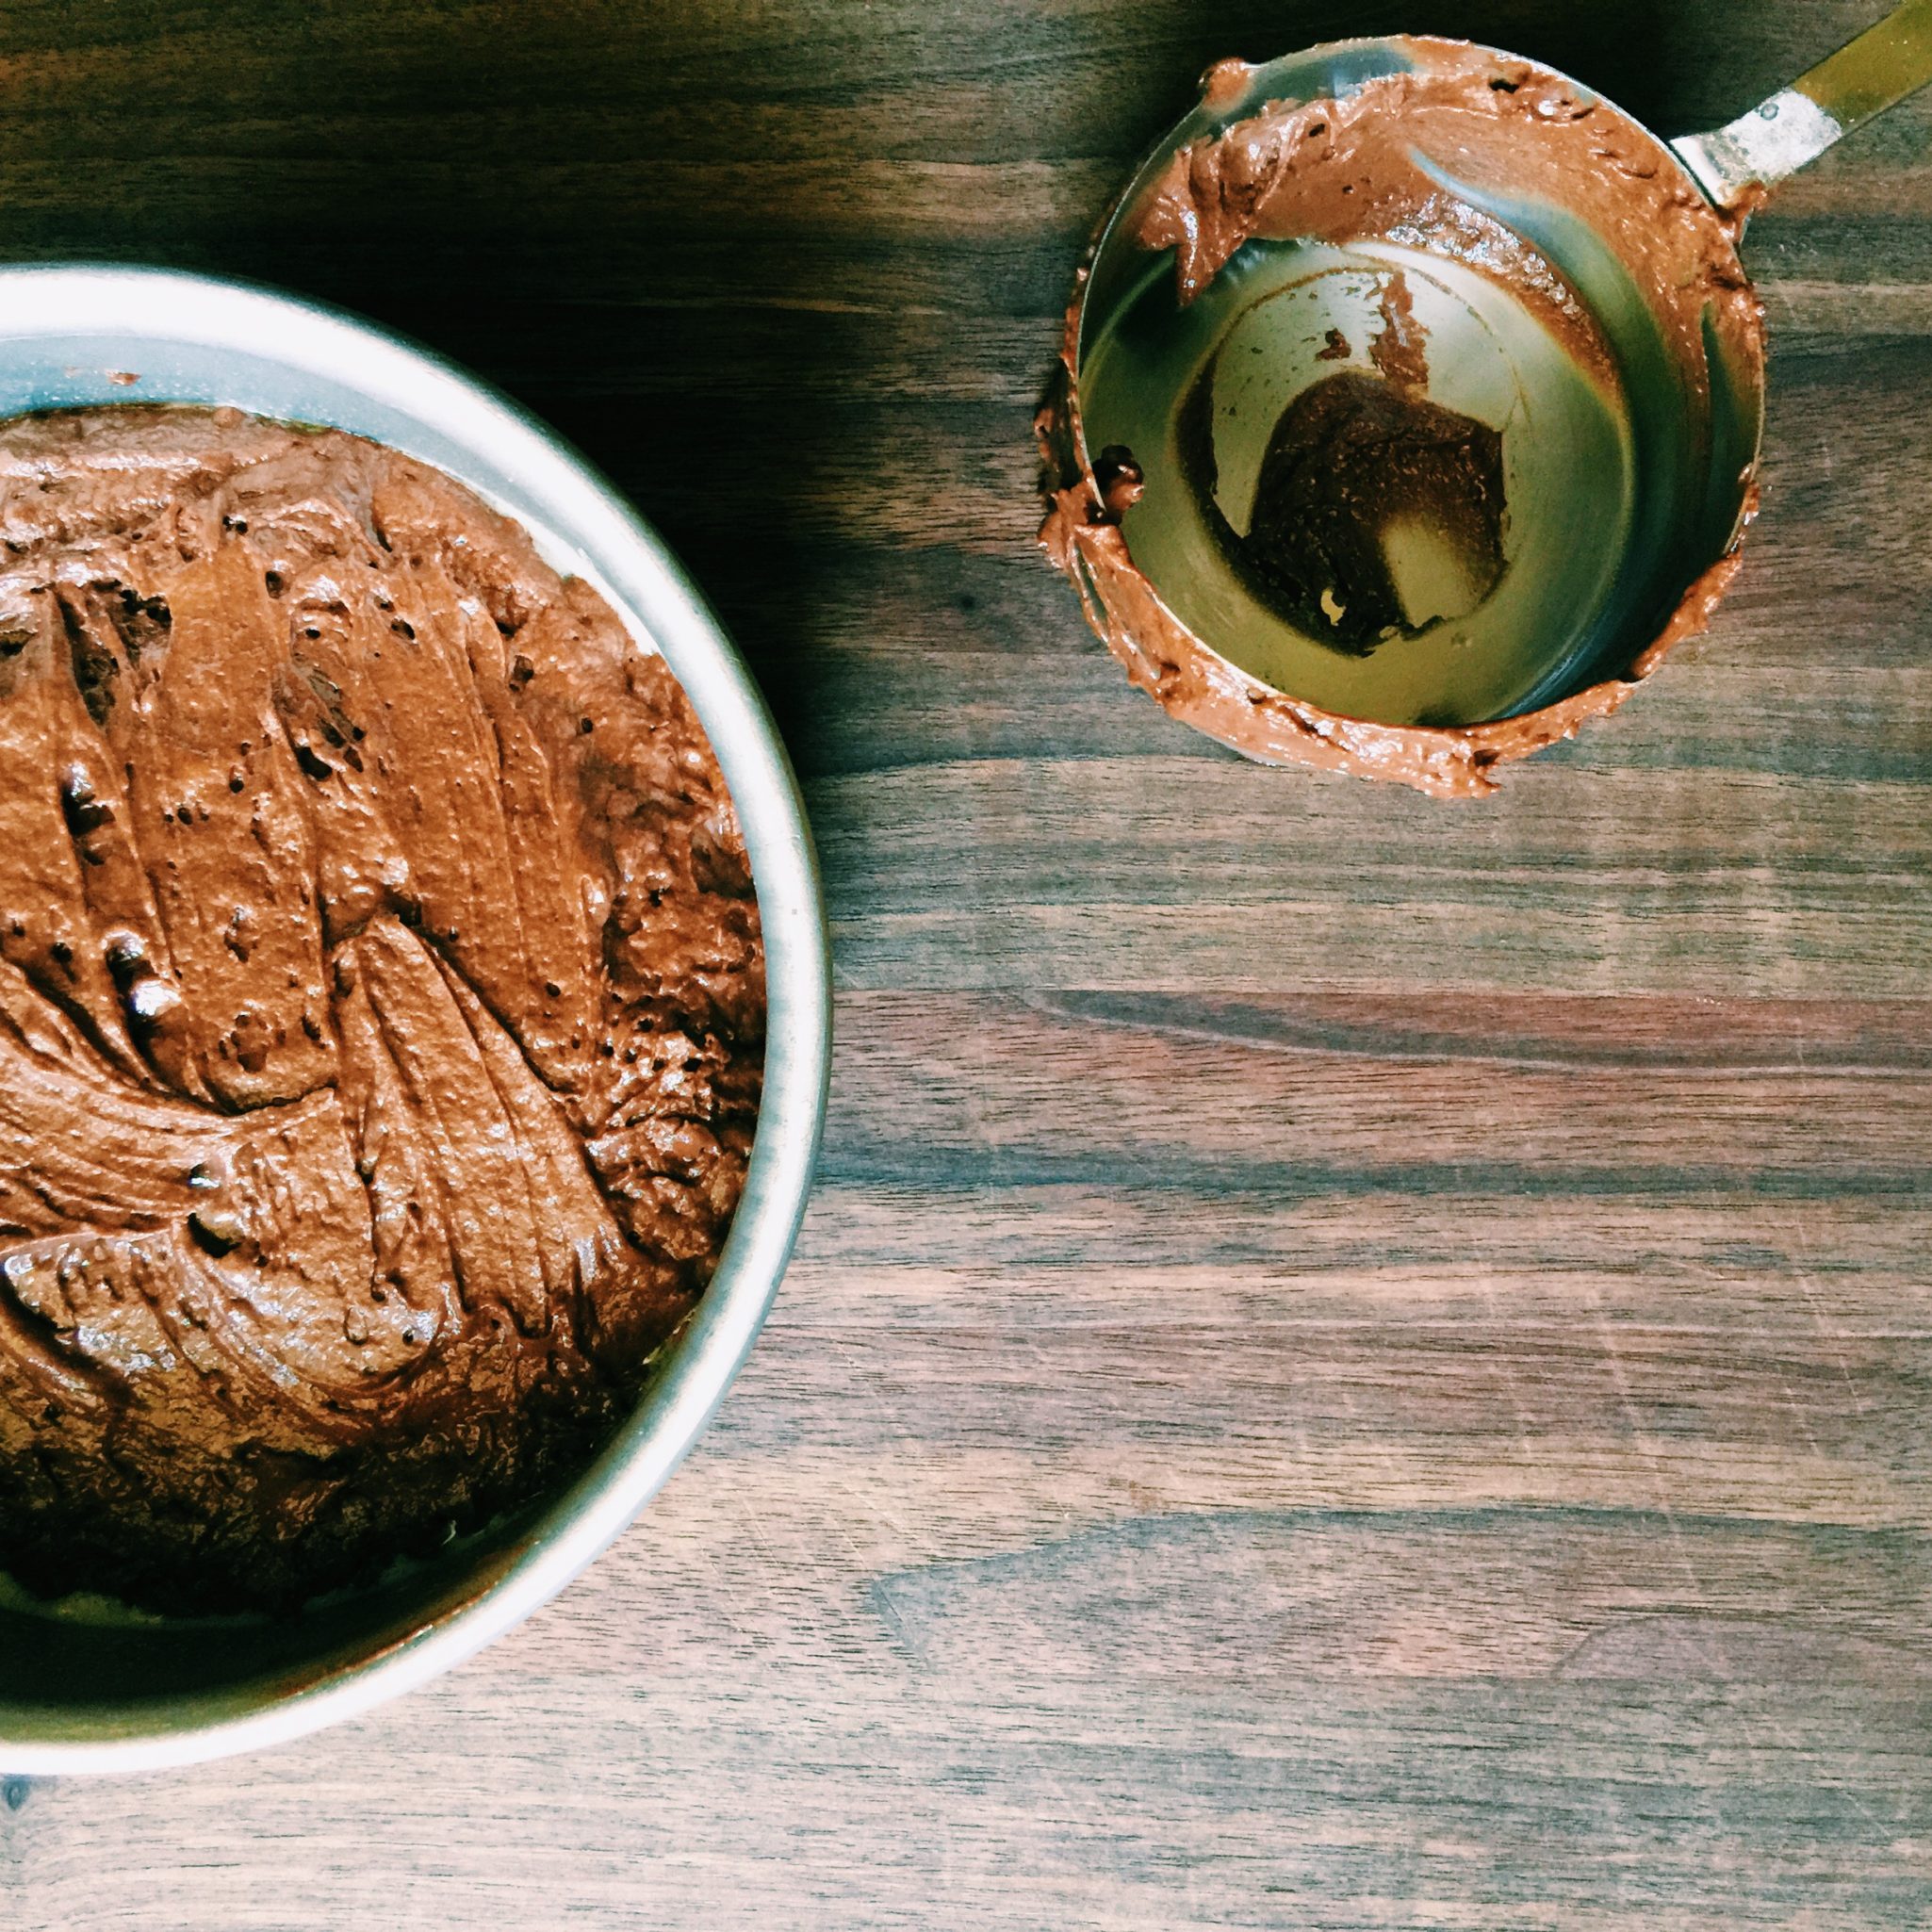
- Put the 2 cups of chocolate in a microwave-proof bowl, and microwave on high for about 30 seconds. Check your chocolate periodically. It’s better to have lumps in it rather than overheat it in the microwave. So take it out when it’s still a bit lumpy and use spatula to beat it by hand until smooth. Be a boss. It feels good, doesn’t it? Set aside and let cool a bit.
- Put the room-temperature shortening, butter and cream cheese in your electric stand mixer fitted with the paddle attachment and beat until smooth.
- Completely mix in the egg yolk.
- Drizzle the cooled chocolate into the shortening-butter mixture until it is fully incorporated. Take a whiff. Heaven.
- Add in your 2 cups of powdered sugar and mix until smooth and kinda thick.
- Blend in your two teaspoons of vanilla extract.
- Use buttermilk or milk, 1 teaspoon at a time, to thin your frosting to the desired consistency. Making frosting is a tango (I think I’ve said this before…more powdered sugar? More milk? You decide.). I’ve made it before without cream cheese (because I was out) and it worked fine…just lean in close and listen to what your frosting needs. It will tell you.
- In an ideal world, you’d have a revolving cake decorating stand, icing spatula and cake cardboard. The cake decorating trifecta. But if you don’t, don’t fret. Put your first layer upside down on your cake plate (or wherever you want to put this baby). Throw a dollop of frosting and smear it on the top. I’m not going to mess with crumb coats and make it more complicated than it needs to be for this birthday cake. If you get crumbs on your spatula, just run it under some water to clean it and keep going.
- Throw the next layer right-side up on top. Throw a dollop of frosting on top and smear about.
- Throw the next layer on top, right-side up. Now this is where you want to give a shit. Throw a healthy dollop on top and smear it about like you know what you’re doing. It works, right? It’s all attitude.
- Put some more frosting on your spatula and start to work on your sides. You can come from the top and run the spatula down the sides of the cake. Don’t panic about imperfections. If you get crumbs on your spatula, clean the spatula and add more frosting.
- Add one final coat of frosting along the sides, moving around the sides of the cake, and smooth it a bit. I go for an imperfect-smooth appearance. I call it the California Mission Look, as it resembles the stuccoed walls of the Missions. Early California Chic, if you will.
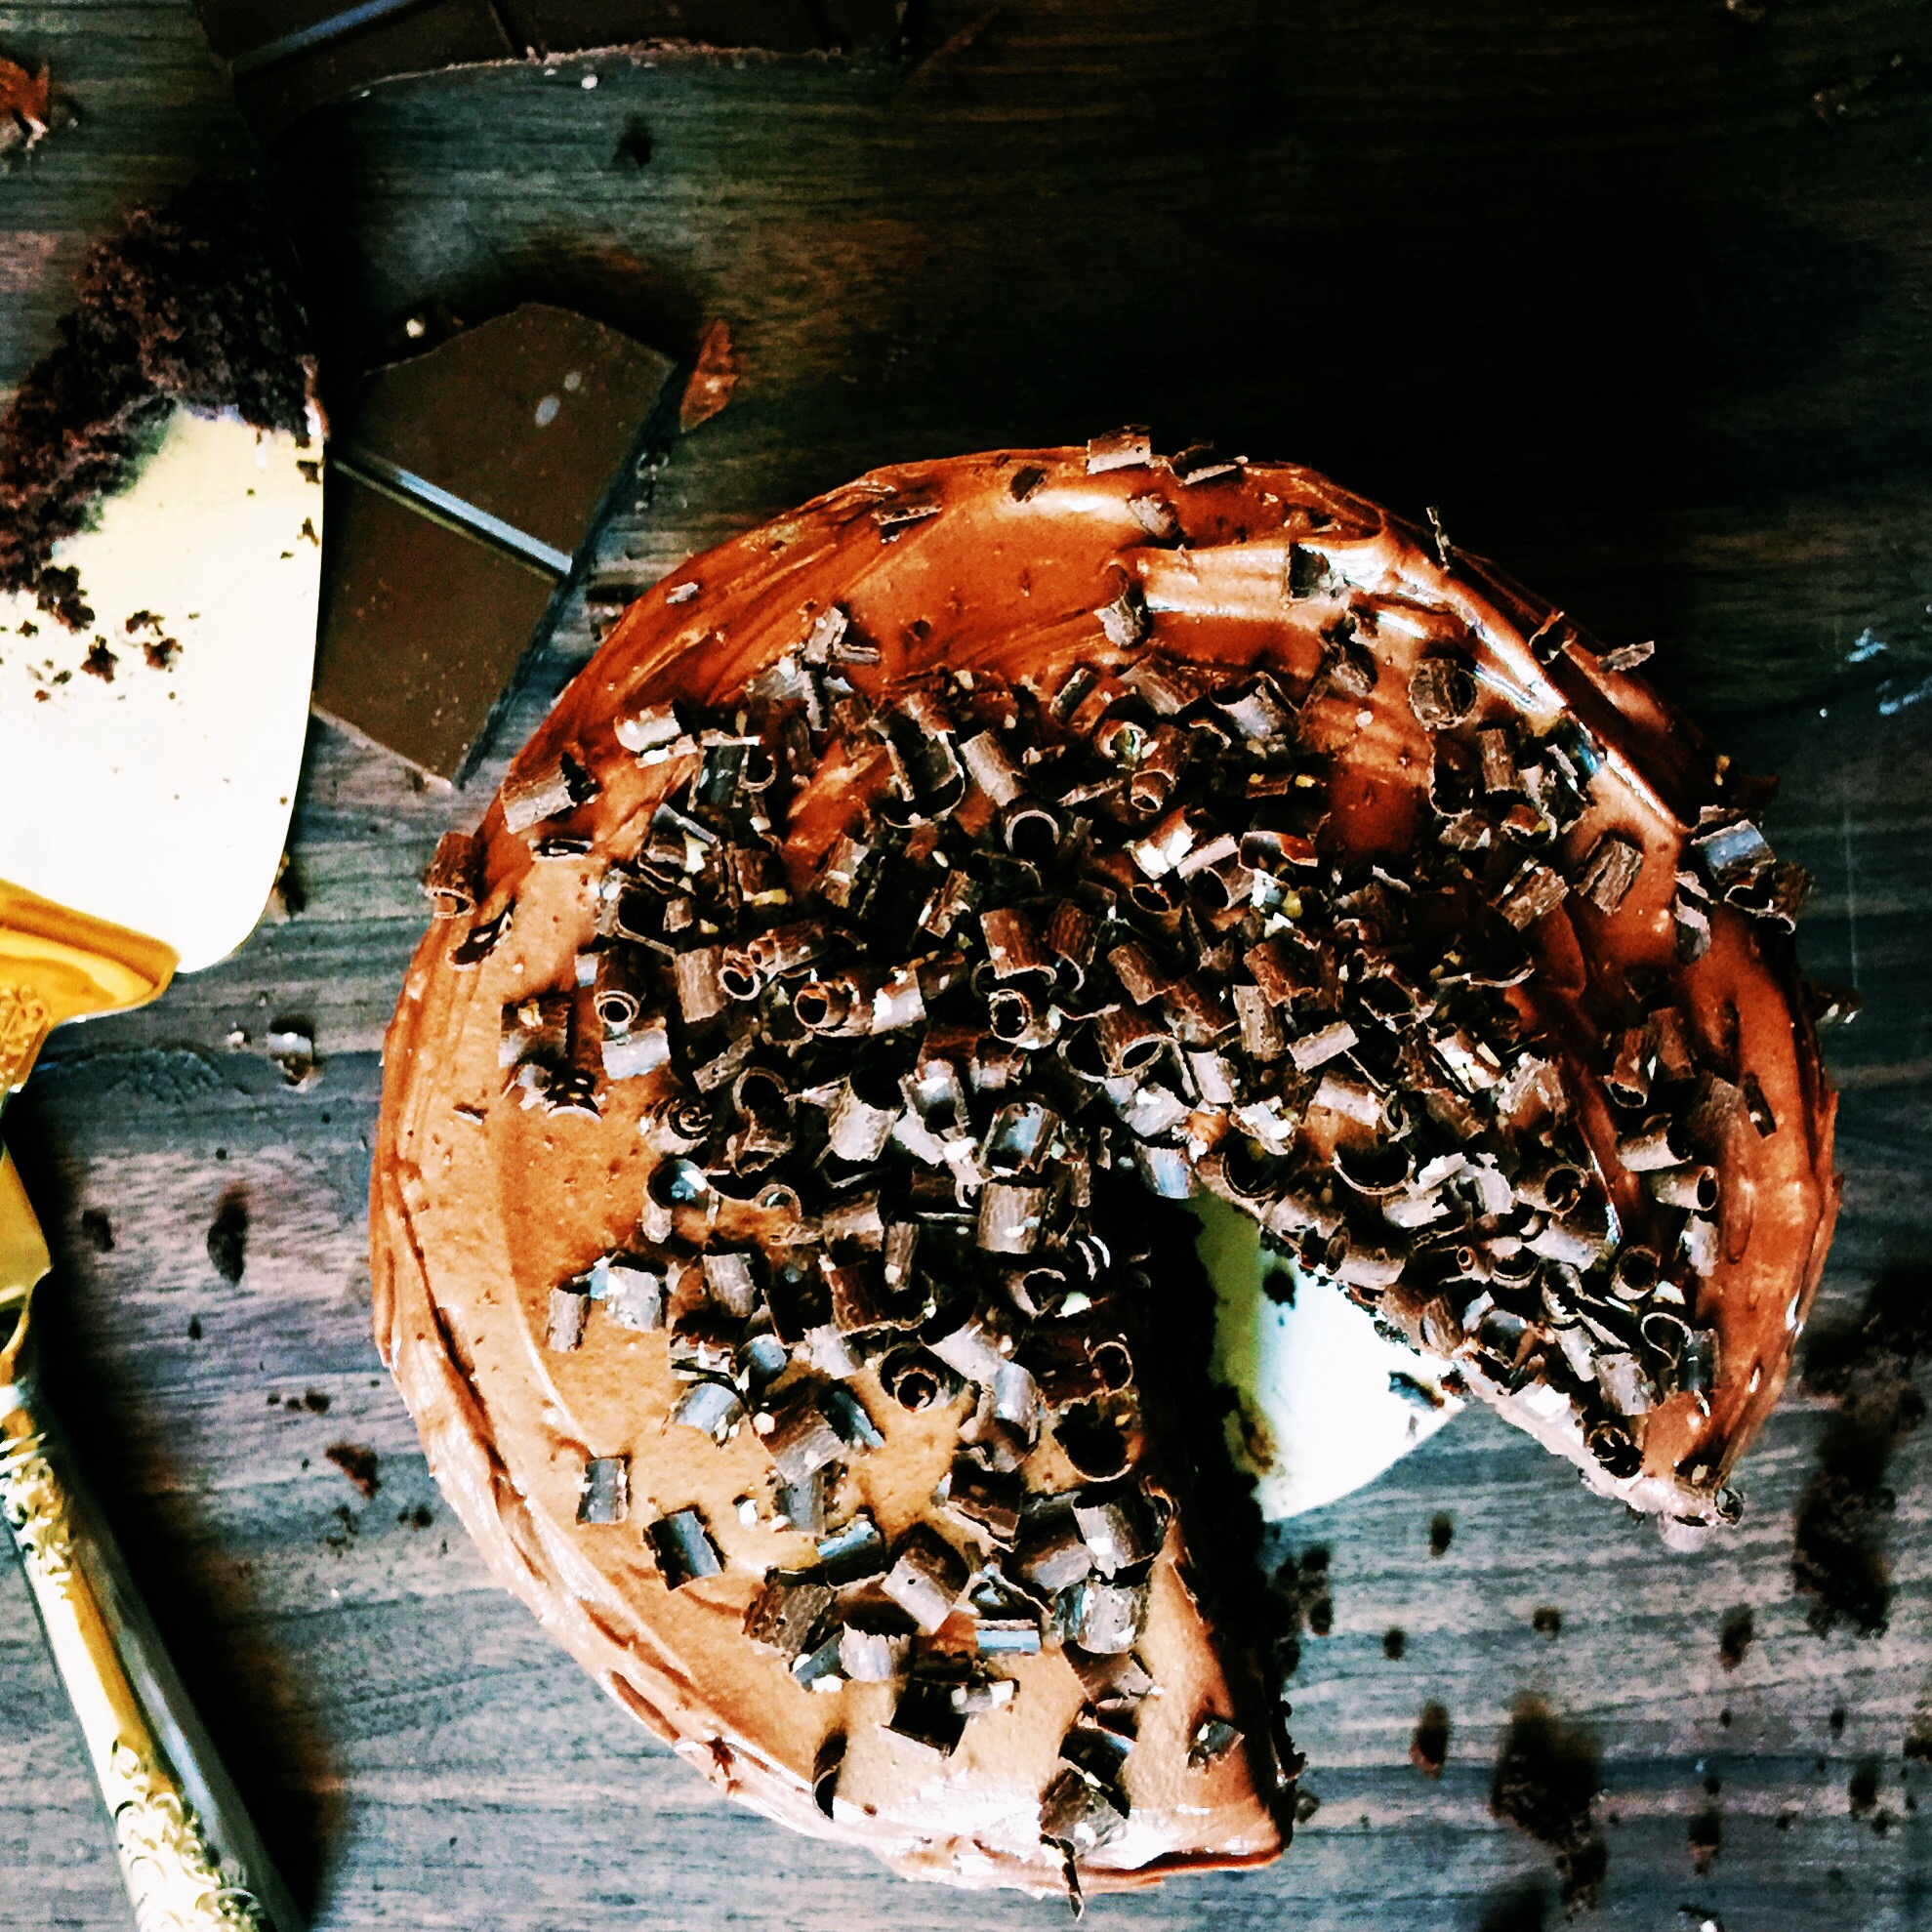
- FINALLY, grab your favorite chocolate bar and a carrot peeler and peel away at the sides to get some nice curly cues. These babies will cover any imperfections on the top. Brava. xo
{ on my mind }
- More Chocolate Yumminess: Triple Chocolate Banana Cake + Espresso-Nutella Drizzle, Crack Cookies, Chocolate Pudding Cakes, Dark Chocolate + Espresso Babka, Holy Shit S’More Cookies, Smoked Salt Double Chocolate Rye Cookies and Fudgy Brownies + Caramelized Pecan Brittle. Yup.
- Straight Outta Compton. That’s it. Can’t wait to see it. I know every lyric (rap?). It’s something to see. We should go together. We’d have fun. You can take the girl out of the LBC, as they say…
- This was a really long post and I’m feeling completely oppressed by the heat and I worked really late last night and I’m feeling a bit like the emoji with just the eyeballs. So, on that note. Peace out homies.
Hi! I am planning to make this for my birthday next weekend, but I was wondering if I could make it a 3 level cake using 3 eight inch tins. If so, would I need to double the frosting, or does it make plenty already? I cant wait to try it. Thank you!
Hi Emma!
Make sure you reduce the bake time if you’re using 8-inch pans, they’ll bake faster.
I *think* this should be enough frosting. To be safe, I would probably make a half batch more, and that would be perfect!
Happy Birthday!!! And let me know if you have any other questions! xox
Thank you so much for answering my questions! Have a wonderful day!
You too!! xo
Why couldn’t today be my birthday????
Coco — Right?!!?! xo
Hi!
I am trying your cake this week (saw it on FeedFeed, and your blog looks delicious!)… What would u use instead of sour cream? Where I am at, we don’t find it in the supermarket… Thanks!!
Hi Hager,
Thanks so much and I hope you love it! My first thought would be to replace the sour cream with some plain, full-fat yogurt. Yogurt will yield a firmer cake crumb, but should still be delish!! Good luck!
R
This looks great!! I can’t wait to try it!!!!!
Thanks Josh!!
Oh my gosh!! I saw this recipe on your Instagram and came straight here. Hold on tight, I’m staying up late ;)
Let me know how you like it!! xx
This looks delish! Thanks for the tips n’ shit
Anytime Bubs!! I like to #shizzelate whenever possible! xox