
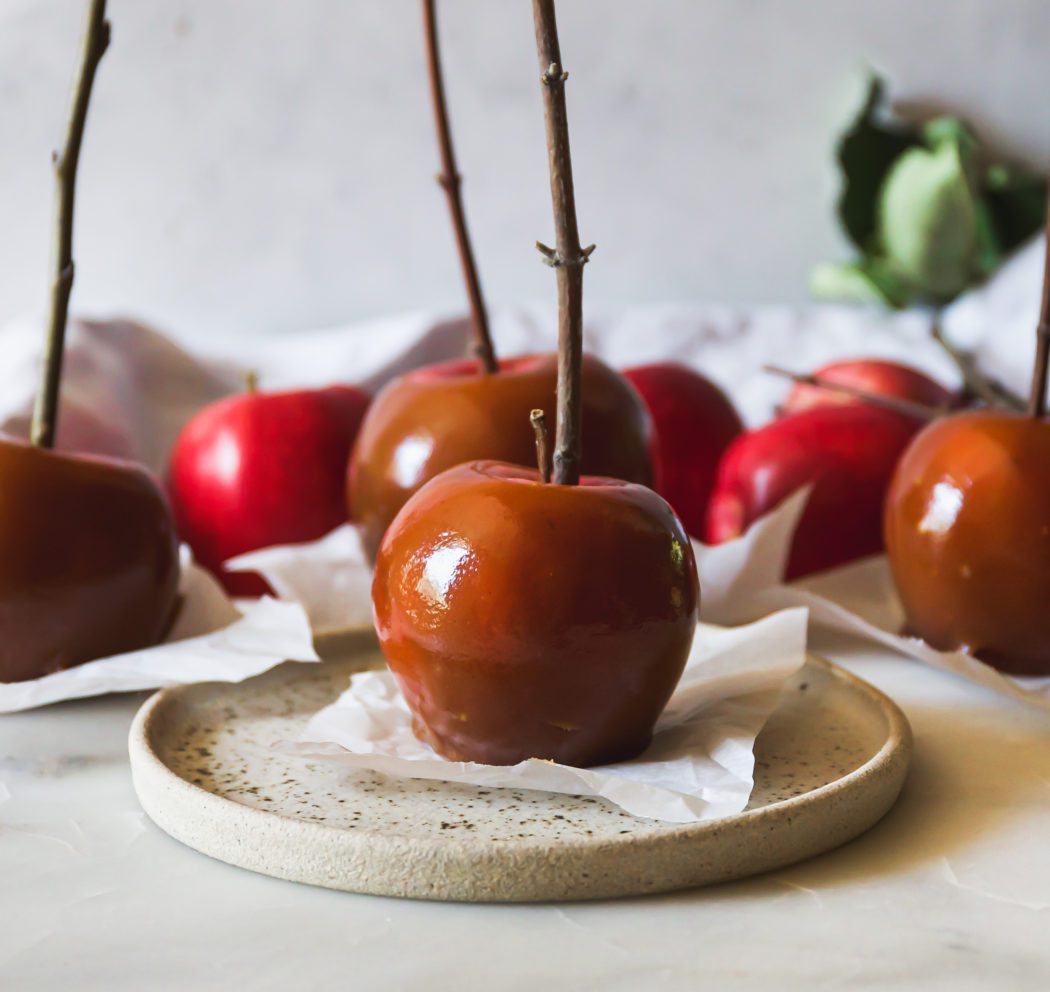
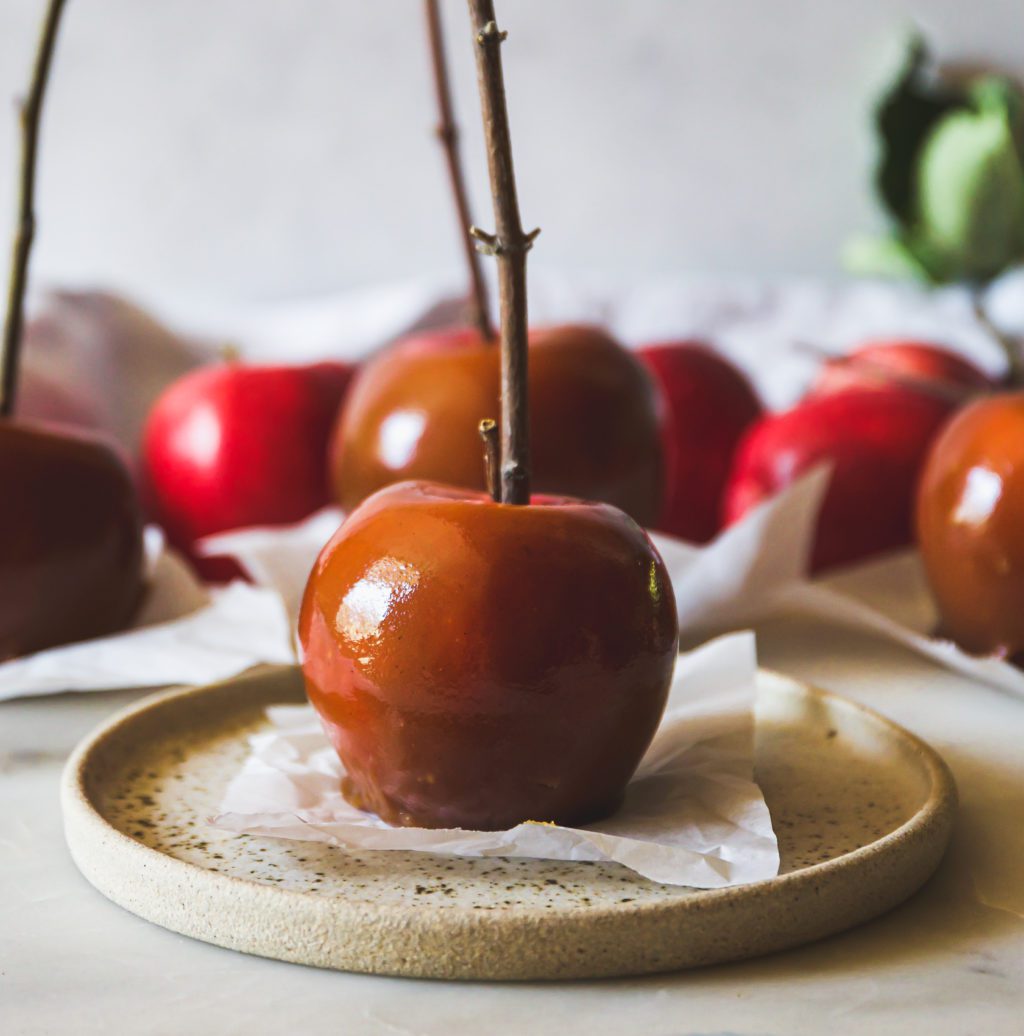
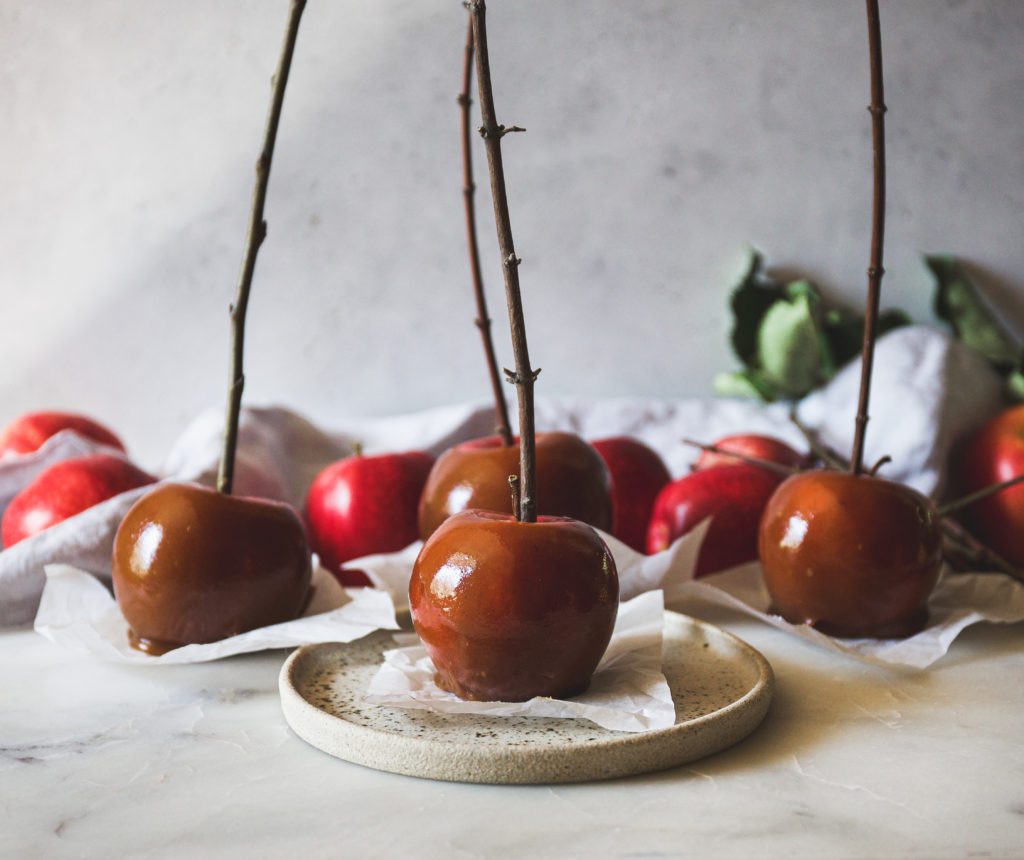
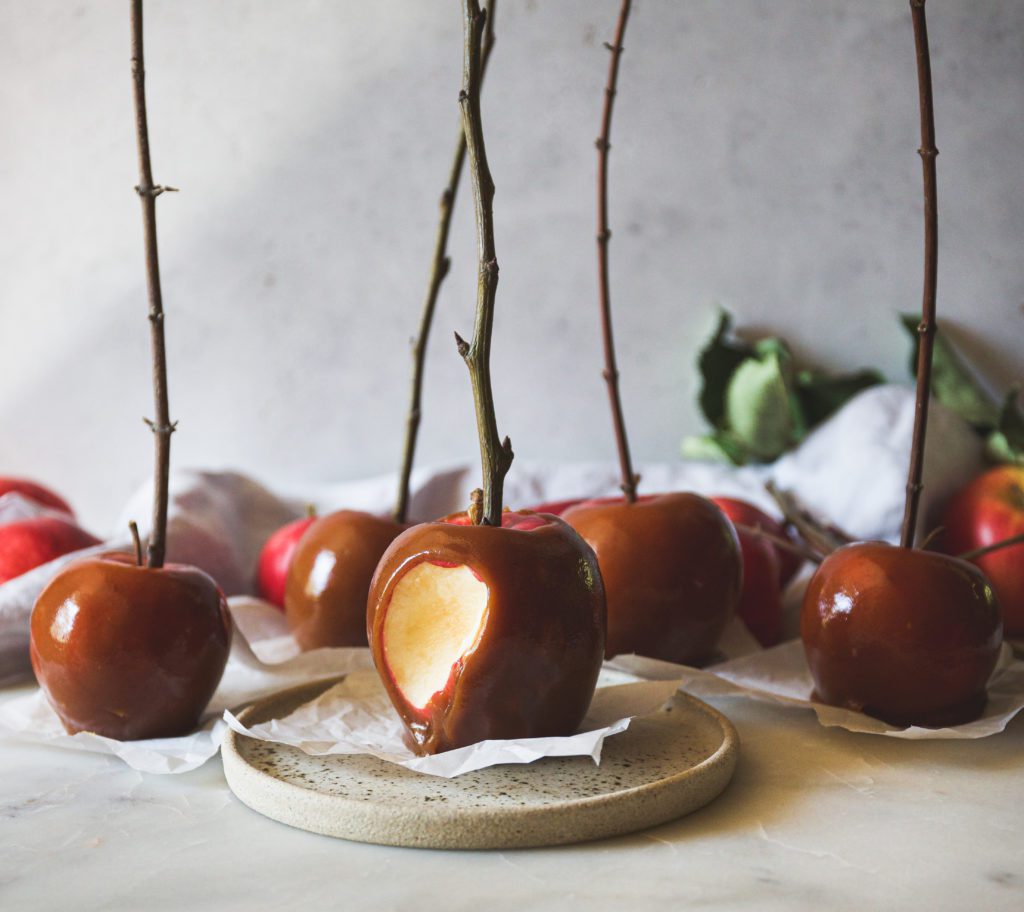
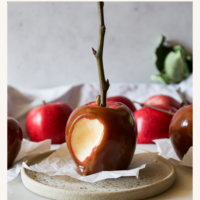
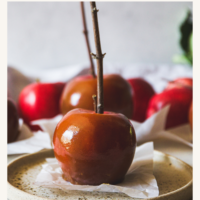
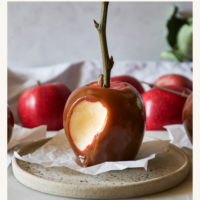
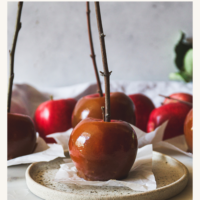
Burnt Caramel Apples are about to become your new favorite treat. Let me set the scene: cool, crisp apples dipped in the deepest, soft caramel.
You will not go to battle with this caramel, it will not pull out a tooth and you won’t have to struggle with it sticking to your teeth. Soft, rich, cool, crisp. Are you sold yet?
In celebration of California Farmer & Farmworkers Month, I created this post in partnership with CA Grown (YAY!). These Burnt Caramel Apple are made completely* with ingredients from California. Our farmers and farmworkers have worked tirelessly, always, and especially these past two years to keep the US fed and with a stable food supply…this is our month to thank them!!
I love easy, fun apple recipes. Here are some of my favorites: Apple Cinnamon Roll Pull Apart Bread, Spiced Apple Cake with Brown Butter Buttercream, Easy Apple Cake and my favorite Slow Cooker Spiced Apple Cider.
Also check out the Caramel Apple Cake (it’s a loaf cake) and Apple Sour Cream Cake with Apple Cider Drizzle in The Cake Book
California agriculture…
- Covers 25 million acres of active farmland,
- Provides 1.2 million jobs,
- Generates over $260 billion (!!!) in revenue,
- Grows over 400 crops,
- Provides the US with 1/3 of its vegetables,
- …2/3s of our fruits and nuts (hello cheese board),
- Our farmers donate over 160 million pounds of food to food banks every year!
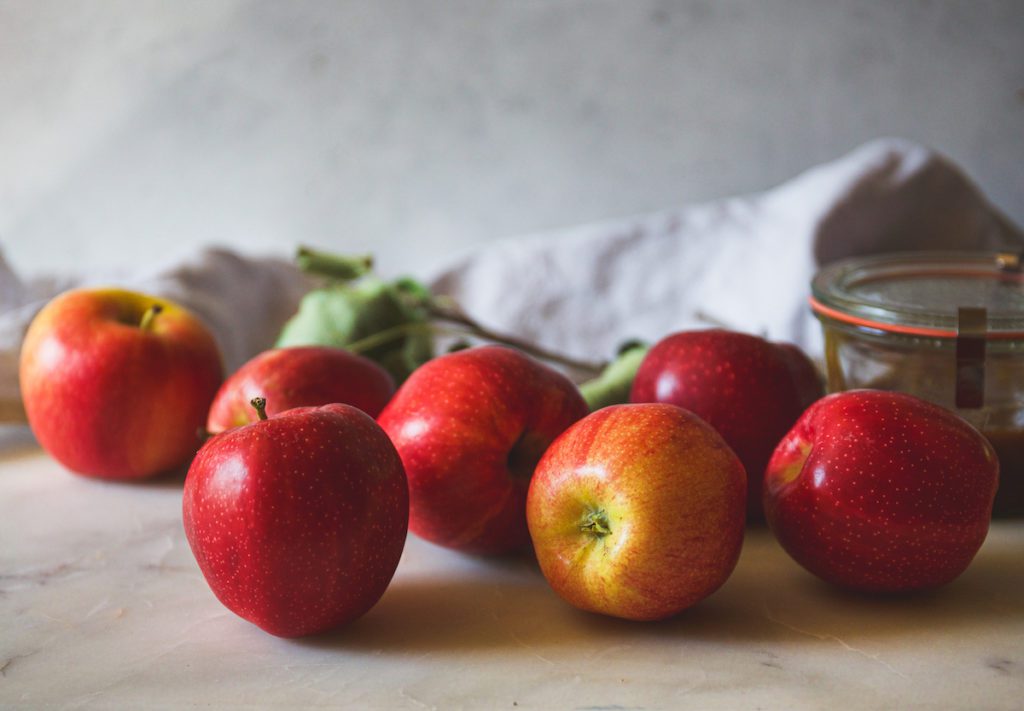
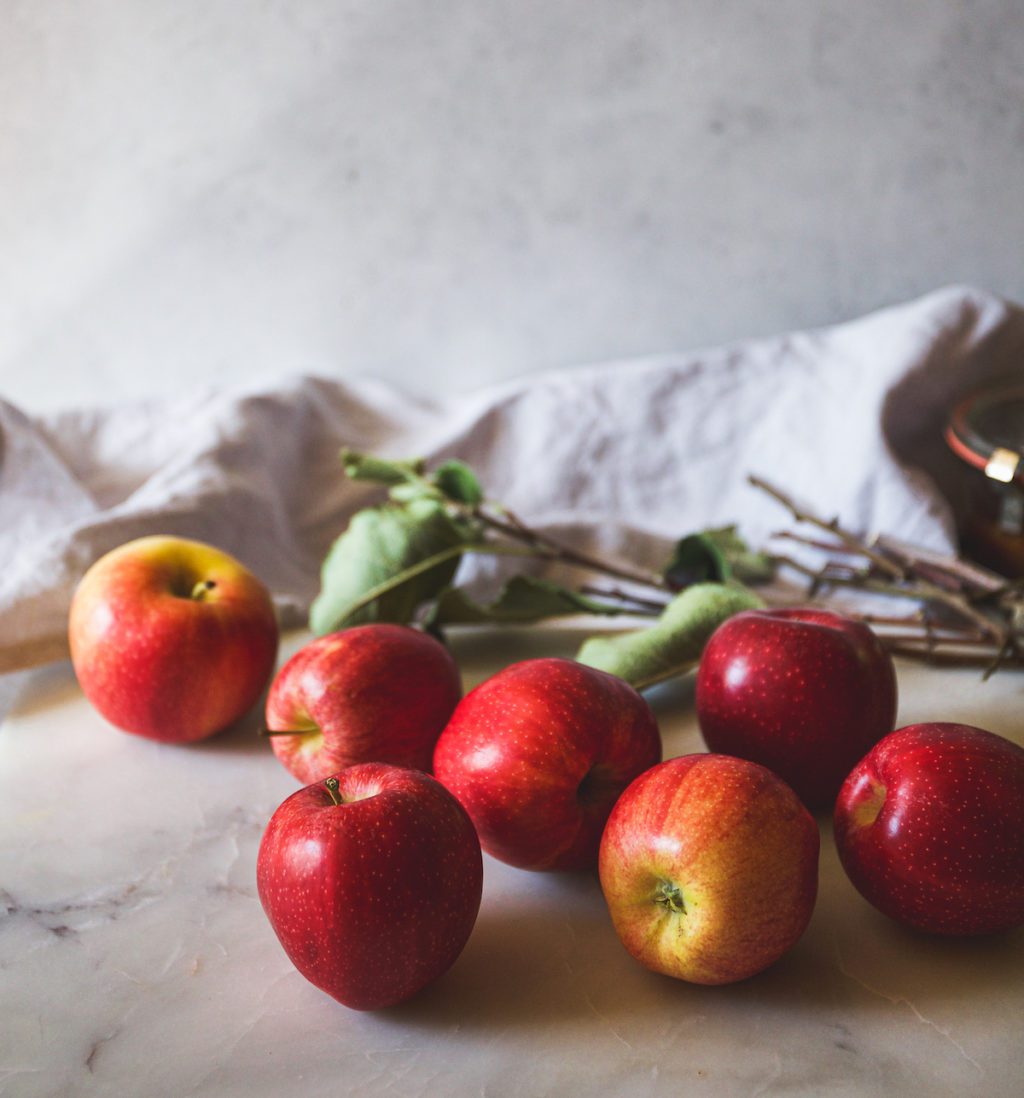
California grows all kinds of apples, but mainly Gala, Fuji, Granny Smith and Cripps PInk. I have both Gala and Granny Smith growing in my yard — they are two of my favorites to bake with (and eat!). For more info on California grown apples, click here!
Born and raised in California, and now living in an area surrounded by farmland, I’ve never valued our farmers and farm workers more than I do now.
Look for the CA Grown label when shopping to show your support for them for their hard work and giving us such beautiful things…like burnt caramel apples (keep reading)!!
Burnt Caramel
Burnt caramel sauce isn’t burnt, let’s just get that out there. The first time I had it was in the San Francisco Ferry Building from Recchiuti (they make the most insane chocolates and yes, burnt caramel sauce).
Imagine the most delicious caramel sauce and then take the flavor even deeper. It’s buttery and toasted marshmallow-esque and so so sooo very delicious. I created my version of their burnt caramel sauce for these caramel apples.
We’re going to bring our sugar, water and lemon (or vinegar) mixture to a deep bronze color and you just start to see little wafts of smoke.
On the Recchiuti website they have you take the melted sugar it until it’s black. I don’t have us take it that far; we’re going to stick with deep bronze.
From there, we add the remaining ingredients and then wait until it reaches the proper temperature.
It’s pretty important that you get it to the correct temperature so that it’s the proper consistency and will hang onto your apples…so dust off your kitchen thermometers (I recommend two of my favorite instant-read thermometers below!)
Burnt Caramel Tips & Troubleshooting
Caramel is one of the easiest and fussiest things out there. It uses minimal ingredients and produces mega flavor in a short amount of time. Here are some tips to make it painless and quick…
Don’t Stir The Sugar…
When you first add the sugar, water and lemon to the pot, gently (calmly) stir until there aren’t any sugar granules remaining and the mixture is clear and liquid.
Once this happens, don’t stir again until it’s time to add the cream and remaining ingredients. You don’t want sugar to splash up the sides of the pot as that can wreck your caramel.
If this happens, use a wet pastry brush to wash it down off the sides.
How Do I know When It’s Good Burnt & Not Bad Burnt…
Once your sugar hits a beautiful bronze, you’re good burnt.
As mentioned above, the OG burnt caramel creators have you take it until the sugar liquid is black. I don’t have the nerves for that…but you do you.
Bubbles in your Caramel, What To Do…
If you’re dipping your apples and you notice that bubbles are starting to form it means that your caramel is getting too cool.
Place it back on the stovetop, over low heat to slightly warm up your caramel and then resume dipping.
Remember, you want it warm enough to dip the apples, but cool enough so that the caramel sticks to the apples and doesn’t slide off.
If It’s Too Runny…
If your caramel is too runny first make sure that you cooked it to the correct temperature. If you did, then you need to let it cool a little bit longer as it will thicken as it cools.
If It’s Too Thick…
If your caramel is too thick whilst dipping the apples, then you probably need to put it back over low heat for several minutes. This will loosen up the sauce a bit.
Burnt Caramel Apple Dipping Tips
Once your burnt caramel is ready, pour it into a small, heat-safe bowl. Stir it for 5 to 10 minutes or until it has thickened a bit but hasn’t set.
Place a stick into the top of an apple and then submerge it in the caramel, turning the apple to coat. I like to turn it several times in the caramel.
Lift it out of the bowl and the excess will slowly start to run back into the bowl. Invert the apple so the caramel starts dripping towards the top of the apple and then put it right side up again.
Do this several time as the caramel sets and cools. I found this was the best way to get a smooth, even coat. Keep doing this until it looks like the caramel is barely moving on the apple (the longer you do this the better!).
This is a soft caramel. The more you invert and swirl the apple while the caramel is setting, the less caramel will slide off of the apple once you’ve set it on the silpat to set.
The caramel is quite pliable so any caramel that pools underneath you should be apple to press to the bottom of the apple so that it looks nice and tidy.
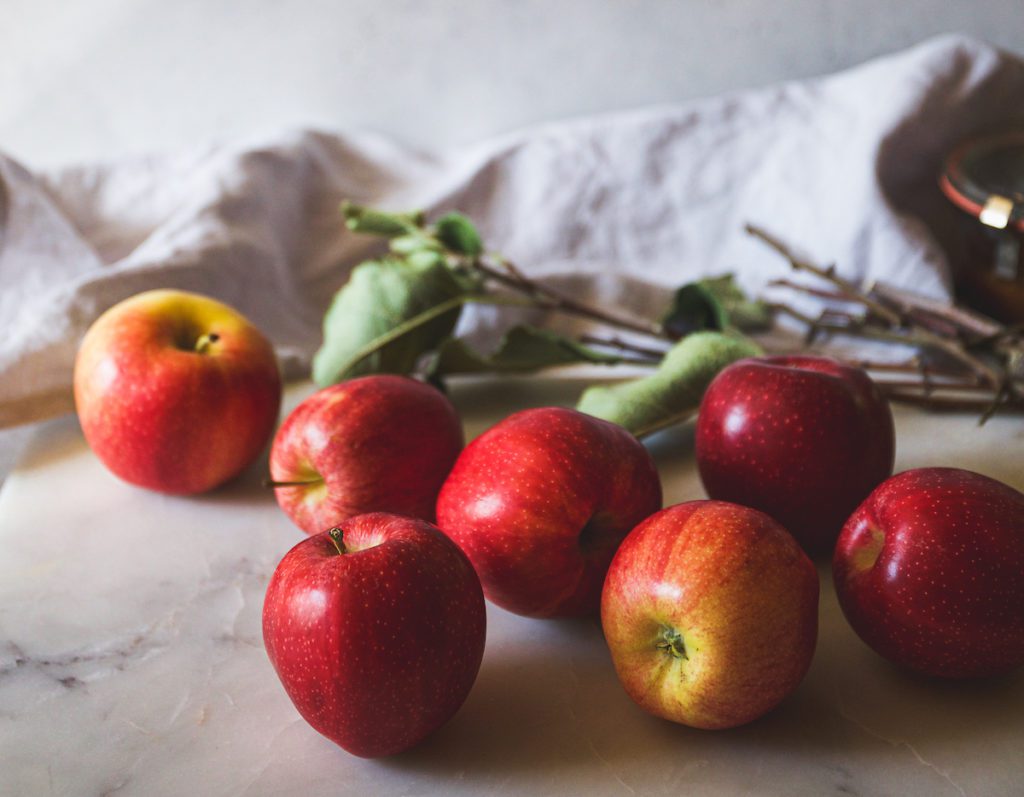
Apple To Use For Caramel Apples
Use your favorite type of apple! We’re not baking these so there aren’t any rules. But I highly recommend something crisp and tart as that pairs so well with the buttery warmth of the caramel.
Prep Your Apples
To prep your apples, thoroughly clean them. You want to try and remove as much of the wax coating as possible.
Dry completely and then set in the fridge until ready to use. You want them cool when they dip into the caramel, as that will help the caramel set faster.
Caramel Apple Sticks & Things
I used the branches from my apple trees. Before using any foraged branches, make sure they are food safe and not poisonous. Also look for branches with some character, funky curves; imperfections only make them cuter.
Look for sturdy branches, that can support your apple while you’re dipping them into the caramel. They also need to be sturdy for when you’re noshing on them as well.
If you don’t want to go the foraged stick route, then use popsicle sticks. I also think, for a dinner party they would be cute serve in a bowl, sans stick, with a pool of crème anglaise or ice cream.
To dip in the caramel, if not using sticks, you could use skewers for dipping and then remove them prior to serving.
Special Equipment
To Serve
These burnt caramel apples are, well, sticky. I went for a soft caramel, not the type of caramel that you’ll lose a tooth in.
With that in mind, consider placing a parchment square under each one if serving at a party…that will make it easier for people to nosh.
More Apple Recipes
Because why stop with caramel apples?!?
Apple Cinnamon Pull-Apart Bread
Spiced Apple Cake with Brown Butter Buttercream
California Agriculture Links for More Info
California Farmer & Farm Worker Month

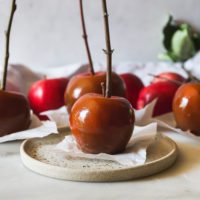
Burnt Caramel Apples
Equipment
- Instant Read Thermometer
Ingredients
- 6-8 medium-sized apples (washed, dried and stored in the fridge until ready to use)
- 1 ½ cup (300 g) granulated sugar
- ½ cup (112 g) water
- 2 teaspoons fresh lemon juice or white vinegar
- ½ vanilla bean (split and scraped (optional))
- ½ teaspoon sea salt
- 1 ¼ cup (300 g) heavy whipping cream
- 6-8 sticks
Instructions
- Line a baking sheet with a silpat or parchment paper. Lightly coat with non-stick spray or a neutral-tasting oil, such as sunflower seed. Set aside a small, heat-safe bowl to put the caramel in later.
- In a medium saucepan over medium heat, add the sugar, water, lemon, vanilla bean seeds and pod, and salt and gently stir until dissolved. This should take about 3 to 5 minutes. Continue with the pan over medium heat and cook for 12 to 15 minutes more or until the liquid has turned a dark bronze and you start to see the smallest bit of smoke. It was also smell of toasted marshmallows. Do not stir or fuss with it during this time. If the edge of the pan starts to look burnt, turn the heat down a touch.
- When ready, slowly pour in the cream. It will hiss and bubble and generally seem quite angry. That’s fine. Continue over medium to medium low heat, occasionally stirring, until the mixture reaches 245 to 250F (118 to 121C). This takes about 10 to 15 minutes. Pour into a small, heat-safe bowl and stir to cool it a bit. You want it thick enough to stay on the apple and yet still liquid enough to swirl your apple in there.
- Press a stick into the apple, near the stem and then dip it in the caramel, turning to coat several times. Life it out of the caramel, letting some of the excess fall back in the bowl and then invert the apple so that some of it starts to drip towards the top of the apple. Once it’s there, turn the apple right-side up. Do this several times as the caramel starts to cool and set. The more you do the, the less pooling you will have at the base of the apples.
- You can eat them immediately, save them for later. For same day eating they can be left at room temperature. If you’ve made them ahead of time, then stash, covered, in the fridge for up to several days.
*The optional vanilla bean is the only product sourced outside of California.
Thank you for supporting the companies, brands & agencies that support DisplacedHousewife. As a proud partner of CA Grown, I hope when you’re shopping you’ll look for the CA Grown license plate sticker to let you know that your goods came from our beautiful state. You can also check at this link to see where your produce is coming from.
Suggestions for how to use the left over caramel from this recipe? Can you reheat and pour on a pan of shortbread and slice nice squares? I imagine it sets nice and is slicable?
That sounds completely delicious!! Other ideas: over ice cream, dip apple slices, drizzle over brownies pre- or post-bake!! xo